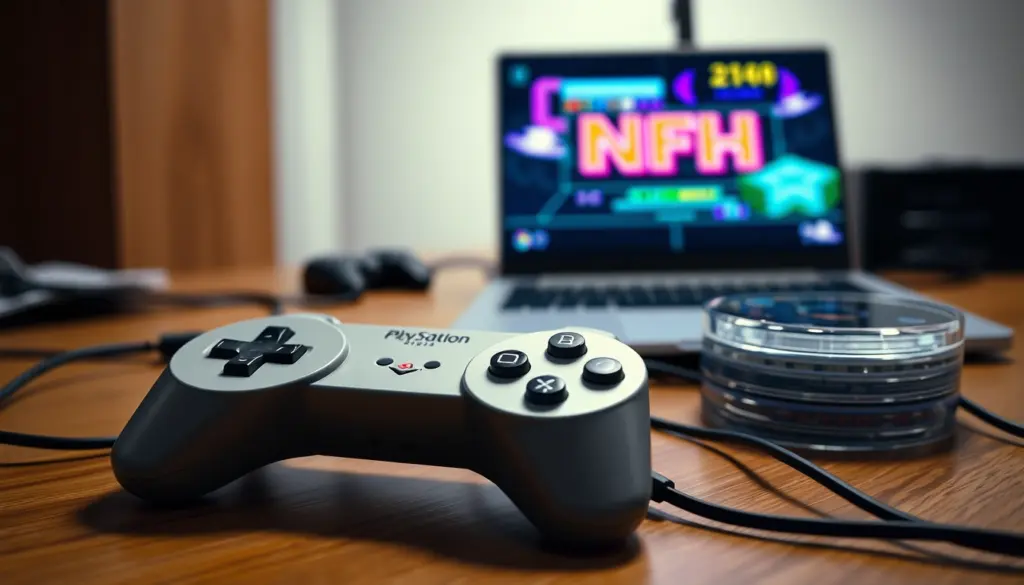
DuckStation is a free PlayStation 1 emulator built almost single-handedly by a developer known as stenzek, and it has become the default recommendation for PS1 emulation on PC largely because it just works – accurate timing, a real Qt-based interface, and none of the plugin-juggling that defined PS1 emulation a decade ago. The project has passed 10,400 stars on GitHub and ships new builds almost daily, but it also carries a detail almost no other setup guide mentions: in September 2024, DuckStation quietly moved off the GPL and onto a restrictive Creative Commons license, a change with real implications for anyone downloading “pre-configured” DuckStation packages. This guide walks through a complete, legal DuckStation setup in 12 steps – installing the emulator, dumping your own 512KB BIOS file, configuring a controller, picking a renderer, and hardening the whole thing so a “free BIOS download” site doesn’t hand you malware along with your childhood library. Budget about 20-30 minutes for the full walkthrough.
What Is DuckStation?
DuckStation is a PlayStation 1 simulator/emulator that has been in development on GitHub since September 9, 2019. Its stated goal is playability, speed, and long-term maintainability – the project deliberately discourages “hack” options, aiming for a default configuration accurate enough to support the vast majority of the PS1’s library without per-game tinkering. It ships two interfaces from the same codebase: a fully-featured Qt desktop frontend and a fullscreen “Big Picture”-style TV UI built on Dear ImGui.
Under the hood, DuckStation runs a CPU recompiler/JIT targeting x86-64, AArch32/armv7, AArch64, and RISC-V/RV64 – RISC-V support in particular is rare among console emulators and a genuine differentiator versus most competing PS1 options. For graphics, it supports Vulkan, Direct3D 11, Direct3D 12, OpenGL, and Metal hardware renderers, plus a vectorized, multi-threaded software renderer for edge cases and troubleshooting. As of this writing, the repository sits at 10,410 stars and 937 forks, with 76 open issues and commits landing almost every day – a level of activity that puts it well ahead of most emulation projects in terms of maintenance velocity.
DuckStation doesn’t use traditional version numbers. It’s a rolling release with two update channels rather than dated majors and minors – more on exactly how that works in Step 12. If you’ve already worked through our PCSX2 setup guide or RPCS3 setup guide for the PS2 and PS3, the general workflow here will feel familiar, though PS1 emulation is considerably lighter on hardware than either of those later consoles.
Is DuckStation Legal? BIOS Dumps, ROMs, and Copyright
DuckStation the software is legal to download and run – it contains no Sony code, and the project has always been distributed publicly with its source visible. The legal question that actually matters is entirely about content, not the emulator itself. DuckStation’s own README is blunt about this: “A ROM image is not provided with the emulator for legal reasons, you should dump this from your own console using Caetla or other means.” That’s a direct quote from the project’s official documentation, and it’s the same standard every legitimate emulation project holds itself to.
Two things make a PS1 game playable: a BIOS dump and a game image. Sony owns the copyright to the PS1 BIOS firmware, and there’s no legal, redistributable substitute for it. The only clean way to obtain one is to dump it yourself from a console you own – not download it from a website. Search results for “PS1 BIOS DuckStation” are dominated by exactly the kind of thin, ad-heavy sites that also tend to bundle adware or worse alongside the file, and downloading from them is copyright infringement regardless of how the site frames it. The same logic covers game images: ripping a disc you own for personal backup sits in a widely tolerated gray zone in most jurisdictions, but grabbing ROMs of games you don’t own is straightforward piracy.
The broader legal principle behind emulation itself – that the emulator is a legitimate interoperability tool, separate from how any individual user sources content – has been tested in European courts. The Court of Justice of the European Union’s Nintendo v. PC Box ruling (Case C-355/12, 2014) established that circumvention tools and emulation software aren’t inherently unlawful; liability turns on how they’re actually used. This guide only covers the legal path: dumping your own BIOS and using your own discs.
DuckStation System Requirements for 2026
DuckStation’s own README describes its hardware needs with characteristic understatement: a CPU “faster than a potato” and a GPU that’s “basically anything made in the last 10 years or so.” That’s not far off – PS1 emulation is dramatically lighter than PS2 or PS3 emulation, since the original hardware itself topped out well under 100 MHz. The real gatekeeping requirement isn’t raw power, it’s instruction-set and OS-version support.
| Platform | OS Version | CPU | GPU |
|---|---|---|---|
| Windows | Windows 10/11, version 1809 or newer | x86-64 with SSE4.1 (Intel post-2007, AMD post-2011); separate SSE2 build for older CPUs | OpenGL 3.1 / D3D11 Feature Level 10.0 / Vulkan 1.0 capable |
| Linux | Ubuntu 22.04-equivalent or newer | x86-64 (SSE4.1), AArch32/AArch64, or RISC-V/RV64 | OpenGL 3.1 / OpenGL ES 3.1 / Vulkan 1.0 capable |
| macOS | macOS 13.3 Ventura or newer | Universal binary – Intel x86-64 or Apple Silicon (ARM64) | Metal-capable (all Macs meeting the OS requirement) |
| Android | Recent Android with a 64-bit SoC recommended | armv7, AArch64, or x86_64; 1.5GHz+ recommended for 32-bit devices | OpenGL ES 3.1 capable |
Windows 7, 8, and 8.1 are explicitly unsupported – DuckStation’s own documentation states running those systems in 2026 “should be considered a security risk.” If you’re stuck on one, the last build that will run is archived as v0.1-5624 in the old-releases repository, unsupported and unmaintained. On the CPU side, most machines built in the last 15 years support SSE4.1 without issue; the SSE2 fallback build exists specifically for pre-2008 Intel and pre-2011 AMD chips, at a real performance cost.
What You Need Before You Start
- A Windows, macOS, Linux, or Android device that meets the requirements above
- A PlayStation 1 or PlayStation 2 console you own – DuckStation accepts a BIOS dump from either, which matters if you don’t have a PS1 handy (more on this in Step 3)
- A way to read the BIOS chip off that console – a modchip, a softmod exploit, or a tool like Caetla, depending on your console model
- One or more PS1 discs you own, or disc images you’ve made from them yourself
- A game controller – DualShock/DualSense, Xbox pads, and most generic SDL/XInput/DirectInput controllers all work
- A small amount of free storage – PS1 games shipped on standard CDs, so a single disc image typically runs 350-700MB, far less than the DVD-sized libraries of later consoles
Step 1: Download DuckStation for Your Platform
Get DuckStation only from duckstation.org or the project’s own GitHub Releases page – never from a third-party “DuckStation + BIOS bundle” site. Builds are compiled automatically with every commit, and the releases page keeps the most recent 30 builds available (older ones move to a separate archive repository). There’s no traditional version number to look for; the file names below are what to search for on the releases page.
- Windows:
duckstation-windows-x64-installer.exe(recommended, installs to your user-local programs directory) orduckstation-windows-x64-release.zipfor a portable archive. ARM64 builds exist for Snapdragon laptops, and a separate SSE2 installer covers pre-2008 CPUs. - Linux:
DuckStation-x64.AppImage, orDuckStation-arm64.AppImageon ARM64 hardware. AppImages need a distro roughly equivalent to Ubuntu 22.04 or newer. - macOS:
duckstation-mac-release.zip, a Universal binary covering both Intel and Apple Silicon. - Android: Install directly from Google Play. DuckStation’s developer explicitly provides no support for the Android build – it’s offered as-is.
If Windows complains about a missing vcruntime140_1.dll file after installing, you’re missing a current Visual C++ runtime – grab the x64 redistributable from Microsoft’s official page and re-run the installer.
Step 2: Install and Launch DuckStation
On Windows, the installer just walks through a standard Setup Wizard. If you chose the zip archive instead, extract it to its own subdirectory first – the archive has no root folder of its own, so extracting directly into your Downloads folder scatters files everywhere. Then launch duckstation-qt-x64-ReleaseLTCG.exe.
On Linux, mark the AppImage executable and run it directly. The first launch offers to create a desktop launcher shortcut automatically. If you’re migrating from the now-deprecated official Flatpak (see the license section below for why it was discontinued), there’s a one-line command to bring your old configuration across:
# Linux – make the AppImage executable and run it
chmod a+x DuckStation-x64.AppImage
./DuckStation-x64.AppImage

# Migrating from the deprecated Flatpak build
mv ~/.var/app/org.duckstation.DuckStation/config/duckstation ~/.local/share
On macOS, double-click the downloaded zip to extract DuckStation.app, then move it wherever you like before opening it. Because DuckStation’s builds aren’t code-signed – the README explains plainly that “a yearly cost is out of the question for a project which brings in zero revenue” – Gatekeeper will initially block the app. Open System Settings → Privacy & Security, find the blocked-app notice, and click “Open Anyway.”
On any platform, if you want a fully self-contained install – useful for a USB drive or for keeping multiple isolated configurations – create an empty file named portable.txt in the same folder as the DuckStation executable before first launch. This keeps settings, BIOS, and saves inside that folder instead of your OS user profile.
# Windows (PowerShell) – enable portable mode
New-Item -Path ".\portable.txt" -ItemType File

# macOS / Linux – enable portable mode
touch ./portable.txt
Step 3: Dump and Add a Legal BIOS
This is the step every “just download a BIOS” shortcut tutorial skips, and it’s the one that actually matters. DuckStation will not boot a single game without a real BIOS image, and there’s a detail here that most competing guides miss entirely: DuckStation explicitly accepts either a PS1 or a PS2 BIOS – the PS2’s backward-compatibility firmware includes a working PS1 BIOS internally. If you already worked through the BIOS-dumping step in our PCSX2 setup guide, that same dumped file works here too; there’s no need to dump twice if you own both consoles.
If you’re dumping directly from a PS1, the process depends on your console revision – some models accept a modchip, others can be dumped with software tools such as Caetla once softmodded. DuckStation’s documentation deliberately stays vague here (“using Caetla or other means”) because the exact method varies by hardware revision and region; a quick search for your specific PS1 model number plus “BIOS dump” will point you to the current community-maintained method.
| Common Filename | Region | Console Revision | Size |
|---|---|---|---|
| SCPH1001.BIN | NTSC-U (North America) | Early models | 512KB |
| SCPH5501.BIN / SCPH7001.BIN | NTSC-U (North America) | Later revisions | 512KB |
| SCPH7003.BIN | PAL (Europe) | Later revisions | 512KB |
| SCPH1000.BIN | NTSC-J (Japan) | Early models | 512KB |
Every legitimate PS1 or PS2 BIOS image is exactly 512KB – if a downloaded file is a wildly different size, that’s an immediate red flag, though the only fully trustworthy source is a console you own regardless of file size. Once you have a dump, verify it wasn’t corrupted in transfer before trusting it:
# Verify a BIOS dump on Linux/macOS
sha1sum SCPH1001.BIN

# Verify a BIOS dump on Windows
certutil -hashfile SCPH1001.BIN SHA1
Copy the verified file into DuckStation’s bios subfolder inside its User Directory – %LOCALAPPDATA%\DuckStation\bios on Windows, ~/.local/share/duckstation/bios on Linux, or ~/Library/Application Support/DuckStation/bios on macOS. This folder is created automatically the first time you run DuckStation, or you can jump straight to it later via Tools → Open Data Directory.
Step 4: Complete First-Time Setup
Launch DuckStation after installation and it walks you through a Setup Wizard. On the BIOS screen, click Browse and point it at the folder containing the file you verified in Step 3. A correctly detected BIOS shows up immediately in the selector, tagged with its region; if nothing appears, double-check the file made it into the right folder and that its checksum actually matched.
The wizard also lets you set a default game directory. Everything here is editable later from the Settings menu, so it’s fine to accept the defaults and revisit graphics and controller options in the next few steps. Once you click through to Finish, DuckStation creates its full data directory structure – including the bios, resources, and subchannels folders referenced throughout this guide – which you can always reach again via Tools → Open Data Directory.
Step 5: Configure Your Controller
Open Settings → Controllers. DuckStation supports SDL, XInput, and DirectInput backends, covering everything from Xbox pads to DualShock/DualSense to most generic USB and Bluetooth controllers, plus dedicated support for GunCon/Justifier lightguns (simulated with a mouse) and the NeGcon racing controller. Multitap configurations support up to 8 connected devices for the handful of PS1 games that supported it.
- Connect your controller before opening the Controllers settings page.
- Select Port 1 and choose a controller type – this is a genuinely PS1-specific decision, unlike later consoles. Most games work fine with “Analog Controller (DualShock),” but a number of early PS1 titles predate analog support entirely and require “Digital Controller” to boot at all.
- Click Automatic Mapping to let DuckStation detect and bind your pad, then test every button and both sticks before closing the page.
- If a pad shows as connected at the OS level but doesn’t respond in-game, toggle between the SDL and XInput/DirectInput backend for that device – this single switch resolves the majority of unresponsive-controller reports.
DuckStation ships with the community-maintained SDL_GameControllerDB mapping database out of the box, so most controllers are recognized without any manual configuration. If you’d rather use a keyboard, the default bindings map the left stick to WASD, the right stick to T/F/G/H, face buttons to I/J/L/K, and Start/Select to Enter/Backspace – all fully rebindable from the same Controllers page.
Step 6: Choose Your Renderer
Settings → Graphics → Renderer is the single setting most likely to affect both performance and stability. Which backends are available depends on your OS.
| Renderer | Platforms | Best For |
|---|---|---|
| Vulkan | Windows, Linux | Default recommendation on most modern GPUs |
| Direct3D 11 | Windows only | Older GPUs or driver-stability fallback |
| Direct3D 12 | Windows only | Recent NVIDIA/AMD/Intel GPUs |
| Metal | macOS only | Native Apple API, avoids translation overhead |
| OpenGL | Windows, Linux, macOS | Widest compatibility, especially older Mesa Linux drivers |
| Software | All platforms | Diagnostics only – not for actual play |
The Software renderer is worth keeping in mind specifically as a troubleshooting tool: if a game displays correctly there but glitches or shows a black screen under Vulkan or Direct3D, the problem is almost always your GPU driver, not your BIOS or your disc image. That distinction comes up again in the troubleshooting table further down.
Step 7: Set Upscaling, PGXP, and Texture Filtering
PS1 games natively rendered at extremely low resolutions, so raising the internal resolution multiplier under Settings → Graphics → Rendering is usually the first visual upgrade people make. The bigger differentiator, though, is PGXP (Precision Geometry Transform Pipeline), a DuckStation feature that corrects the PS1’s signature geometry “wobble” – the warping and jittering you see on 3D models on original hardware, caused by the console’s fixed-point math. PGXP recalculates vertex positions with floating-point precision instead, and can optionally extend that correction to texture perspective and depth-buffer emulation as well.
True color (24-bit) rendering removes the PS1’s native color banding, and DuckStation’s texture filtering can be applied selectively or forced globally – forcing it everywhere reduces shimmering at high resolutions but can occasionally introduce visual glitches in games that relied on the PS1’s unfiltered look for specific effects. As with most emulator visual settings, these are worth testing per game rather than maxing out globally on day one.
Step 8: Add Your Game Library and Convert to CHD
DuckStation reads discs directly, or from disc images in BIN/CUE, MAME CHD, single-track ECM, MDS/MDF, CCD, and unencrypted PBP formats. For anyone building a real library, converting BIN/CUE images to CHD is worth doing up front: CHD is a lossless, compressed container from the MAME project that shrinks disc images substantially without losing any data, using the chdman command-line tool.
# Convert a BIN/CUE image to a compressed CHD
chdman createcd -i "Game Title.cue" -o "Game Title.chd"
Full chdman syntax and compression options are documented on the official MAME tools page. Once your images are added via File → Add Search Directory, DuckStation automatically identifies game titles and hashes using data from the redump.org disc-preservation project, and can optionally preload disc images to RAM to avoid stutter on slow or spinning storage.
Step 9: Load and Boot Your First Game
With BIOS, controller, and renderer all configured, double-click a title in your game list to boot it. A clean first launch looks roughly like this in DuckStation’s log window:
[BIOS] Region: NTSC-U, Loaded: SCPH1001.BIN
[GPU] Renderer: Vulkan, Resolution Scale: 4x, PGXP: Enabled
[CDROM] Loaded image: Game_Title.chd (redump match found)
[Pad] Port 1: Analog Controller (DualShock) – Automatic Mapping active
[System] Boot complete
If the game freezes at the PlayStation splash screen instead of reaching a title screen, that’s the single most common sign of the Digital-vs-Analog controller type mismatch mentioned in Step 5, not a bad disc image or a broken install.
Step 10: Set Up Memory Cards and Save States
Under Settings → Memory Cards, DuckStation auto-creates a virtual memory card the first time a game writes a save, stored as a .mcd file. By default, each game gets its own per-game memory card automatically, which avoids the classic PS1-era problem of running out of memory-card blocks – you can switch to a single card “Shared Between All Games” instead if you prefer the authentic constraint. Multi-disc games automatically share the same memory card across all their discs, so switching discs mid-playthrough doesn’t orphan your save.
Save states are a separate system entirely – instant snapshots of the whole emulated machine, bound to F1 (load) and F2 (save) by default. DuckStation supports both rewind (roll back time, at a storage and CPU cost) and runahead (compute several frames ahead of what’s displayed, then snap back once real input arrives, trading extra CPU load for genuinely lower input lag – useful for fighting games and shoot-em-ups). Neither replaces a real memory-card save: save states are tied to the exact DuckStation build that created them, and an update is not guaranteed to load an old one cleanly. Use them freely for convenience, but always back real progress with an in-game save at natural checkpoints.
Step 11: Apply Cheats, Patches, and Widescreen Hacks
DuckStation ships with a built-in cheat and patch database, community-maintained at the duckstation/chtdb repository and bundled fresh with every release. Cheats can be toggled per game from that title’s Properties screen. The emulator also automatically detects and applies PPF patch files placed alongside a game image – the format most fan translations ship in – with no manual patching step required.
Widescreen support works through a per-game patch database rather than a single universal toggle, since the PS1 rendered virtually its entire library natively in 4:3 – stretching the aspect ratio without a matching code patch just distorts the image rather than rendering a wider field of view. Where a widescreen patch exists for a given title, it’s applied the same way as any other patch from that game’s Properties screen.
Step 12: Keep DuckStation Updated (Stable vs Preview)
DuckStation’s auto-updater tracks one of two channels, changeable from Settings → Interface → Updates:
- Stable – tracks the
latesttag on GitHub Releases. Updates less frequently, and every build on this channel has had more real-world testing. - Preview – rebuilt on every single commit pushed to the repository. Gets fixes and new features immediately, but with minimal testing, so it can occasionally introduce new bugs alongside the fixes.
By default, DuckStation tracks whichever channel you originally downloaded from. There’s no dated version number to chase – the “latest” GitHub release tag simply moves forward, most recently published July 8, 2026 as this guide was being written. If you hit a compatibility bug on Stable, switching to Preview is the standard first troubleshooting step, since fixes land there immediately rather than waiting for the next Stable promotion.
The 2024 License Change: What CC BY-NC-ND Means for You
This is the detail that separates DuckStation from every other emulator in this series, and it’s worth understanding even as a purely end-user. Until September 1, 2024, DuckStation was licensed under the GPLv3, a standard open-source license. It then briefly moved to a PolyForm Strict License, before settling – just twelve days later, on September 13, 2024 – on its current license: CC BY-NC-ND 4.0 (“Attribution-NonCommercial-NoDerivatives”), as reported at the time by GamingOnLinux.
In practice, this changes almost nothing for the setup you just walked through: DuckStation remains completely free to download and use, and its source remains publicly visible. What changed is redistribution. The README is explicit that unmodified releases and code can still be shared, but “pre-configured settings and packages are considered modifications” – meaning any third party bundling DuckStation with preset options, a BIOS, or a curated ROM pack is operating outside the license, on top of whatever copyright problems the bundled BIOS or ROMs already create. That’s one more reason Step 1’s “official sources only” rule matters more here than it does for most other emulators.
The change has already had two concrete, visible effects. First, the official Flatpak package (org.duckstation.DuckStation) was pulled from distribution – Flathub’s own listing now states plainly that the app “is no longer maintained on Flathub,” which is why Step 2 above includes a manual migration command instead of pointing Linux users to Flatpak. Second, in July 2025, the developer pulled the project’s official Arch Linux PKGBUILD and threatened to drop Linux support entirely, writing in a GitHub thread – independently confirmed by both Linuxiac and GamingOnLinux – “I specifically forbid packages for DuckStation.” The stated frustration was Arch/AUR users running broken unofficial packages and then directing bug reports at him instead of the package maintainer, on a platform he estimated at roughly 2% of DuckStation’s total userbase. Linux support itself was not removed – the official AppImage remains fully maintained and is, as of this guide, the recommended way to run DuckStation on Linux.
Hardening Your DuckStation Setup
Emulation guides rarely cover security, but the DuckStation ecosystem has real, avoidable risk – mostly concentrated around where people get BIOS files and installers, not around DuckStation itself.
- Only download DuckStation from duckstation.org or its official GitHub releases. Third-party “DuckStation setup” or “DuckStation BIOS pack” sites are exactly the kind of download that bundles adware or worse alongside the free-BIOS hook – and per the license section above, any site bundling pre-configured DuckStation packages is already operating outside the project’s own terms.
- Verify BIOS dump integrity with a checksum, as shown in Step 3, rather than trusting a file because it opened without an error. A corrupted or tampered dump can cause subtle bugs that look like emulator problems.
- Treat unofficial DuckStation builds as untrustworthy by default. Because the CC BY-NC-ND license explicitly forbids modified redistribution, any build claiming to be a “modified” or “enhanced” DuckStation is both a license violation and impossible to verify for tampering – there’s no legitimate reason for one to exist.
- Use a unique password for your RetroAchievements account if you enable achievement tracking. It’s a separate third-party service DuckStation authenticates against, not something baked into the emulator itself.
- Use portable mode (Step 2) on shared or public machines so your BIOS, saves, and configuration don’t leak into a shared user profile.
- Only place trusted files in the Resource Overrides folder. DuckStation lets you override UI images and sound effects by dropping files into a
resourcessubdirectory – convenient for customization, but treat any pre-made “resource pack” from an unfamiliar source the same way you’d treat any other unverified executable content.
A Complete, Repeatable DuckStation Deployment Script
If you’re setting DuckStation up on more than one machine, this script builds a portable folder layout, verifies a BIOS dump’s checksum against a hash you supply, and checks that Vulkan is actually available before you go hunting for a “black screen” bug that’s really just a missing GPU driver. Save it as setup-duckstation.sh on Linux or macOS.
#!/usr/bin/env bash
# setup-duckstation.sh – portable folder structure, BIOS checksum, Vulkan check
set -euo pipefail

DS_HOME="${1:-$HOME/DuckStation-Portable}"
BIOS_FILE="${2:-}"
EXPECTED_SHA1="${3:-}"

echo "==> Creating DuckStation portable folder structure at $DS_HOME"
mkdir -p "$DS_HOME"/{bios,resources,subchannels}
touch "$DS_HOME/portable.txt"
# DuckStation creates its remaining subfolders (cache, covers, saves, etc.)
# automatically on first launch once portable.txt is present.

if [[ -n "$BIOS_FILE" ]]; then
  if [[ ! -f "$BIOS_FILE" ]]; then
    echo "ERROR: BIOS file not found at $BIOS_FILE" >&2
    exit 1
  fi
  SIZE_BYTES=$(stat -c%s "$BIOS_FILE" 2>/dev/null || stat -f%z "$BIOS_FILE")
  if [[ "$SIZE_BYTES" -ne 524288 ]]; then
    echo "WARNING: BIOS is not exactly 512KB (524288 bytes) – likely not a valid dump"
  fi
  ACTUAL_SHA1=$(sha1sum "$BIOS_FILE" | awk '{print $1}')
  echo "==> BIOS SHA1: $ACTUAL_SHA1"
  if [[ -n "$EXPECTED_SHA1" && "$ACTUAL_SHA1" == "$EXPECTED_SHA1" ]]; then
    echo "==> Checksum OK – copying BIOS into portable folder"
    cp "$BIOS_FILE" "$DS_HOME/bios/"
  elif [[ -n "$EXPECTED_SHA1" ]]; then
    echo "ERROR: checksum mismatch – re-dump this BIOS, do not use it" >&2
    exit 1
  else
    echo "WARNING: no expected checksum supplied, skipping verification"
    cp "$BIOS_FILE" "$DS_HOME/bios/"
  fi
else
  echo "NOTE: no BIOS file supplied – dump one from your own PS1 or PS2 (see Step 3) and re-run this script"
fi

echo "==> Checking for Vulkan support"
if command -v vulkaninfo >/dev/null 2>&1 && vulkaninfo --summary >/dev/null 2>&1; then
  echo "==> Vulkan is available – recommended renderer"
else
  echo "WARNING: Vulkan not detected – install your GPU vendor's Vulkan driver, or fall back to OpenGL/Metal"
fi

echo "==> Done. Launch DuckStation from $DS_HOME and point it at this folder."
Run it with ./setup-duckstation.sh ~/DuckStation-Portable /path/to/dumped-bios.bin <expected-sha1>. It refuses to copy a BIOS whose checksum doesn’t match, and flags a file that isn’t exactly 512KB before you even get to the checksum step – two hard stops in place of “silently trust whatever file I pointed it at.”
Common Pitfalls When Setting Up DuckStation
- Downloading a BIOS instead of dumping one. Beyond the legal exposure, third-party BIOS files are a known malware vector, and a file you didn’t create yourself has no reliable way to verify its integrity.
- Choosing the wrong controller type for an early game. A handful of PS1 titles predate analog-stick support and simply won’t get past the boot logo with “Analog Controller (DualShock)” selected – switch to “Digital Controller” per Step 5 if a game hangs at launch.
- Extracting the Windows zip straight into your Downloads folder. The archive has no root subdirectory of its own, so it dumps every file loose into whatever folder you extract it to – always extract to a fresh subfolder first.
- Treating save states as your only save method. They’re tied to the exact DuckStation build that created them and can break across updates. Always back real progress with an in-game memory-card save.
- Assuming a “pre-configured DuckStation pack” from a random site is safe or legitimate. As covered above, the CC BY-NC-ND license specifically forbids that kind of redistribution – if a site is offering one, it’s already not following the project’s own rules.
- Ignoring the SSE4.1 requirement on very old hardware. A pre-2008 Intel or pre-2011 AMD CPU needs the dedicated SSE2 build from the releases page; the standard build will simply fail to launch.
Troubleshooting DuckStation: 10 Common Problems
| Symptom | Likely Cause | Fix |
|---|---|---|
| BIOS shows no green checkmark in the setup wizard | Wrong folder, or a corrupt/incomplete dump | Re-check the file path and re-run the checksum verification from Step 3 |
| Missing vcruntime140_1.dll on launch (Windows) | Outdated Visual C++ runtime | Install the current x64 VC++ redistributable from Microsoft |
| Game boots to a black screen | Wrong-region BIOS, or a hardware-renderer-specific bug | Confirm the BIOS region matches the game; switch to Software renderer to isolate a GPU-driver issue |
| Controller connects but doesn’t respond in-game | SDL/XInput/DirectInput backend mismatch | Toggle the input backend for that device in Settings → Controllers |
| Game freezes at the PlayStation splash screen | Wrong controller type selected (Digital vs Analog) | Switch controller type per Step 5 and retry |
| Crackling or desynced audio above 100% speed | Time-stretching artifact at non-standard emulation speed | Return to 100% speed, or adjust the audio sync settings |
| A specific PAL game hangs or crashes mid-cutscene | Missing LibCrypt subchannel data | Place a matching-named .sbi file next to the disc image |
| AppImage does nothing when double-clicked (Linux) | Missing execute permission | Run chmod a+x on the AppImage file |
| “App is from an unidentified developer” (macOS) | Build isn’t code-signed (no certificate, by design) | System Settings → Privacy & Security → “Open Anyway” |
| Save state won’t load after updating DuckStation | Save states are build-specific | Load your last real memory-card save instead; this is why Step 10 matters |
Beyond this list, DuckStation’s own Discord server – linked from duckstation.org – is the most active place to get help with a game-specific issue, since the developer and experienced users are both regularly present there.
Advanced Tips for DuckStation Power Users
- Reach for runahead in reflex-heavy genres. Fighting games and shoot-em-ups benefit the most from runahead’s reduced input lag; the CPU overhead is real, so it’s worth toggling per-game rather than leaving it on globally on weaker hardware.
- Use per-game controller presets. DuckStation supports saved controller presets separate from your global mapping, useful for games with unusual control schemes like light-gun titles or NeGcon racers.
- Try the free camera function for screenshots. It’s a genuine built-in feature for detaching the camera from gameplay – useful for archival-quality screenshots of a game’s 3D environments.
- Capture footage natively. Built-in video capture uses Media Foundation on Windows and FFmpeg everywhere else, with no separate recording software required.
- Enable Discord Rich Presence if you want your currently-running game visible to friends – it’s a toggle in the Settings, not something DuckStation does by default.
- Build from source if you want bleeding-edge fixes between Preview builds. Personal builds for your own use are unaffected by the CC BY-NC-ND restriction – it’s redistribution of modified builds that’s off-limits, not building or running your own copy. Requirements and steps are in the repository’s README.
DuckStation vs Other Ways to Play PS1 Games in 2026
DuckStation isn’t the only route back into the PS1 library. Here’s where it sits against the realistic alternatives before you commit half an hour to setup.
| Method | Cost | BIOS/Legal Note | 2026 Status |
|---|---|---|---|
| DuckStation | Free (CC BY-NC-ND, source-available) | Dump your own PS1 or PS2 BIOS | Actively developed, near-daily commits |
| Beetle PSX HW (RetroArch core) | Free, open-source | Dump your own BIOS | Actively maintained inside RetroArch |
| PCSX ReARMed | Free, open-source | Dump your own BIOS | Maintained, mainly used on lower-powered/mobile hardware |
| ePSXe | Free / paid mobile version | Dump your own BIOS | Rarely updated; reviewers now generally recommend DuckStation instead |
| Original PS1 hardware (used market) | Cost of a used console + discs | None needed – has its own BIOS | Native output only, no upscaling or save states |
| PS1 Classics (PS3 / PSP / Vita PSN) | Per-title, historical storefront | None needed – Sony-licensed | Store closes permanently in July 2027 |
Retro-hardware review site RetroHandheldHQ‘s 2026 comparison names DuckStation the best PS1 emulator available “not particularly close,” specifically calling out that it “does everything ePSXe does but better” – with “no reason to use ePSXe” today given how infrequently it’s updated. For anyone chasing the widest format support, the most accurate geometry correction via PGXP, and the most active development of any current PS1 option, DuckStation remains the clear default in 2026.
Frequently Asked Questions
Is DuckStation legal to use?
Yes. DuckStation itself contains no Sony code and is legal to download and run. The legal risk is entirely in how you source your BIOS and games – dump your own BIOS from a PS1 or PS2 you own, and use discs or images of games you legitimately own.
Do I need a PS1 to get a BIOS, or can I use my PS2?
Either works. DuckStation explicitly accepts a PS2 BIOS as well as a PS1 BIOS, since PS2 firmware includes PS1 backward-compatibility support. If you’ve already dumped a BIOS for a PS2 emulator, that same file is valid here.
Is DuckStation still open source?
Not in the strict sense anymore. It moved from GPLv3 to CC BY-NC-ND 4.0 in September 2024. The source remains publicly viewable and the compiled builds remain free to download and use, but commercial use and redistribution of modified versions are no longer permitted under the license.
What’s the difference between the Stable and Preview update channels?
Stable tracks the “latest” tagged release on GitHub and updates less frequently, with more real-world testing behind each build. Preview rebuilds on every commit and gets fixes immediately, at the cost of having had minimal testing. Switch channels anytime from Settings → Interface → Updates.
Why did the Flatpak version disappear?
The official Flatpak package was discontinued following the September 2024 license change and is no longer maintained on Flathub. The AppImage, downloaded directly from GitHub Releases, is now the recommended way to run DuckStation on Linux.
Can DuckStation run without a BIOS file?
No. Unlike some other emulators that offer a high-level emulation fallback, DuckStation requires a real, dumped PS1 or PS2 BIOS image before it will boot any game – there’s no built-in substitute.
What’s the difference between save states and memory cards?
Memory cards are the emulated equivalent of real PS1 save files, written by the game itself and stable across DuckStation updates. Save states are full snapshots of the emulator’s memory at an instant in time, convenient for quick checkpoints but tied to the specific build that created them – not a reliable long-term backup.
Does DuckStation work on Steam Deck or other Linux handhelds?
Yes – the Linux AppImage runs natively on SteamOS and similar distributions, either standalone or bundled inside a frontend like EmuDeck or Batocera. The same BIOS-dumping requirement applies regardless of platform.