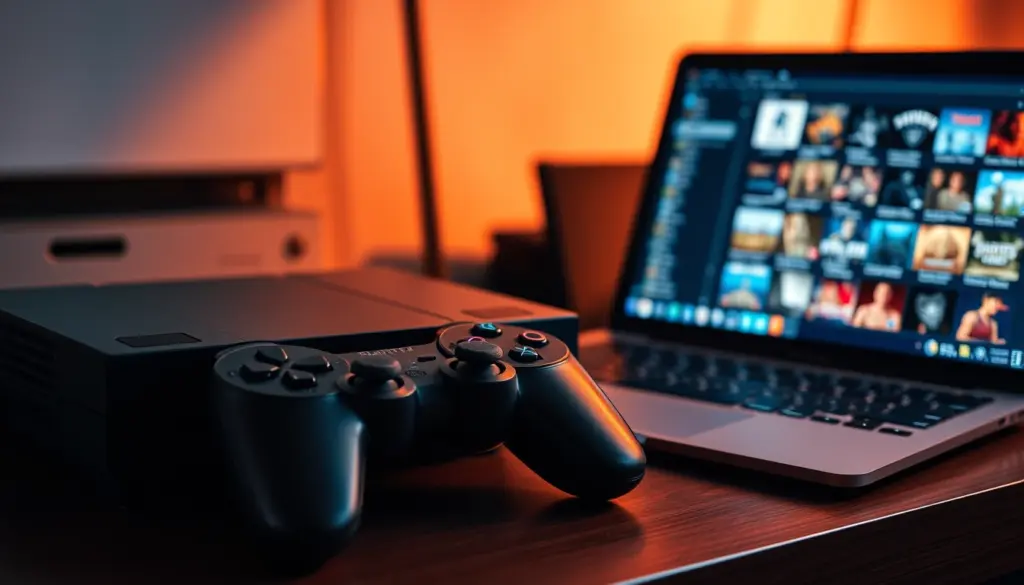
The PlayStation 2 sold more than 160 million units before Sony ended production in January 2013, making it the best-selling game console in history. Its library topped 4,000 titles across a 13-year production run, and a huge share of those games never received a proper remaster. PCSX2 is the open-source emulator that brings that entire catalog back to modern Windows, macOS, and Linux machines – and according to PCSX2’s own compatibility database, roughly 99% of PS2 games are now rated “playable” or better. This guide walks through a complete, legal PCSX2 setup in 12 steps: installing the emulator, dumping your own BIOS, configuring a controller, tuning performance, and hardening the whole thing so you’re not one bad download away from malware. Budget about 30-45 minutes for the full walkthrough, most of which is BIOS-dumping and first-boot configuration.
What Is PCSX2?
PCSX2 is a free, open-source PlayStation 2 emulator that began life in 2001, started by developers known as Linuzappz and Shadow, who had previously worked on the original PlayStation emulator PCSX. The project reached its first public 0.9.1 release in July 2006, then went through a major usability overhaul with version 0.9.8 in May 2011, which introduced the wxWidgets-based interface that longtime users associate with “classic” PCSX2. Since version 0.9.7, the project has been licensed under GPL-3.0-or-later, and its source is developed in the open on GitHub.
The most important recent milestone is version 2.0, released in July 2024. It replaced the aging wxWidgets interface with a modern Qt-based UI, added native Vulkan rendering support, and – significantly for stability – removed the old plugin-based architecture that PCSX2 had relied on since the early 2000s. Graphics, audio, and input handling are now built directly into the core emulator instead of being swappable third-party plugin DLLs, which is part of why current PCSX2 setup is noticeably simpler than the guides you may remember from a decade ago. The full version history is documented on the project’s Wikipedia page.
PCSX2 emulates the PS2’s custom hardware at a low level: the 294.912 MHz “Emotion Engine” CPU (rated around 6.2 GFLOPS), the 147.456 MHz “Graphics Synthesizer” GPU capable of roughly 75 million polygons per second, and the console’s 32MB of RDRAM system memory plus 4MB of video RAM. Recreating that custom silicon in software is why PS2 emulation historically demanded far more raw CPU power than emulating older 16-bit or even N64-era systems – a theme that comes up repeatedly in the requirements and performance sections below. If you’ve already set up RetroArch or Dolphin for other consoles, PCSX2 fits the same general workflow, but PS2 emulation is more demanding and configuration-sensitive than either.
That demanding reputation is also why PCSX2 has long been considered one of the harder emulation projects to get exactly right. Outlets like PC Gamer have covered the emulator for years precisely because getting a PS2 game running well used to require real trial and error with graphics plugins and per-game hacks. The 2.0 rewrite, and the years of accuracy work that led up to it, are what turned that reputation around.
Is PCSX2 Legal? BIOS Dumps, ISOs, and Copyright
The PCSX2 software itself is unambiguously legal. It’s open-source, distributed under the GPL, and contains no Sony code – the project has survived over two decades partly because its developers have been strict about this. The legal gray area is entirely about content, not the emulator. General-audience outlets like MakeUseOf cover this same distinction whenever they walk through PS2 emulation on PC.
Two things make a PS2 game playable in PCSX2: a BIOS dump and a game image (ISO or a physical disc read directly). Sony owns the copyright to the PS2 BIOS firmware, and there is no legal, redistributable substitute for it – PCSX2 ships with none. The only legally clean way to obtain one is to dump it yourself from a PS2 console you own. Downloading a BIOS file from a website, including the many “PS2 BIOS download” sites that rank for PCSX2-related searches, is copyright infringement, and several of those sites are also known vectors for bundled adware or worse. The same logic applies to game ISOs: ripping a disc you own for personal backup and offline play sits in a widely tolerated gray zone in many jurisdictions, but downloading ROMs of games you don’t own is straightforward piracy regardless of what any download site claims. This guide only covers the legal path: dumping your own BIOS and using your own game discs.
PCSX2 System Requirements for 2026
Because the PS2’s Emotion Engine was designed as a single, powerful vector processor rather than a multi-core chip, PCSX2 performance still leans heavily on single-thread CPU speed even in 2026, more than most other console emulators of similar era. Official guidance splits requirements into three tiers – Minimum, Recommended, and Heavy – the last of which targets high internal-resolution upscaling and the most demanding games.
| Component | Minimum | Recommended | Heavy / Upscaled |
|---|---|---|---|
| Operating System | Windows 10 21H2+, Ubuntu 22.04+, macOS 11+ | Windows 11, recent Linux, macOS 13+ | Same, with latest GPU drivers |
| CPU | x86-64 with SSE4.1, PassMark ≥2000 (e.g. Core i5-4570K, Ryzen 5 1500X) | AVX2 support, PassMark ≥2500, 6 cores | AVX2, PassMark ≥3000, 6+ cores with SMT |
| GPU | Vulkan 1.1 / D3D11 / OpenGL 3.3, PassMark G3D ≥600 (GTX 750 Ti, RX 460, Arc A380 class) | Vulkan 1.3 / D3D12 / OpenGL 4.6 / Metal, PassMark G3D ≥6000, 4GB VRAM | Same API support, PassMark G3D ≥12000, 8GB+ VRAM |
| RAM | 8GB | 16GB | 16GB+ |
| Notes | Runs most games at native resolution | Comfortable 3x-4x internal resolution upscaling | 6x-8x upscaling, heavy texture/shader work |
Apple Silicon Macs are technically exempt from the SIMD-instruction requirements above (ARM doesn’t have SSE4.1/AVX2), but PCSX2’s own guidance still rates M-series Macs in the Heavy tier for reliable performance, since translation layers add overhead. Full requirement details are published on the official PCSX2 requirements page.
What You Need Before You Start
- A Windows, macOS, or Linux PC that meets at least the minimum tier above
- A PlayStation 2 console you own, plus a USB drive or SD card, for the legal BIOS dump
- A memory card adapter or a way to get files off the PS2 (a FreeMcBoot-compatible memory card, or a network adapter for slim PS2 models)
- One or more PS2 discs you own, or ISO backups you’ve made of your own discs
- A game controller – an Xbox pad, DualShock/DualSense, or any generic USB/Bluetooth gamepad all work
- About 100MB of free space for PCSX2 itself, plus room for BIOS files, ISOs, save states, and screenshots
On storage: PS2 discs were single-layer DVD-5 (up to roughly 4.7GB) or dual-layer DVD-9 (up to roughly 8.5GB), so a modest personal library of your own backed-up discs can add up to tens of gigabytes fast. A cheap external SSD is worth having on hand if you’re archiving more than a handful of titles, both for space and for load-time improvements over spinning storage.
Step 1: Download and Install PCSX2
Get PCSX2 only from the official downloads page or its GitHub releases page – never from a third-party “PCSX2 + BIOS bundle” site. The project ships on two tracks: a Stable build that’s updated every few months, and a Nightly build that updates roughly with every commit. The official docs describe Nightly as “highly recommended” over Stable for most users, since PS2 emulation compatibility fixes land there first; check the downloads page for whichever is current when you install, since PCSX2’s release cadence means a hardcoded version number here would be stale within weeks.
Installation differs slightly by platform:
- Windows: The Stable build ships as a conventional installer (.exe). Nightly builds are portable ZIP archives – extract them anywhere.
- macOS: Download the .tar.xz archive, extract it, and drag the PCSX2 app bundle into Applications.
- Linux: Use the official AppImage or install via Flatpak from Flathub.
# Linux – AppImage method
chmod +x PCSX2-v2.x-linux-x64.AppImage
./PCSX2-v2.x-linux-x64.AppImage

# Linux – Flatpak method (recommended for auto-updates)
flatpak install flathub net.pcsx2.PCSX2
flatpak run net.pcsx2.PCSX2
If you want a fully self-contained setup – useful for running PCSX2 off a USB drive, or keeping multiple isolated configurations – create an empty portable.ini (or portable.txt) file in the same folder as the PCSX2 executable before first launch. This tells PCSX2 to store its settings, BIOS, saves, and screenshots inside its own install folder instead of scattering them into your OS user-profile directories.
# Windows (PowerShell) – enable portable mode
New-Item -Path ".\portable.ini" -ItemType File

# macOS / Linux – enable portable mode
touch ./portable.ini
Step 2: Dump a Legal BIOS From Your Own PS2
This is the step every shortcut-hunting “just download a BIOS” tutorial skips, and it’s the one that actually matters. PCSX2 will not run a single game without a real PS2 BIOS file, and the only legal way to get one is to dump it from a console you own.
- Softmod your PS2. The common routes are FreeMcBoot (memory-card based, works on most fat and many slim models, exploit kits run roughly $15), Fortuna (a slim-focused equivalent, similar cost), or FreeDVDBoot (free, but requires a burnable DVD and a compatible drive). Older consoles can also use a hardware modchip if you’re comfortable opening the case.
- Run a BIOS-dumping tool – such as the official
biosdrainutility – from your softmodded PS2’s exploit menu. It reads the BIOS chip and writes the dump to a FAT32/MBR-formatted USB drive, or transfers it over a network connection via tools like ps2client/ps2link if your console has a network adapter. - Verify the dump. Compute its checksum and compare it against the known-good hash for your BIOS revision in the ReDump preservation project’s database. A mismatched hash usually means a bad or incomplete dump, not a virus – but it’s worth re-dumping rather than trusting a partial file.
- Copy the BIOS file(s) into PCSX2’s
biosfolder (underDocuments/PCSX2/in non-portable mode, or the portable install folder if you set that up in Step 1).
# Verify a BIOS dump's checksum on Linux/macOS
sha1sum SCPH-39001.bin
# compare the output hash against the ReDump entry for your BIOS revision

# Verify a BIOS dump's checksum on Windows
certutil -hashfile SCPH-39001.bin SHA1
Dump the BIOS that matches your console’s own region – a USA console gives you a USA BIOS, a European console gives you a PAL BIOS, and so on. Most games run fine against any correctly-dumped BIOS of the right region, and PCSX2’s setup wizard (next step) will show a confirmation once it recognizes a valid file.
Step 3: Complete First-Time Setup
Launch PCSX2 after installation and it will walk you through a First-Time Configuration wizard. Click through to the BIOS selection screen, choose Browse, and point it at the folder containing your dumped BIOS file. A valid, complete dump shows a green checkmark next to it in the selector; a red X means PCSX2 either can’t find a BIOS in that folder or the file is corrupt/incomplete – re-check Step 2 if you see this.
The wizard also lets you set your default game directory (where your ISOs live) and confirms your OS’s default renderer and input backend. You can change every one of these later from the Settings menu, so it’s fine to accept the defaults here and revisit graphics and controller tuning in the next steps. Once you reach the end of the wizard, click Finish – PCSX2 will create its full folder structure (bios, memcards, sstates, snaps, cheats, inis, logs) inside its data directory, which you can always jump to via Tools → Open Data Directory.
Step 4: Configure Your Controller
Open Settings → Controllers → Controller Settings. PCSX2 exposes two general input backends: XInput, which Xbox controllers use natively, and DirectInput/SDL, which covers DualShock, DualSense, and most generic USB or Bluetooth pads.
- Connect your controller before opening the Controllers settings page.
- Select Port 1, choose the correct controller type (typically “DualShock 2” to match the original PS2 pad layout), and click Automatic Mapping – PCSX2 will detect your pad and bind buttons automatically in most cases.
- Test face buttons, both sticks, and both triggers using the on-screen input viewer before closing the settings page.
- If a pad shows as connected in Windows/macOS/Linux but doesn’t respond once mapped, toggle between the XInput and DirectInput/SDL API for that device – this single switch resolves the large majority of “controller not working” reports.
If you’d rather play with a keyboard for now, the same screen has an Automatic Mapping → Keyboard option that binds a sensible default layout.
Step 5: Choose a Renderer and Graphics Backend
PCSX2 2.0’s Qt rewrite exposes several rendering backends, and picking the right one for your hardware makes a bigger difference than almost any other single setting.
| Renderer | Platforms | Best For | Notes |
|---|---|---|---|
| Vulkan | Windows, Linux, macOS (via MoltenVK) | Most modern GPUs, best overall performance | Default recommendation since the 2.0 rewrite |
| Direct3D 11 | Windows only | Older or budget GPUs, driver-stability fallback | Slightly lower feature ceiling than D3D12/Vulkan |
| Direct3D 12 | Windows only | Recent NVIDIA/AMD/Intel GPUs | Comparable to Vulkan on most modern hardware |
| OpenGL | Windows, Linux, macOS | Legacy or Mesa-driver Linux systems | Widest compatibility, generally not the fastest option |
| Metal | macOS only | Apple Silicon and recent Intel Macs | Native Apple API, avoids translation overhead |
| Software | All platforms | Diagnosing GPU-driver issues | Very slow; a diagnostic tool, not a real option for play |
The Software renderer deserves a special mention: it’s not meant for actual play, but it’s the single best troubleshooting tool PCSX2 has. If a game displays correctly in Software mode but glitches or shows a black screen in Vulkan or Direct3D, the problem is almost always your GPU driver or a hardware-renderer-specific bug – not your BIOS, not your ISO, and not a broken install. Keep that distinction in mind; it comes up again in the troubleshooting table further down.
Step 6: Set Internal Resolution and Texture Filtering
Native PS2 output looks blurry by modern standards, so PCSX2’s internal resolution multiplier is usually the first thing people crank up. Under Settings → Graphics → Rendering, the Internal Resolution option scales from native (1x) up to 8x. As a reference point, 3x Native lands around 1080p and is a solid middle-ground default; 6x Native lands around 4K and needs a genuinely strong GPU to hold full speed in demanding titles. You can also override resolution per game (right-click a game in your library → Properties → Graphics), which is useful for titles that only misbehave at higher multipliers.
Texture filtering has two relevant modes: “Bilinear (PS2)” filters textures only where the original game code called for filtering, which is the most accurate to how the game actually looked on hardware; “Bilinear (Forced)” filters everything uniformly, which reduces shimmering at high resolutions but can introduce visual glitches in specific titles that relied on the PS2’s unfiltered look for effects like fake transparency. If widescreen looks stretched, that’s expected until you also enable a widescreen patch (Step 10) – the PS2 itself rendered the vast majority of its library natively in 4:3, so changing the aspect ratio alone just distorts the image without a matching code patch.
Step 7: Tune Speedhacks for Full-Speed Performance
If a game won’t hold full speed even with the right renderer, PCSX2’s Speedhacks (Settings → Emulation → Speedhacks) trade a small amount of accuracy for performance. They’re most useful on hardware near the Minimum requirements tier, or when you’ve pushed internal resolution higher than your GPU comfortably handles.
- Speed Hack Presets slider: Level 2 is the standard safe starting point – full speed gains with minimal compatibility risk for most games. Presets above 3 start trading noticeably more accuracy for speed and can introduce glitches or slowdown in sensitive titles.
- EE Cyclerate: Controls the emulated clock rate of the Emotion Engine. Default runs the exact original speed; +1 or +2 (mild underclock-style optimizations) is the commonly recommended safe range. Higher levels can visibly break physics or scripted events in some games.
- VU Cycle Stealing: Steals emulated cycles from the Vector Units to speed up the main CPU emulation. Levels 1-2 typically give a noticeable FPS gain with low compatibility risk; go past that only if a specific game needs it and you’re prepared to troubleshoot.
The practical workflow: enable Speedhacks, set the preset to 2, launch the game you’re struggling with, and only increase individual sliders further if you’re still short of full speed. Treat every increase past the safe defaults as a per-game experiment, not a global “set once” setting.
Step 8: Set Up Memory Cards
Under Settings → Memory Cards, PCSX2 auto-creates a virtual memory card the first time a game writes a save. You can also create one manually and choose its size, or – the option worth knowing about – create a “Folder” type card, which behaves as effectively unlimited storage with no real downside over a fixed-size virtual card. Memory cards are stored as individual .ps2 files inside the memcards folder in your PCSX2 data directory (Tools → Open Data Directory, or Settings → Memory Cards → Browse, will take you straight there).
This is also the point to internalize the difference between memory cards and save states, since it’s one of the most common sources of lost progress – covered in detail in the pitfalls section below.
Step 9: Load and Boot Your First Game
With BIOS, controller, and graphics settings in place, add your ISO folder (or insert a disc, for direct-disc play) via File → Game List → Add Search Directory, then double-click a title to boot it. A clean first boot looks roughly like this in the PCSX2 log window:
[BIOS] Console region: NTSC-U
[BIOS] Loaded: SCPH-39001 (v2.30 2008-05-08)
[GS] Renderer: Vulkan, Internal Resolution: 3x Native (1080p)
[CDVD] Loaded image: Game_Title.iso (ISO9660)
[EE] Boot complete, handing off to game executable
[PAD] Port 1: DualShock 2 profile – Automatic Mapping active
If instead you get a black screen, a hang on the loading screen, or a crash, jump to the troubleshooting table further down – those three symptoms cover the large majority of first-boot problems and each has a specific, known cause.
Step 10: Apply Widescreen Patches and Cheats
PCSX2 supports per-game patches and cheats through a plain-text format called Pnach. Each patch file is named after the game’s serial number and the CRC hash of its executable – for example, a patch for one particular release of a game might be named SCES-50916_6A8F18B9.pnach. General cheat patches go in the cheats folder inside your PCSX2 data directory; widescreen-specific patches go in a separate cheats_ws folder, and PCSX2 auto-detects and offers them once “Apply Widescreen Patches” is enabled in Graphics settings.
[Widescreen 16:9]
gsaspectratio=16:9
patch=1,EE,00100000,word,12345678
That’s the illustrative shape of a widescreen patch, not a working code for any specific game – the group name must read exactly [Widescreen 16:9] for PCSX2’s global toggle to pick it up automatically, but the actual memory address and value on the patch= line are unique per game and per game revision. Full syntax is documented on the official writing patches page. Community-maintained patch collections cover most of the popular library; the PCSX2/pcsx2_patches repository on GitHub is the project-endorsed source and syncs directly with the main emulator repo. Once a patch file is in place, you can enable or disable it per game from that title’s Properties → Patches tab, so you’re never stuck with a patch that turns out to cause more problems than it solves.
Step 11: Use Save States the Right Way
Save states – instant snapshots of the entire emulated machine, bound to F1/F3 by default – are enormously convenient for skipping past a tough section or testing a Speedhack change without replaying ten minutes of game. They are not a substitute for real memory-card saves. Save states are tied to the exact PCSX2 version and sometimes the exact game revision that created them; updating PCSX2, especially across a major version, is not guaranteed to load an old save state cleanly. Store them in the default sstates folder, use them freely for convenience, but always make sure you’ve also triggered a real, in-game memory-card save at natural checkpoints. If you only remember one rule from this entire guide, make it this one – it’s the single most common way people lose PS2 emulation progress.
Step 12: Keep PCSX2 Updated and Check Compatibility
Before deep-troubleshooting any specific game bug, update to the latest Nightly build – the official docs explicitly recommend this as the first troubleshooting step, since PS2 emulation accuracy fixes ship continuously. It’s also worth checking the official compatibility list before assuming a problem is something you misconfigured; some PS2 titles have known, documented quirks (a specific cutscene that needs a particular Speedhack disabled, for instance) that have nothing to do with your setup.
Hardening Your PCSX2 Setup
Emulation guides rarely cover security, but the PCSX2 ecosystem has real, avoidable risk surface – mostly concentrated around where people get BIOS files and ISOs, not around PCSX2 itself.
- Only download PCSX2 from pcsx2.net or its official GitHub releases. Search results for “PCSX2 download” and especially “PCSX2 BIOS download” are heavily populated by sites bundling adware, browser hijackers, or worse alongside the “free BIOS” hook – the same sites that are asking you to break copyright law are not sites you should trust with an executable.
- Verify BIOS dump integrity with a checksum, as shown in Step 2, rather than trusting a file just because it opened without an error. A corrupted dump can cause subtle, hard-to-diagnose game bugs that look like emulator problems.
- Keep ISOs and BIOS files on an encrypted or access-controlled volume if you’re on a shared or portable machine – they’re personal backups of media you own, not something you want casually exposed.
- Use portable mode (Step 1) on shared or public machines so your configuration, saves, and BIOS don’t leak into a shared user profile.
- Treat third-party Pnach patch collections like any other community code you didn’t write – stick to well-known, actively maintained repositories such as PCSX2’s own patches project rather than a patch attached to a random forum post.
A Complete, Repeatable PCSX2 Deployment Script
If you’re setting PCSX2 up on more than one machine – or just want a repeatable, auditable process instead of clicking through folders – this script builds the standard portable folder layout, verifies a BIOS dump’s checksum against a hash you supply, and confirms Vulkan is actually available before you go looking for a “black screen” bug that’s really a missing graphics driver. Save it as setup-pcsx2.sh on Linux or macOS.
#!/usr/bin/env bash
# setup-pcsx2.sh – build folder structure, verify BIOS, check Vulkan
set -euo pipefail

PCSX2_HOME="${1:-$HOME/PCSX2-Portable}"
BIOS_FILE="${2:-}"
EXPECTED_SHA1="${3:-}"

echo "==> Creating PCSX2 portable folder structure at $PCSX2_HOME"
mkdir -p "$PCSX2_HOME"/{bios,cheats,cheats_ws,inis,logs,memcards,sstates,snaps}
touch "$PCSX2_HOME/portable.ini"

if [[ -n "$BIOS_FILE" ]]; then
  if [[ ! -f "$BIOS_FILE" ]]; then
    echo "ERROR: BIOS file not found at $BIOS_FILE" >&2
    exit 1
  fi
  ACTUAL_SHA1=$(sha1sum "$BIOS_FILE" | awk '{print $1}')
  echo "==> BIOS SHA1: $ACTUAL_SHA1"
  if [[ -n "$EXPECTED_SHA1" ]]; then
    if [[ "$ACTUAL_SHA1" == "$EXPECTED_SHA1" ]]; then
      echo "==> Checksum OK – copying BIOS into portable folder"
      cp "$BIOS_FILE" "$PCSX2_HOME/bios/"
    else
      echo "ERROR: checksum mismatch – re-dump this BIOS, do not use it" >&2
      exit 1
    fi
  else
    echo "WARNING: no expected checksum supplied, skipping verification"
    cp "$BIOS_FILE" "$PCSX2_HOME/bios/"
  fi
else
  echo "NOTE: no BIOS file supplied – dump one from your own PS2 (see Step 2) and re-run this script"
fi

echo "==> Checking for Vulkan support"
if command -v vulkaninfo >/dev/null 2>&1; then
  if vulkaninfo --summary >/dev/null 2>&1; then
    echo "==> Vulkan is available – recommended renderer"
  else
    echo "WARNING: vulkaninfo present but reported an error – check GPU drivers"
  fi
else
  echo "WARNING: vulkaninfo not found – install your GPU vendor's Vulkan driver package, or fall back to OpenGL"
fi

echo "==> Done. Launch PCSX2 from $PCSX2_HOME and point it at this folder."
Run it with ./setup-pcsx2.sh ~/PCSX2-Portable /path/to/your/dumped-bios.bin <expected-sha1-from-ReDump>. It refuses to copy a BIOS whose checksum doesn’t match what you supply, which turns “silently trust a file” into a hard stop – exactly the kind of guardrail worth having around a step that’s otherwise easy to get subtly wrong.
Common Pitfalls When Setting Up PCSX2
- Downloading a BIOS instead of dumping one. Beyond the legal issue, third-party BIOS files are a common way people end up with malware, and there’s no way to verify integrity on a file you didn’t create yourself.
- Treating save states as your only save method. They’re version- and revision-sensitive; a PCSX2 update can leave an old save state unloadable. Always back real progress with an in-game memory-card save.
- Maxing out Speedhacks “for more FPS.” EE Cyclerate and VU Cycle Stealing past the commonly recommended safe range trade accuracy for speed and can break scripted events, physics, or cutscene timing in specific games.
- Picking the wrong controller API. A pad that shows as connected at the OS level but doesn’t respond in-game is almost always an XInput/DirectInput mismatch, not a broken controller.
- Skipping portable mode, then losing track of settings. Without a
portable.ini, PCSX2 scatters BIOS, saves, and config across OS-specific user-profile folders, which gets confusing fast if you ever reinstall or move to a new machine. - Blaming the emulator for a bad ISO rip. A corrupt or incomplete disc image produces symptoms – crashes, black screens, hangs – that look identical to BIOS or configuration problems. Re-verify the source disc before assuming PCSX2 itself is at fault.
Troubleshooting PCSX2: 10 Common Problems
| Symptom | Likely Cause | Fix |
|---|---|---|
| Black screen after loading | Wrong-region BIOS, or a hardware-renderer-specific bug | Confirm BIOS region matches the game; switch to Software renderer to isolate a GPU-driver issue |
| Stuck on loading screen indefinitely | Corrupt or incomplete ISO | Re-rip or re-verify the source disc image |
| Red X on BIOS in setup wizard | PCSX2 can’t find a valid BIOS in the selected folder | Re-check the file path and re-verify the dump’s checksum from Step 2 |
| Controller connects but doesn’t respond in-game | Input API mismatch | Toggle between XInput and DirectInput/SDL for that device |
| Crackling or delayed audio | Audio buffer/latency setting too aggressive, or CPU bottleneck | Increase audio buffer size in Settings → Audio; reduce internal resolution if CPU-bound |
| Frame rate drops in busy scenes | Internal resolution or Speedhacks mismatched to your GPU/CPU tier | Drop internal resolution one step, or enable Speed Hack Preset 2 |
| Save state won’t load after an update | Save states are version/revision-specific | Load your last real memory-card save instead; this is why Step 11 matters |
| HUD or menus stretched after enabling widescreen | Aspect ratio changed without a matching widescreen patch | Add the game’s Pnach widescreen patch from Step 10, or revert to 4:3 |
| Crash or freeze on a specific cutscene | Known game-specific compatibility quirk | Check the game’s entry on the official compatibility list for a documented workaround |
| Vulkan renderer won’t initialize | Outdated or missing Vulkan-capable GPU driver | Update your GPU driver, or temporarily switch to Direct3D 11/12 (Windows) or OpenGL |
For anything not covered above, the official troubleshooting guide and the compatibility list are the two most reliable next steps – both are maintained by the people who actually write the emulator.
Advanced Tips for PCSX2 Power Users
- Use per-game configuration overrides. Right-click any title in your library → Properties, and every graphics, Speedhack, and patch setting can be overridden just for that game without touching your global defaults.
- Generate a GS dump when reporting bugs. If you hit a genuine rendering bug worth reporting upstream, PCSX2 can capture a GS (Graphics Synthesizer) dump that developers can replay to debug the exact frame that broke – far more useful to a bug report than a screenshot.
- Try texture replacement for a genuine visual upgrade. Per-title Properties → Graphics → Texture Replacements lets PCSX2 dump a game’s original textures to DDS files (Dump Textures) and load higher-resolution replacements in their place, matched by CRC32 hash. This is the mechanism behind community HD texture packs; PCSX2 doesn’t host a centralized pack repository the way some other emulators do, so quality and coverage vary by game and community project.
- Separate your BIOS by region if you play imports. You can keep multiple BIOS files (NTSC-U, PAL, NTSC-J) in the same bios folder and pick the right one per game from Properties, which matters for a handful of titles that behave differently across regions.
- Check the compatibility list before assuming a bug is yours. A meaningful share of “my game is broken” reports turn out to be documented, game-specific quirks with known workarounds already listed against that title.
- Keep a known-safe Speedhack profile for problem games. Rather than tuning globally, save an EE Cyclerate/VU Cycle Stealing combination that’s worked for a specific troublesome title as that game’s per-title override, so a global tweak later doesn’t reintroduce an old bug.
PCSX2 vs Other Ways to Play PS2 Games in 2026
PCSX2 isn’t the only route back into the PS2 library, and it’s worth knowing where it sits relative to the alternatives before you commit an evening to setup.
| Method | Cost | BIOS/Legal Note | Resolution | Platforms |
|---|---|---|---|---|
| PCSX2 | Free, open-source (GPL-3.0) | Dump your own BIOS | Native up to 8x internal (well beyond 4K on strong GPUs) | Windows, macOS, Linux |
| NetherSX2 (AetherSX2 fork) | Free | Dump your own BIOS | Device-dependent | Android |
| Original PS2 hardware (used market) | Cost of a used console + discs | None needed – has its own BIOS | Native 480i/480p only | PS2 only |
| Early PS3 (launch 60GB/20GB models) | Used market, discontinued line | None needed – built-in PS2 hardware | Native only | PS3 only; later slim/super-slim PS3 models dropped this entirely |
| PS2 Classics (PlayStation Store) | Per-title purchase | None needed – Sony-licensed | Native, a few titles patched/upscaled | Purchasable on PS4; playable on PS5 via backward compatibility |
AetherSX2, once the default PS2 emulator on Android, was discontinued by its original developer in 2023 after sustained online harassment and was pulled from the Google Play Store; NetherSX2, a community fork, has since become the go-to continuation for mobile PS2 emulation. Sony’s own PS2 Classics program, meanwhile, only ever brought a fraction of the console’s 4,000-plus-game library forward digitally, and titles can only be purchased on PS4 – PS5 owners access them through backward compatibility rather than a direct storefront purchase. For anyone chasing the deepest catalog coverage, the highest achievable image quality, and the most granular control over performance, PCSX2 on a PC remains the most complete option in 2026.
Frequently Asked Questions
Is PCSX2 legal to use?
Yes. PCSX2 itself is open-source software containing no Sony code. The legal risk is entirely in how you source your BIOS and games – dump your own BIOS from a PS2 you own, and use discs or ISOs of games you legitimately own.
Do I need to own a physical PS2 to use PCSX2?
To do this legally, yes – you need your own PS2 to dump a legitimate BIOS. There’s no legal, redistributable substitute for the BIOS file, so a PS2 (even a cheap used one bought specifically for this) is effectively a required part of the setup.
What’s the difference between PCSX2 Stable and Nightly builds?
Stable updates every few months and is more conservative; Nightly updates roughly with every code commit and gets compatibility and bug fixes far sooner. The official documentation recommends Nightly for most users, and specifically as the first thing to try when troubleshooting a game-specific issue.
Can PCSX2 run well on a laptop or budget PC?
Yes, for most of the library, if you meet the Minimum requirements tier (PassMark CPU score around 2000+, a Vulkan/D3D11-capable GPU, 8GB RAM). Because the Emotion Engine emulation leans on single-thread CPU speed, an older quad-core desktop CPU can sometimes outperform a newer but weaker laptop chip. Demanding titles and high internal-resolution upscaling need the Recommended or Heavy tier instead.
Does PCSX2 support Apple Silicon Macs?
Yes. M-series Macs are exempt from the x86 SIMD instruction requirements that apply to Intel/AMD systems, and PCSX2 supports Metal as a native rendering backend on macOS. Apple Silicon Macs are still officially rated in the Heavy requirements tier for consistent performance.
What’s the highest resolution PCSX2 can render PS2 games at?
The internal resolution multiplier goes up to 8x native. As reference points, 3x Native lands around 1080p and 6x Native lands around 4K; 8x pushes well past that, though very few GPUs hold full speed at that multiplier in demanding games.
Why is my game running slow or stuttering even though my PC is powerful?
Check three things in order: that you’re on a hardware renderer (Vulkan/D3D/Metal, not Software), that your internal resolution isn’t set higher than your GPU can sustain, and that you haven’t left aggressive Speedhacks enabled from a previous troubleshooting session. Single-thread CPU speed also matters more for PS2 emulation than total core count, so a high core-count-but-lower-clock CPU can underperform expectations here.
Can I use PCSX2 on Steam Deck or other Linux handhelds?
Yes – PCSX2 runs natively on Linux, including SteamOS, either standalone via Flatpak or bundled as part of an emulation frontend like EmuDeck. The same BIOS-dumping requirement applies regardless of platform.
Related Coverage
- RetroArch: 100+ Cores in 12 Steps, 30 Min
- EmuDeck on Steam Deck: 20+ Emulators, 12 Steps
- Dolphin Emulator: GameCube & Wii in 4K, 12 Steps
- Batocera 43.1 Setup: 200+ Systems, 12 Steps
- Batocera vs RetroPie vs Recalbox: 200+ Systems
For more retro-gaming and emulation coverage, visit the gaming section.