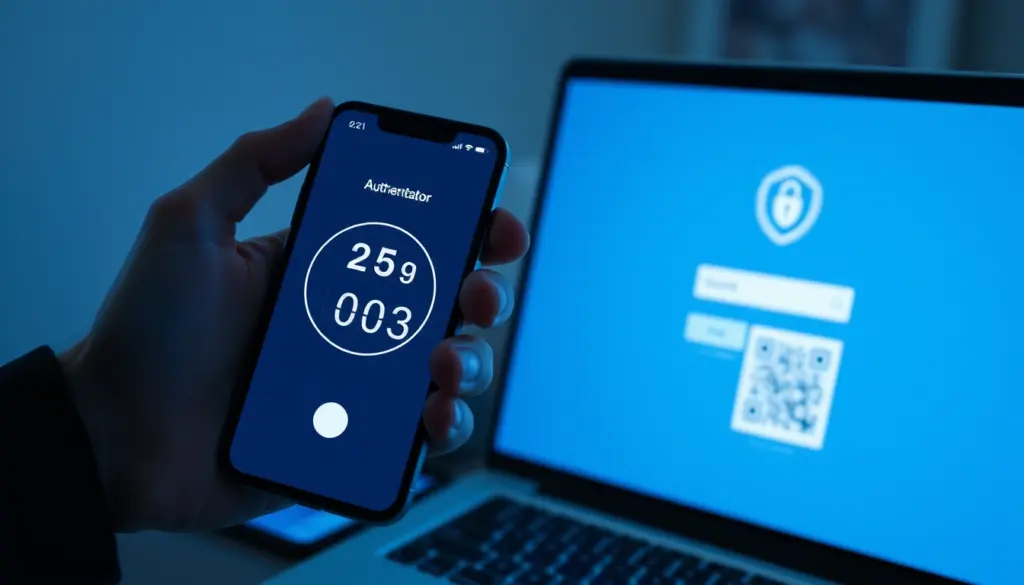
Passwords leak. Billions of them already have. The single fastest fix a developer can ship is two factor authentication, and the data backs it up: Microsoft’s research found that multi-factor authentication reduces the risk of account compromise by 99.22% across the entire user population, and by 98.56% even when the attacker already holds leaked credentials. Microsoft’s earlier guidance put it more bluntly, that turning on MFA blocks “over 99.9 percent of account compromise attacks.” This tutorial shows you how to build that protection yourself in Node.js using time-based one-time passwords (TOTP), the same standard Google Authenticator, Authy, and Microsoft Authenticator speak.
By the end of these 11 steps you will have a complete working project: a registration flow that issues a TOTP secret, a scannable QR code, a login flow that demands a 6-digit code, single-use recovery codes, rate limiting, and replay protection. Every line runs on Node.js 20, Express 5, and the actively maintained otplib library. Plan on roughly 45 minutes start to finish.
Why Two-Factor Authentication Stops Almost Every Account Attack
A password is a single shared secret. Once it is phished, reused, or dumped in a breach, the attacker is you. Two factor authentication adds a second, independent proof of identity, something you have (a device generating codes) on top of something you know (the password). An attacker who steals your password from a breach still cannot log in, because they do not hold the second factor.
The numbers are not marketing. A Google study of consumer accounts, cited in Microsoft’s own research, found that adding a second-factor challenge prevented 100% of automated bot attacks, 96% of bulk phishing attacks, and 76% of targeted attacks. Microsoft separately reported that over 99.99% of MFA-enabled accounts remained secure across its investigation window. For the cost of one npm package and an afternoon, you close the door on the overwhelming majority of credential-stuffing and bot-driven takeovers.
Not all second factors are equal. SMS codes are vulnerable to SIM-swap fraud and telecom interception, where an attacker convinces a carrier to port your number to their SIM and harvests the texted code. App-based TOTP removes the mobile network from the equation entirely: the secret lives on the device, and codes are generated offline. This is why NIST and most security teams now treat app-based authenticators as the practical baseline and reserve phishing-resistant passkeys for the highest-assurance flows. We will cover where TOTP sits in that hierarchy later in this guide.
How TOTP Works: RFC 6238 in Plain English
TOTP is defined in RFC 6238. It builds directly on the HMAC-based one-time password (HOTP) algorithm from RFC 4226. HOTP derives a code from a shared secret and an incrementing counter. TOTP makes one change: it replaces that counter with the current time, divided into fixed windows. Both the server and the authenticator app hold the same secret, so they independently compute the same 6-digit code for the same 30-second window. No code is ever transmitted during setup, only the secret, and only once.
The counter is calculated as the number of seconds since the Unix epoch, divided by the time step (30 seconds), floored to an integer. That counter is fed through HMAC-SHA1 with the shared secret, and the result is truncated to a 6-digit decimal. Because both sides use the same clock and the same secret, they agree on the code without ever communicating. The table below lists the parameters that mainstream authenticator apps expect by default.
| Parameter | Default value | Notes |
|---|---|---|
| Time step (period) | 30 seconds | The window each code is valid for; 30s is required for Google Authenticator compatibility |
| Digits | 6 | Some apps support 7 or 8; 6 is the universal default |
| HMAC algorithm | SHA-1 | RFC 6238 default; SHA-256 and SHA-512 are allowed but less widely supported by apps |
| Secret encoding | Base32 | Authenticator apps and libraries expect Base32-encoded secrets |
| Provisioning scheme | otpauth:// | The URI encoded into the enrollment QR code |
| Verification window | ±1 step | Tolerates modest clock drift between server and device |
The use of SHA-1 here often raises eyebrows. SHA-1 is broken for collision resistance, but TOTP uses it inside HMAC, which depends on a different property (pre-image resistance under a secret key) that remains sound. The standard kept SHA-1 for interoperability. You can switch to SHA-256, but only if both server and app agree, which most consumer apps do not, so stick with the default unless you control both ends.
Prerequisites and Versions
This project uses a small, current dependency set. The versions below are what the code was written and tested against in June 2026. Pin them in your package.json for reproducibility, then upgrade deliberately.
| Tool / package | Version | Role in the project |
|---|---|---|
| Node.js | 20.20.2 (LTS) | Runtime; any 18.x or 20.x LTS works |
| npm | 10.x | Package manager, ships with Node 20 |
| express | 5.2.1 | HTTP server and routing |
| otplib | 13.4.1 | TOTP secret generation and verification |
| qrcode | 1.5.4 | Renders the otpauth:// URI as a scannable QR image |
| express-rate-limit | 7.x | Throttles verification attempts |
You also need a smartphone with an authenticator app installed (Google Authenticator, Microsoft Authenticator, Authy, or any TOTP-compatible app) to test the enrollment flow in Step 10. Basic familiarity with Express routes and async/await is assumed. If you have not built an auth layer before, our JWT authentication in Node.js walkthrough pairs naturally with this one, since 2FA sits on top of a working password login.
Step 1: Initialize the Project and Install Dependencies
Create a fresh directory and initialize it. We use ES module syntax, so set "type": "module" in the generated package.json.
mkdir totp-2fa-demo && cd totp-2fa-demo
npm init -y
npm pkg set type=module
npm install [email protected] [email protected] [email protected] express-rate-limit@7
node --version
# v20.20.2
That installs everything you need. otplib handles the cryptography, qrcode turns the provisioning URI into an image, and express-rate-limit protects the verify endpoint. There are no native build dependencies, so installation is fast and works the same on macOS, Linux, and Windows.
Step 2: Build a Minimal Express Server and User Store
To keep the focus on 2FA, we use an in-memory user store instead of a database. In production this maps directly to a users table; the fields we add (totpSecret, totpEnabled, recoveryCodes, lastUsedStep) become columns. Create server.js:
import express from 'express';

const app = express();
app.use(express.json());

// In-memory store. Replace with your database in production.
const users = new Map();

// Seed one demo user who has a password but no 2FA yet.
users.set('[email protected]', {
  email: '[email protected]',
  passwordOk: true,      // pretend the password was already verified
  totpSecret: null,
  totpEnabled: false,
  recoveryCodes: [],     // array of { hash, used }
  lastUsedStep: null,    // replay protection, set in Step 8
});

const PORT = 3000;
app.listen(PORT, () => console.log(`Server on http://localhost:${PORT}`));

export { app, users };
This is deliberately thin. We assume the password step already happened (our Argon2 password hashing guide covers that half). The passwordOk flag stands in for a successful password check. Everything from here adds the second factor on top.
Step 3: Generate a TOTP Secret for Each User
When a user opts in to 2FA, the server generates a fresh Base32 secret and stores it as pending. Do not mark 2FA as enabled yet. The user has not proven they can produce a valid code, and if you enable it now a setup failure would lock them out. Add this route to server.js:
import { authenticator } from 'otplib';

// Allow one step of drift in either direction (RFC-recommended).
authenticator.options = { window: 1 };

app.post('/2fa/setup', (req, res) => {
  const { email } = req.body;
  const user = users.get(email);
  if (!user) return res.status(404).json({ error: 'User not found' });

  // Generate a Base32 secret. Store as pending until verified.
  const secret = authenticator.generateSecret(); // e.g. "KRSXG5CTMVRXEZLU"
  user.totpSecret = secret;
  user.totpEnabled = false;

  res.json({ secret, message: 'Scan the QR code, then confirm a code to enable.' });
});
authenticator.generateSecret() returns a Base32 string with enough entropy (160 bits by default) to resist brute force. Never reuse a secret across users, and never log it. Treat it like a password: it is the root of the user’s entire 2FA. We will encrypt it at rest in Step 11.
Step 4: Create the otpauth:// URI and Render the QR Code
Users do not type Base32 secrets by hand. They scan a QR code that encodes an otpauth:// provisioning URI. That URI carries the issuer (your app name), the account label (usually the email), and the secret. otplib builds the URI; the qrcode package renders it as a data URL you can drop straight into an <img> on your setup page.
import QRCode from 'qrcode';

app.get('/2fa/qrcode', async (req, res) => {
  const { email } = req.query;
  const user = users.get(email);
  if (!user || !user.totpSecret) {
    return res.status(400).json({ error: 'Start setup first' });
  }

  // Build the otpauth:// URI. The issuer appears in the user's app.
  const uri = authenticator.keyuri(user.email, 'Shattered Demo', user.totpSecret);
  // uri === otpauth://totp/Shattered%20Demo:[email protected]?secret=...&issuer=Shattered%20Demo

  try {
    const dataUrl = await QRCode.toDataURL(uri); // base64 PNG data URL
    res.json({ uri, qrcode: dataUrl });
  } catch (err) {
    res.status(500).json({ error: 'Could not render QR code' });
  }
});
The keyuri method URL-encodes the issuer and label for you. Always set a recognizable issuer: it is what the user sees in their authenticator app, and a generic or missing issuer leads to confused users deleting the wrong entry. Return both the data URL (for the QR image) and the raw secret (so users on the same device, who cannot scan their own screen, can type it manually).
Step 5: Verify the First Code to Enable 2FA
Now the user scans the QR, their app starts generating codes, and they submit the current one. The server verifies it against the pending secret. Only on success do you flip totpEnabled to true. This confirmation step is what prevents lockouts from a botched scan.
app.post('/2fa/enable', (req, res) => {
  const { email, token } = req.body;
  const user = users.get(email);
  if (!user || !user.totpSecret) {
    return res.status(400).json({ error: 'Start setup first' });
  }

  // Constant work regardless of result; otplib handles the comparison.
  const isValid = authenticator.verify({ token, secret: user.totpSecret });
  if (!isValid) {
    return res.status(401).json({ error: 'Invalid code. Try the latest one.' });
  }

  user.totpEnabled = true;
  res.json({ enabled: true, message: '2FA is now active on your account.' });
});
authenticator.verify() returns a boolean. With window: 1 it checks the current 30-second step plus one before and one after, so a user who submits a code a few seconds after it rolls over still succeeds. Do not widen the window beyond 1 or 2; each extra step is another valid code an attacker could guess.
Step 6: Add 2FA to the Login Flow
With 2FA enabled, login becomes two stages. Stage one checks the password (assumed here). If the account has 2FA on, the server does not issue a session yet; it returns a “2FA required” response. Stage two verifies the TOTP code and only then establishes the session.
app.post('/login', (req, res) => {
  const { email } = req.body;
  const user = users.get(email);

  // Stage one: password already verified (passwordOk).
  if (!user || !user.passwordOk) {
    return res.status(401).json({ error: 'Invalid credentials' });
  }

  // If 2FA is off, log in directly.
  if (!user.totpEnabled) {
    return res.json({ authenticated: true, session: 'issue-real-session-here' });
  }

  // 2FA is on: pause and demand a code.
  res.json({ authenticated: false, twoFactorRequired: true });
});

app.post('/login/2fa', (req, res) => {
  const { email, token } = req.body;
  const user = users.get(email);
  if (!user || !user.totpEnabled) {
    return res.status(400).json({ error: 'No 2FA pending for this account' });
  }

  const isValid = authenticator.verify({ token, secret: user.totpSecret });
  if (!isValid) {
    return res.status(401).json({ error: 'Invalid 2FA code' });
  }

  res.json({ authenticated: true, session: 'issue-real-session-here' });
});
The key security property: never issue a session token until the second factor passes. A common mistake is returning a partial session or a “pre-auth” token that an attacker can use directly. Keep stage one stateless beyond a short-lived, single-purpose challenge identifier if you need one.
Step 7: Generate and Store Single-Use Recovery Codes
Phones get lost, wiped, and stolen. Without a fallback, a lost device means a locked account and a support ticket. Recovery codes are the standard fallback: a set of single-use, high-entropy strings shown to the user exactly once at setup. Store them hashed, never in plaintext, and invalidate each after use.
import crypto from 'node:crypto';

function generateRecoveryCodes(count = 10) {
  const plain = [];
  const stored = [];
  for (let i = 0; i < count; i++) {
    // 10 hex chars, formatted as xxxxx-xxxxx for readability.
    const raw = crypto.randomBytes(5).toString('hex');
    const code = `${raw.slice(0, 5)}-${raw.slice(5)}`;
    plain.push(code);
    // Hash before storing. SHA-256 is fine for high-entropy random codes.
    const hash = crypto.createHash('sha256').update(code).digest('hex');
    stored.push({ hash, used: false });
  }
  return { plain, stored };
}

app.post('/2fa/recovery-codes', (req, res) => {
  const { email } = req.body;
  const user = users.get(email);
  if (!user || !user.totpEnabled) {
    return res.status(400).json({ error: 'Enable 2FA first' });
  }
  const { plain, stored } = generateRecoveryCodes();
  user.recoveryCodes = stored;          // store only hashes
  res.json({ recoveryCodes: plain });   // show plaintext once, never again
});
Because recovery codes are randomly generated with 40 bits of entropy each, a fast hash like SHA-256 is acceptable; you do not need bcrypt or Argon2 here, which exist to slow down attacks on low-entropy human passwords. Now wire redemption into the 2FA login route as an alternative to a TOTP code:
app.post('/login/recovery', (req, res) => {
  const { email, code } = req.body;
  const user = users.get(email);
  if (!user || !user.totpEnabled) {
    return res.status(400).json({ error: 'No 2FA on this account' });
  }
  const hash = crypto.createHash('sha256').update(code).digest('hex');
  const entry = user.recoveryCodes.find(c => c.hash === hash && !c.used);
  if (!entry) {
    return res.status(401).json({ error: 'Invalid or already-used recovery code' });
  }
  entry.used = true; // burn it
  res.json({ authenticated: true, warning: 'Recovery code used. Regenerate your set.' });
});
Step 8: Add Rate Limiting and Replay Protection
A 6-digit code has only one million possibilities. With a generous verification window, an attacker who can submit thousands of guesses per minute has a real shot. Two defenses close this: rate limiting throttles attempts, and replay protection ensures a code cannot be used twice even within its valid window.
import rateLimit from 'express-rate-limit';

// Cap verification attempts: 5 per 5 minutes per IP.
const verifyLimiter = rateLimit({
  windowMs: 5 * 60 * 1000,
  max: 5,
  standardHeaders: true,
  legacyHeaders: false,
  message: { error: 'Too many attempts. Wait and try again.' },
});

// Apply to both 2FA verification routes.
app.use(['/login/2fa', '/login/recovery'], verifyLimiter);
Replay protection records the time step of the last accepted code. otplib does not expose the matched step from verify(), so compute the current step yourself and reject any code from a step you have already accepted. Replace the verify logic in your 2FA login route with this:
function currentStep(period = 30) {
  return Math.floor(Date.now() / 1000 / period);
}

function verifyWithReplayGuard(user, token) {
  const isValid = authenticator.verify({ token, secret: user.totpSecret });
  if (!isValid) return false;

  const step = currentStep();
  // Reject if this step (or a newer one) was already used.
  if (user.lastUsedStep !== null && step <= user.lastUsedStep) {
    return false;
  }
  user.lastUsedStep = step;
  return true;
}
With this guard, even if an attacker intercepts a valid code over a phished page, they cannot replay it: the moment the legitimate user (or the attacker) submits it once, that step is burned. Combined with rate limiting, online brute force becomes impractical.
Step 9: Let Users Disable or Reset 2FA
Users sometimes need to turn 2FA off or move to a new phone. Disabling 2FA is a sensitive action, so require a valid current code (or recovery code) before doing it. Never let a plain password alone disable the second factor; that defeats the purpose.
app.post('/2fa/disable', (req, res) => {
  const { email, token } = req.body;
  const user = users.get(email);
  if (!user || !user.totpEnabled) {
    return res.status(400).json({ error: '2FA is not enabled' });
  }
  // Require proof of the second factor to remove the second factor.
  if (!authenticator.verify({ token, secret: user.totpSecret })) {
    return res.status(401).json({ error: 'Valid 2FA code required to disable' });
  }
  user.totpSecret = null;
  user.totpEnabled = false;
  user.recoveryCodes = [];
  user.lastUsedStep = null;
  res.json({ disabled: true });
});
To reset (re-enroll on a new device), the cleanest path is disable then run setup again from Step 3. This issues a fresh secret, so the old device’s codes stop working immediately, which is exactly what you want when a phone is replaced or lost.
Step 10: Test the Full Flow with a Real Authenticator App
Code that passes unit tests can still fail against a real app because of clock drift or encoding mistakes. Test against an actual authenticator. Start the server, then walk the flow with curl and your phone.
node server.js
# Server on http://localhost:3000

# 1. Start setup, get the pending secret.
curl -s -X POST localhost:3000/2fa/setup \
  -H 'Content-Type: application/json' \
  -d '{"email":"[email protected]"}'
# {"secret":"KRSXG5CTMVRXEZLU","message":"Scan the QR code, then confirm a code to enable."}

# 2. Get the QR code data URL and open it in a browser to scan.
curl -s 'localhost:3000/2fa/[email protected]' | head -c 120
# {"uri":"otpauth://totp/Shattered%20Demo:[email protected]?secret=KRSXG5CTMVRXEZLU...

# 3. Read the 6-digit code from your app, confirm it.
curl -s -X POST localhost:3000/2fa/enable \
  -H 'Content-Type: application/json' \
  -d '{"email":"[email protected]","token":"492817"}'
# {"enabled":true,"message":"2FA is now active on your account."}
Now test the login. A correct code authenticates; a stale one fails; the same code submitted twice is rejected by the replay guard. If your codes are consistently rejected, your server clock is almost certainly off, which is the single most common TOTP bug. Jump to troubleshooting below.
# Login stage one: 2FA challenge returned.
curl -s -X POST localhost:3000/login \
  -H 'Content-Type: application/json' \
  -d '{"email":"[email protected]"}'
# {"authenticated":false,"twoFactorRequired":true}

# Login stage two: submit current code.
curl -s -X POST localhost:3000/login/2fa \
  -H 'Content-Type: application/json' \
  -d '{"email":"[email protected]","token":"058321"}'
# {"authenticated":true,"session":"issue-real-session-here"}
Step 11: Harden the Project for Production
The demo store keeps secrets in plaintext memory. In production, the TOTP secret is as sensitive as a password and deserves encryption at rest. Encrypt it with a key held outside the database (in a KMS or environment secret), so a database dump alone does not hand an attacker every user’s second factor.
import crypto from 'node:crypto';

// 32-byte key from env, never hard-coded. Use a KMS in real deployments.
const KEY = crypto.scryptSync(process.env.SECRET_KEY, 'totp-salt', 32);

function encryptSecret(plain) {
  const iv = crypto.randomBytes(12);
  const cipher = crypto.createCipheriv('aes-256-gcm', KEY, iv);
  const enc = Buffer.concat([cipher.update(plain, 'utf8'), cipher.final()]);
  const tag = cipher.getAuthTag();
  return Buffer.concat([iv, tag, enc]).toString('base64');
}

function decryptSecret(blob) {
  const buf = Buffer.from(blob, 'base64');
  const iv = buf.subarray(0, 12);
  const tag = buf.subarray(12, 28);
  const enc = buf.subarray(28);
  const decipher = crypto.createDecipheriv('aes-256-gcm', KEY, iv);
  decipher.setAuthTag(tag);
  return Buffer.concat([decipher.update(enc), decipher.final()]).toString('utf8');
}
This uses AES-256-GCM, an authenticated cipher, so tampering is detected on decrypt. If you want a deeper treatment of symmetric encryption in Node, our AES-256 encryption in Node.js guide breaks down GCM, IVs, and auth tags in detail. The official Node.js crypto documentation is the authoritative reference for these APIs.
A production checklist before you ship: serve everything over HTTPS so codes are never sent in cleartext; store secrets encrypted as above; enforce the rate limiter on a shared store (Redis) if you run multiple instances; log failed 2FA attempts for anomaly detection; and offer recovery codes at enrollment, not as an afterthought. Align your authenticator choices with NIST SP 800-63B, which sets the federal baseline for authenticator assurance.
Common Pitfalls That Break TOTP
Most TOTP failures trace back to a short list of mistakes. Here are the five that account for the majority of support tickets and security holes.
- Server clock drift. TOTP is entirely time-based. If your server clock is more than a step or two off real time, every code fails. Run NTP and verify with
timedatectl. This is the number-one cause of “the code never works.” - Enabling 2FA before verifying a code. If you flip
totpEnabledon at setup without confirming the user can produce a valid code, a bad scan locks them out permanently. Always require the confirmation in Step 5. - Storing secrets in plaintext. A leaked database with plaintext TOTP secrets hands attackers a working second factor for every user. Encrypt at rest, as in Step 11.
- Widening the verification window to “fix” failures. Bumping
windowto 5 or 10 masks a clock problem and quietly multiplies the codes an attacker can guess. Keep it at 1, fix the clock instead. - Skipping replay protection. Without tracking the last used step, a code phished and replayed within its 30-second window still works. The guard in Step 8 is not optional for a real deployment.
Troubleshooting TOTP in Node.js
When something goes wrong, this table maps the symptom to the likely cause and the fix. Work top to bottom; clock issues are far more common than code bugs.
| Symptom | Likely cause | Fix |
|---|---|---|
| Every code is rejected | Server clock drift | Sync NTP; check timedatectl; confirm timezone is UTC-correct |
| Codes work intermittently near the 30s boundary | No drift tolerance | Set authenticator.options = { window: 1 } |
| App shows codes but server says invalid | Secret encoding mismatch | Confirm the secret is Base32; do not re-encode it before passing to verify |
| QR code will not scan | Malformed otpauth URI | Use authenticator.keyuri(); do not hand-build the URI |
| Wrong account name in the app | Missing or generic issuer | Pass a clear issuer string to keyuri() |
| Same code accepted twice | No replay guard | Track lastUsedStep as in Step 8 |
| Recovery code never matches | Comparing plaintext to stored hash | Hash the submitted code with the same algorithm before lookup |
| Rate limiter not triggering behind a proxy | Client IP is the proxy IP | Set app.set('trust proxy', 1) so real client IPs are seen |
| Codes fail only in production | Container clock not synced | Ensure the host/container has NTP; containers drift if the host does |
Advanced Tips for Production 2FA
Once the basics work, these refinements separate a demo from a hardened system. Each addresses a real-world edge case the happy path ignores.
- Configure otplib explicitly. Set
authenticator.options = { digits: 6, step: 30, window: 1 }rather than relying on defaults, so an upstream change never silently shifts your parameters. - Show remaining validity. Expose the seconds left in the current step on your UI so users do not submit a code that is about to expire. Compute it as
30 - (Math.floor(Date.now()/1000) % 30). - Encrypt recovery codes with the same KMS key. Even though they are hashed, encrypting the hash list adds defense in depth against a partial database read.
- Alert on factor changes. Email the user whenever 2FA is enabled, disabled, or recovery codes are regenerated. An unexpected alert is often the first sign of an account takeover in progress.
- Plan the upgrade path to passkeys. TOTP is strong against credential stuffing but is still phishable; a fake page can relay a code in real time. Where you need phishing resistance, layer in WebAuthn/passkeys, which bind authentication to the origin and cannot be relayed.
SMS vs App-Based TOTP vs Passkeys: Which to Use
2FA is not a single thing. The three mainstream second factors differ sharply in cost, usability, and resistance to attack. This table summarizes where each fits, so you can decide what to ship and what to deprecate.
| Factor | Phishing resistant | SIM-swap risk | Works offline | Best for |
|---|---|---|---|---|
| SMS one-time code | No | High | No | Last resort; better than nothing, but deprecate where possible |
| App-based TOTP | No (relay-phishable) | None | Yes | Strong, low-cost default for most apps; the focus of this guide |
| Push approval | No (prompt fatigue) | None | No | Convenient, but vulnerable to MFA-fatigue spam attacks |
| Hardware token (TOTP) | No | None | Yes | Users who refuse to install an app |
| Passkey / FIDO2 | Yes | None | Yes | Highest assurance; origin-bound and unphishable |
The practical takeaway: app-based TOTP, what you built in this tutorial, is the right default for the vast majority of applications. It is free, works offline, and shuts down SIM-swap entirely. Reserve passkeys for flows that demand phishing resistance, and treat SMS as a fallback you are actively trying to retire. For background on how attackers exploit the weak link, our guide to phishing attacks shows exactly what TOTP does and does not protect against.
Frequently Asked Questions
Is otplib or speakeasy the better choice in 2026?
Use otplib for new projects. It is actively maintained, currently at version 13.4.1, with a clean API and TypeScript support. The older speakeasy (2.0.0) still works and appears in many tutorials, but it has seen far less recent maintenance. Both implement RFC 6238 correctly; otplib is simply the safer long-term bet.
Why do my TOTP codes keep failing?
In the overwhelming majority of cases the server clock is wrong. TOTP derives codes from the current time, so a drift of even 60 seconds breaks verification. Sync your server with NTP and confirm with timedatectl. If the clock is correct, check that you set window: 1 and that the secret is stored as unmodified Base32.
How many recovery codes should I issue?
Ten single-use codes is the common standard, matching GitHub and Google. Each should carry at least 40 bits of entropy, be shown only once, stored hashed, and burned after use. Prompt the user to regenerate their set once they have used several, so they never run out.
Is app-based TOTP safe against phishing?
It blocks credential stuffing, password reuse, and SIM-swap completely, but it is not fully phishing-proof. A convincing fake login page can ask for the code and relay it to the real site within its 30-second window. Replay protection limits the damage, but if you need true phishing resistance, use passkeys/FIDO2, which bind the login to the legitimate origin.
Can I use SHA-256 instead of SHA-1 for TOTP?
The standard allows it, but most consumer authenticator apps assume SHA-1, so switching breaks compatibility with Google Authenticator and similar apps. SHA-1 inside HMAC is still cryptographically sound for this use, since it relies on properties unaffected by the known collision attacks. Keep the default unless you control both the server and the client app.
How do I store the TOTP secret securely?
Treat it like a password. Encrypt it at rest with AES-256-GCM using a key held outside the database, ideally in a KMS or secret manager, as shown in Step 11. A plaintext secret in a leaked database is a working second factor for an attacker, which defeats the entire mechanism.
Does 2FA replace strong password hashing?
No. They defend different layers. 2FA stops an attacker who already has the password; strong hashing (Argon2, bcrypt, scrypt) protects the passwords themselves if your database leaks. Ship both. Pair this guide with an Argon2 or bcrypt password layer for full coverage.
What happens if a user loses their phone and recovery codes?
That requires an identity-verified, manual account-recovery process handled by support, deliberately, because any automated bypass becomes the weakest link an attacker will target. Encourage users to save recovery codes at enrollment so this rare path stays rare.
Related Coverage
- JWT Authentication in Node.js: 10 Steps
- Argon2 Password Hashing in Node.js: 11 Steps
- AES-256 Encryption in Node.js: 12 Steps
- Password Security: What Actually Keeps Accounts Safe
- Phishing Attacks: How to Recognize and Avoid Them
- Online Security Explained: A Practical Guide
You now have a complete, working two factor authentication system in Node.js: secret generation, QR enrollment, a two-stage login, single-use recovery codes, rate limiting, replay protection, and encrypted storage. Wire the in-memory store to your real database, serve it over HTTPS, and you have shipped the single most effective account-security upgrade available to a developer today.