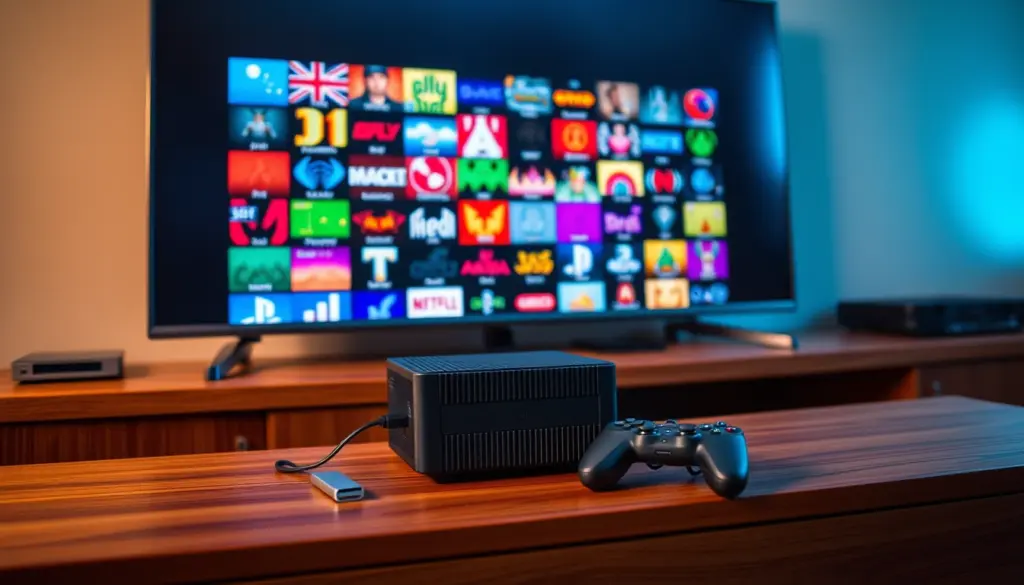
Most emulation tools install on top of an operating system you already run. Batocera does the opposite: it replaces your boot process entirely, running straight from a USB drive or SD card and shipping nothing but Linux plus more than 200 preconfigured emulator cores. The current stable release, version 43.1 "Glasswing," landed on 30 May 2026, and setting it up correctly — not just booting it, but securing it and organizing your library — takes about 30 minutes if you follow the steps in the right order.
This walkthrough covers picking the right hardware, flashing and verifying the image, hardening SSH before you do anything else, adding ROMs and BIOS files the way Batocera actually expects them, and scripting the whole deployment so it’s repeatable. We’ll also cover what changed in 43.1, the pitfalls that trip up first-timers, and a troubleshooting table for when something doesn’t boot the way it should.
What Is Batocera, and Why 200+ Systems in One Image?
Batocera.linux is a free, open-source Linux distribution built specifically for retro-gaming emulation. Unlike EmuDeck or RetroArch — both of which install as software on top of an OS you already run — Batocera is the OS. It boots directly from removable media, uses EmulationStation as its menu-driven frontend, and wires together RetroArch’s libretro cores alongside standalone emulators like Dolphin (GameCube/Wii), PCSX2 (PS2), Flycast (Dreamcast), RPCS3 (PS3), Cemu (Wii U), and Azahar (3DS) so you get one consistent interface across all of them.
The project advertises support for more than 200 systems out of the box, from the Atari 2600 and NES up through PS2, GameCube, and — on capable hardware — PS3. On GitHub, batocera-linux/batocera.linux carries 3,108 stars and 707 forks as of this writing, with commits pushed daily, which is a reasonable proxy for how actively the project is maintained.
The single biggest practical difference from RetroPie, Recalbox, or a manual RetroArch install is that Batocera’s system partition is read-only. Your ROMs, BIOS files, save states, and configuration all live on a separate writable partition called SHARE. That split means a bad update or a corrupted config can’t easily brick your whole library — you reflash the boot image and your data is untouched. We cover the full three-way breakdown, including GitHub star counts and hardware-support tables side by side, in our Batocera vs RetroPie vs Recalbox comparison.
Because Batocera boots from removable media, it also doesn’t touch your existing Windows or Linux install by default. Plug in the drive, change your boot order (or hit the one-time boot-menu key), and unplug it when you’re done gaming — the machine goes right back to whatever OS lives on its internal disk. For more on our broader gaming hardware coverage, including where Batocera fits next to full desktop Linux gaming distros, see our Bazzite vs SteamOS comparison.
Prerequisites: Hardware, Storage, and Software Versions
Before you start, confirm you actually have what the install needs. This tutorial was tested against Batocera 43.1 "Glasswing," the current stable release; where behavior differs meaningfully from the prior 42 "Papilio" release, we’ve flagged it.
| Requirement | Minimum | Recommended |
|---|---|---|
| Batocera version | 43.0 | 43.1 "Glasswing" (30 May 2026 point release) |
| USB drive / SD card | 16 GB | 32 GB or larger — automatic updates require 32 GB+ |
| Target hardware | Any x86_64 PC or Raspberry Pi 4 | Pi 5, mini-PC, or a dedicated retro rig |
| Flashing tool | balenaEtcher, Raspberry Pi Imager, or USBImager | Same, plus dd on Linux for scripted installs |
| Host OS to flash from | Windows 10/11, macOS, or Linux | Any — flashing tools are cross-platform |
| Controller | Any USB or Bluetooth gamepad | Xbox- or DualSense-style pad for the cleanest default mapping |
| Network | Optional | Ethernet or Wi-Fi for scraping box art and SSH access |
That storage line deserves emphasis: Batocera’s own installation wiki states plainly that 16 GB is the floor and 32 GB is what you need for full functionality, because the system cannot automatically download updates with only 16 GB available. Buy the bigger drive up front — it’s cheaper than re-flashing later.
Step 1: Pick the Right Hardware Tier for Your Systems
Batocera publishes a different image for every hardware architecture, and the most common first-timer mistake is grabbing the wrong one — an image built for Raspberry Pi won’t boot on an x86_64 mini-PC, and vice versa. Before downloading anything, match your hardware to the systems you actually want to play, since that determines both which image to grab and how much horsepower you’ll need.
| Hardware | Realistic Ceiling | Notes |
|---|---|---|
| Raspberry Pi 4 (4 GB+) | 8/16-bit consoles, PS1, N64, Dreamcast | Cheapest entry point; N64 and Dreamcast need per-game tuning |
| Raspberry Pi 5 | Adds PSP, Saturn, light GameCube | Roughly double the Pi 4’s GPU throughput |
| x86_64 mini-PC (Intel N100/N150 class) | PS2, GameCube, Wii, most Dreamcast/Saturn titles | Best price-to-system ratio for 3D-era consoles |
| Desktop with a discrete GPU | PS3 (RPCS3), Wii U (Cemu) | RPCS3 and Cemu are both CPU-heavy, not just GPU-heavy |
| Handheld PC (Steam Deck, ROG Ally, etc.) | Everything through PS2/GameCube, portable | Can coexist with SteamOS on some devices — see our Linux gaming OS comparison |
It’s worth noting that the entry cost for this hardware has moved with the rest of the market. Raspberry Pi’s own pricing notices show the 8 GB Pi 5 climbing from $95 in December 2025 to $125 by February 2026, and the 16 GB model jumping from $145 to $205 in the same window — a side effect of the AI-driven memory shortage that has pushed single-board computer prices higher throughout 2026, the same shortage that’s been driving up Steam Deck, Steam Machine, and console prices (see our coverage of the 2026 RAM shortage). If you already own a machine that can run a browser comfortably, it’s almost certainly capable of handling 2D and PS1-era emulation without spending anything new.
Step 2: Download the Correct Batocera 43.1 Image
Head to batocera.org/download and pick the image matching Step 1’s hardware choice. Images follow a consistent naming pattern: batocera-[architecture]-[version]-[date].img.gz — for example, batocera-x86_64-43.1-20260530.img.gz for a 64-bit PC on the 43.1 point release. Raspberry Pi images are split further by board revision (bcm2711 for Pi 4, bcm2712 for Pi 5), so don’t grab a generic "Raspberry Pi" image and assume it covers both boards.
The image is gzip-compressed, and that’s intentional — you don’t need to manually extract it. balenaEtcher and Raspberry Pi Imager both read .img.gz files directly and decompress on the fly during flashing.
If the main download is slow, Batocera also serves images through regional mirrors — the same mirror infrastructure used for updates in Step 11 — linked directly from the download page itself. There’s no need to hunt for third-party mirror links, and you shouldn’t: a Batocera image from anywhere other than batocera.org or its listed mirrors is not something you can verify against the official checksum in Step 3.
Step 3: Verify the Image Before You Flash It
A corrupted download produces a drive that half-boots, panics randomly, or fails partway through partition expansion — all of which are far more annoying to diagnose after the fact than a five-second checksum check up front. Batocera publishes checksums alongside every image on the download page. Verify with:
sha256sum batocera-x86_64-43.1-20260530.img.gz
# compare the output against the checksum listed next to the
# download link on batocera.org/download
On Windows, without a Unix-style shell available, PowerShell’s built-in equivalent works the same way:
Get-FileHash .\batocera-x86_64-43.1-20260530.img.gz -Algorithm SHA256Either way, if the hash doesn’t match, don’t flash it — re-download instead. A silently-corrupted image is the single most time-consuming failure to diagnose after the fact, because the symptoms (random boot hangs, a scraper that half-works, a system that loads some games and not others) look identical to a dozen other unrelated problems.
Step 4: Flash Batocera to a USB Drive or SD Card
The GUI path is balenaEtcher — cross-platform, handles .img.gz directly, and validates the write afterward. Raspberry Pi Imager works well if you’re targeting a Pi board specifically, and USBImager is a lighter alternative on Linux.
If you’re on Linux and want a command-line path — useful later when we script the whole deployment — identify your device first, then flash:
# identify the correct device FIRST -- writing to the wrong
# device destroys whatever data is on it
lsblk

# flash (replace /dev/sdX with your USB device, NOT a partition
# like /dev/sdX1)
zcat batocera-x86_64-43.1-20260530.img.gz | sudo dd of=/dev/sdX bs=4M status=progress conv=fsync
Pointing dd at the wrong device node erases whatever’s there with zero confirmation prompt. Run lsblk immediately before flashing, every time, and double-check the device letter — not a partition number — before you hit enter.
On Windows, if a previously-flashed USB stick appears to "shrink" and Explorer refuses to show its full capacity afterward, that’s expected: Batocera’s partition layout confuses Windows’ disk management. Recover the drive with diskpart‘s clean / create partition primary / format quick sequence before reusing it for something else — the drive isn’t damaged.
Step 5: Boot Batocera for the First Time
Insert the drive, power on, and interrupt the boot process to select it as the boot device — the key varies by motherboard, but F10, F11, F12, and Delete are the most common; check your PC’s splash screen if you’re not sure. On a UEFI system that refuses to even list the USB drive as bootable, the fix is almost always Secure Boot: go into firmware settings and disable it, since Batocera’s kernel isn’t signed for Microsoft’s Secure Boot chain.
First boot takes noticeably longer than every boot after it, because Batocera is expanding the SHARE partition to fill the rest of the drive. Expect output conceptually similar to this (illustrative — exact line timing varies by hardware):
[   4.812] batocera-boot: expanding SHARE partition...
[   4.813] batocera-boot: resize2fs running on /dev/sda3
[  11.204] batocera-boot: SHARE partition resized to 29.8G
[  11.401] batocera-boot: starting EmulationStation
On some boards this expansion needs one extra reboot to finish cleanly — if EmulationStation looks stuck or renders oddly on the very first boot, power-cycle once before assuming something’s wrong. After that, you’ll land in EmulationStation’s system wheel and Batocera is technically "installed."
Step 6: Lock Down SSH Before You Do Anything Else
This is the step most retro-gaming tutorials skip, and it shouldn’t be skipped. Batocera enables SSH by default, and the login is root / linux on every single install — that’s not a secret, it’s documented on Batocera’s own SSH access wiki page. That’s a reasonable tradeoff for a hobbyist box sitting on your living-room network, but it becomes a real exposure the moment the machine is reachable from outside your LAN: port-forwarded for remote play, sitting on a shared dorm or office network, or exposed via UPnP by a router you don’t fully control. Batocera’s own security documentation is blunt about this — the project was not designed to be a secure OS by default, so treat that as a known constraint rather than an oversight to report as a bug.
Change it immediately, either over SSH or from the menu:
ssh [email protected]
# password: linux (default -- change this now)

batocera-config setRootPassword "a-long-unique-passphrase"
reboot
Or from EmulationStation: MAIN MENU → SYSTEM SETTINGS → SECURITY → ROOT PASSWORD, and enable "Enforce Security" while you’re there — this also requires credentials for the SMB network share instead of leaving it open to anyone on the same Wi-Fi network.
One quirk worth knowing: if you change your network hardware later — adding or removing a USB Ethernet adapter, for instance — Batocera can regenerate a fresh default password on some builds. Get in the habit of running batocera-config getRootPassword after any hardware change instead of assuming your custom password persisted.
Step 7: Add Your ROMs and BIOS Files
Batocera ships with zero games and zero BIOS files — you’re expected to dump these yourself from media you own (more on the legal side later in this piece).
| Content Type | Path | Notes |
|---|---|---|
| ROMs | /userdata/roms/[system]/ | Each folder contains an _info.txt listing exactly which file extensions that core accepts |
| BIOS | /userdata/bios/ | Some cores expect subfolders, e.g. /userdata/bios/dc/ for Dreamcast’s dc_boot.bin and dc_flash.bin |
| Config | /userdata/system/batocera.conf | Covered in Step 10 |
Batocera checks BIOS integrity by MD5 hash for many systems, so a mismatched file shows up as missing even when the filename is exactly right. MENU → GAMES SETTINGS → MISSING BIOS lists precisely what each installed system still needs, including the expected hash. Full path documentation lives on the add games and BIOS wiki page.
Three ways to get files onto those paths, easiest first:
- Network share — Batocera exposes an SMB share with zero configuration:
\\BATOCERA\shareon Windows,smb://BATOCERA.local/shareon macOS/Linux. If you enabled "Enforce Security" in Step 6, authenticate withrootand your new password. - USB drive — plug a USB stick with your files into the Batocera machine, open the in-OS file manager with F1, and copy from there.
- SCP over SSH — the most scriptable option, and the one we build on in Step 12.
# copy a whole SNES ROM folder to a Batocera box at 192.168.1.50
scp -r ./snes-roms/* [email protected]:/userdata/roms/snes/

# copy Dreamcast BIOS files into their required subfolder
scp dc_boot.bin dc_flash.bin [email protected]:/userdata/bios/dc/
Step 8: Configure Controllers and Input Hotkeys
EmulationStation auto-detects most USB and Bluetooth controllers and walks you through a button-mapping wizard the first time it sees a new pad. Xbox- and DualSense-style controllers get the cleanest default mapping, since most RetroArch cores assume that layout. Bluetooth pairing lives under MAIN MENU → CONTROLLERS.
| Hotkey Combo | Action |
|---|---|
| HOTKEY + START | Quit the current game, return to EmulationStation |
| HOTKEY + A | Save state |
| HOTKEY + B | Load state |
| HOTKEY + X | Open the RetroArch quick menu (RGUI) |
| HOTKEY (held) | Modifier button for all of the above, usually mapped to Select/Back |
Forgetting which button is mapped to HOTKEY is the single most common "how do I quit a game" support question — it’s whatever you assigned during that first-run wizard. Re-run MENU → CONTROLLERS → CONFIGURE if you need to check or redo it.
Step 9: Scrape Box Art, Metadata, and Videos
Once ROMs are in place, EmulationStation’s default list view is just filenames. MAIN MENU → SCRAPER pulls in box art, descriptions, release dates, and per-game preview videos from ScreenScraper.fr, Batocera’s default source, documented on the scraper wiki page, with TheGamesDB available as an alternative.
Registering a free ScreenScraper account before you scrape raises your rate limit and speeds up large libraries considerably — running unauthenticated against a few thousand ROMs can take a long time and occasionally gets throttled mid-run. You can scrape a single system, a single game, or the whole library in one pass; box art and metadata get written into your SHARE partition alongside the ROMs, so they survive OS updates and reflashes as long as SHARE itself isn’t wiped.
The scraper menu also lets you choose what to pull per pass — box art only, box art plus a synopsis and release metadata, or the full set including per-game preview clips and marquee images (the last of which meaningfully increases both scrape time and the space used on SHARE, worth skipping on a 16–32 GB drive with a large library). If a specific game comes back unmatched or matched to the wrong region’s cover art, MENU → SCRAPER also supports a manual per-game search and override rather than forcing you to re-run the whole library.
Step 10: Fine-Tune Per-System Settings With batocera.conf
Most day-to-day settings — shaders, per-system emulator choice, RetroAchievements — are reachable from menus, but batocera.conf at /userdata/system/batocera.conf gives you direct, scriptable control, which matters once you’re maintaining more than one Batocera box.
# /userdata/system/batocera.conf
# format: system.option=value

ps2.emulator=pcsx2
snes.shaderset=scanlines
global.retroachievements=1
global.retroachievements.hardcore=0
wifi.enabled=1
wifi.ssid=YourNetworkName
wifi.key=YourNetworkPassword
Edit it directly over SSH or SCP, or through the file manager, then reboot for changes to apply. Because this file lives on the writable SHARE partition, it isn’t touched by a standard OS update — see Step 11.
One setting worth flagging: RetroAchievements Hardcore Mode (global.retroachievements.hardcore=1) disables save states entirely. That’s a common surprise for anyone chasing achievements who’s also used to quick-saving mid-level.
Step 11: Update Batocera Without Wiping Your Library
Because ROMs, BIOS files, saves, and batocera.conf all live on SHARE and the OS itself lives on a separate read-only boot partition, updating is safe by design — an update only touches the boot partition.
From the menu: MAIN MENU → UPDATES & DOWNLOADS → START UPDATE. Over SSH:
batocera-upgrade https://mirrors.o2switch.fr/x86_64/stable/last
reboot
Expected output looks conceptually like this (illustrative — exact wording varies by release):
Downloading update... 100%
Verifying image...
Writing boot partition...
Update complete. Reboot to apply.
Even though SHARE is untouched by design, back it up before a major version jump (42 to 43, for instance) anyway. batocera-upgrade is well-tested, but copying /userdata costs a few minutes and removes any risk entirely — the SMB share or scp from Step 7, reversed, both work fine for this.
Step 12: Automate the Whole Deployment (Complete Working Project)
If you’re setting up more than one Batocera box — a home arcade cabinet, a second unit for a kid’s room, or you just want a repeatable process instead of clicking through menus every time — it’s worth scripting Steps 3, 4, and 6 together. The script below has two phases: flash verifies the checksum and writes the image with a confirmation guard against the classic "wrong device" disaster, and harden waits for SSH after you’ve booted the target machine, then rotates the default root password and pushes your batocera.conf.
#!/usr/bin/env bash
# deploy-batocera.sh -- verify, flash, and SSH-harden a Batocera
# image end to end.
#
# Phase 1: ./deploy-batocera.sh flash batocera-x86_64-43.1-20260530.img.gz checksums.sha256 /dev/sdX
# Phase 2 (after first boot): ./deploy-batocera.sh harden 192.168.1.50

set -euo pipefail
MODE="${1:?usage: deploy-batocera.sh  ...}"

case "$MODE" in
  flash)
    IMAGE="$2"; CHECKSUM_FILE="$3"; TARGET_DEV="$4"

    echo "==> Verifying checksum"
    sha256sum -c "$CHECKSUM_FILE" --ignore-missing

    echo "==> This ERASES everything on $TARGET_DEV."
    read -rp "Type the device path again to confirm: " CONFIRM
    [ "$CONFIRM" = "$TARGET_DEV" ] || { echo "Mismatch, aborting."; exit 1; }

    zcat "$IMAGE" | sudo dd of="$TARGET_DEV" bs=4M status=progress conv=fsync
    sync
    echo "==> Flashed. Boot the target from this drive, then run: $0 harden <ip>"
    ;;

  harden)
    HOST="$2"
    NEW_PW="${BATOCERA_ROOT_PASSWORD:?export BATOCERA_ROOT_PASSWORD first}"

    echo "==> Waiting for SSH on $HOST"
    until ssh -o StrictHostKeyChecking=accept-new -o ConnectTimeout=5 root@"$HOST" true 2>/dev/null; do
      sleep 5
    done

    echo "==> Rotating the default root password"
    ssh root@"$HOST" "batocera-config setRootPassword '$NEW_PW'"

    if [ -f ./batocera.conf ]; then
      echo "==> Pushing batocera.conf"
      scp ./batocera.conf root@"$HOST":/userdata/system/batocera.conf
    fi

    ssh root@"$HOST" reboot
    echo "==> Done. Confirm with: ssh root@$HOST"
    ;;

  *)
    echo "unknown mode: $MODE" >&2; exit 1
    ;;
esac
The password is read from an environment variable rather than hardcoded, and the flash phase requires you to retype the device path before it touches anything — both are small guards, but they’re the two mistakes that actually cause data loss in practice. Save it, adjust the paths, and you have a repeatable Batocera deployment instead of a one-off manual process.
What’s New in Batocera 43.1 "Glasswing"
Batocera’s version numbers are simple increments rather than a year-based scheme — 43 followed by point release 43.1, with the prior major release being 42 "Papilio" on 12 October 2025. Version 43 shipped 8 May 2026, and 43.1 followed on 30 May 2026 as a bug-fix pass. Here’s what actually changed, according to the official changelog:
| Change | Details |
|---|---|
| custom.sh deprecated | Existing custom.sh scripts auto-convert to services on first boot after the upgrade; write new customizations as services going forward |
| Azahar replaces Azahar Plus | 3DS emulation core switched to the upstream Azahar project; encrypted CIA/CCI files are no longer supported — 3DS ROMs must be decrypted before use |
| Legacy Nvidia drivers dropped | 340.xx and 390.xx driver support removed; only 470.xx, 580.xx, and 590.xx continue to be supported |
| ROM folder renames | Several folders (including odyssey2, megadrive-msu, and halflife) renamed to match system naming conventions instead of emulator names |
| RPCS3 shutdown fix (43.1) | Fixed a bug where RPCS3 sometimes blocked a clean game exit |
| Updated emulator cores | Cemu bumped to its April 2026 build, Amiberry to March 2026, BigPEmu to v121 |
The ability to use a custom.sh script is deprecated in this version. If you already used such a script, then it will be one-time transformed into a service.
Batocera official changelog, batocera.org/changelog
If you’re upgrading an existing Batocera install rather than setting one up fresh, the custom.sh and 3DS decryption changes are the two most likely to actually break something you were relying on — check MENU → SYSTEM SETTINGS → SERVICES after upgrading if you had any custom scripts in place.
6 Common Pitfalls When Setting Up Batocera
- Flashing the wrong architecture image. A Raspberry Pi image on a PC (or vice versa) produces a drive that either won’t boot or boot-loops with no useful error message.
- Leaving the default root/linux SSH credentials in place on a network you don’t fully control, including anything port-forwarded for remote access.
- Buying a 16 GB drive and then wondering why automatic updates fail. 32 GB is the real functional minimum, not the documented floor.
- Assuming a correctly-named BIOS file is enough. Many cores MD5-check BIOS content, so a renamed-but-wrong dump still shows as missing.
- Expecting RetroAchievements Hardcore Mode and save states to coexist. Hardcore Mode disables save states entirely, not just during tracked sessions.
- Treating a "shrunk" USB drive after flashing as dead. It isn’t — reformat it with diskpart (Windows) or GParted (Linux/macOS) and it’s reusable.
Troubleshooting Batocera: 9 Issues and Fixes
| Symptom | Likely Cause | Fix |
|---|---|---|
| Machine won’t boot from the drive at all | Wrong architecture image, or Secure Boot enabled | Re-download the correct per-architecture image; disable Secure Boot in UEFI firmware |
| Boots to a black screen after the splash | GPU driver mismatch, common on very new or very old GPUs | Check the release notes for your GPU; legacy Nvidia 340.xx/390.xx are unsupported as of v43 |
| First boot hangs during partition expansion | Some boards need one extra reboot to finish resizing SHARE | Power-cycle once; if it repeats, try a different USB port |
| Can’t reach the network share from Windows | Enforce Security is on and you’re not authenticating, or hostname resolution is failing | Try the IP address instead of the hostname; supply root credentials if prompted |
| A ROM doesn’t show up, or shows in the wrong system | File extension isn’t in that system’s accepted list | Check _info.txt inside that system’s ROM folder for accepted formats |
| BIOS-dependent system says BIOS is missing despite the file being present | MD5 mismatch — wrong dump or revision | Use MENU → GAMES SETTINGS → MISSING BIOS to see the exact hash expected |
| Scraper is extremely slow or keeps timing out | Unauthenticated ScreenScraper requests are rate-limited | Register a free ScreenScraper account and enter it under MENU → SCRAPER |
| Root password appears to reset itself | Adding or removing a network adapter can regenerate the default password on some builds | Re-run batocera-config setRootPassword after any hardware change; verify with getRootPassword |
| Update fails partway through | Interrupted connection or a stale mirror URL | Re-run batocera-upgrade with a fresh mirror from batocera.org/download; SHARE data is untouched even after a failed attempt |
| A custom.sh script stopped working after upgrading to 43 | custom.sh support was deprecated in v43 | Check MENU → SYSTEM SETTINGS → SERVICES — it was auto-converted on first boot; adjust from there |
If none of the above matches what you’re seeing, run batocera-support over SSH before asking for help anywhere — it bundles the relevant logs into one file, which is what most community troubleshooting threads will ask for first.
Advanced Tips: Netplay, RetroAchievements, Kodi, and Shaders
Netplay. RetroArch’s built-in netplay works across Batocera boxes on any core that supports it. Host a session from the in-game RetroArch quick menu (HOTKEY + X), share the room code, and play classic multiplayer titles with a friend running a separate Batocera install over the internet — no additional software needed.
RetroAchievements. Toggle globally with the global.retroachievements key in batocera.conf, or per-system from the in-game menu. Remember that Hardcore Mode trades away save states, as covered in Step 10 — decide per-library whether that tradeoff is worth it before you turn it on for everything.
Kodi. Bundled as a switchable app from the main system wheel, turning the same box into a general media center without a second install or a dual-boot setup.
Shaders, bezels, and themes. MENU → CONTENT DOWNLOADER pulls community themes, CRT-style shaders, and system-accurate bezels directly onto the box. Per-system default shaders are set with the [system].shaderset= key in batocera.conf, as shown in Step 10 — useful if you want scanline filters on every console from the SNES era without configuring each system individually through menus.
Ports. Engine ports like DOOM, OpenBOR, and ScummVM-based adventure games run as a "Ports" system alongside the console emulation. They’re not console emulation in the strict sense — you’re running the original game engine’s open-source reimplementation against your own game data — but Batocera bundles and launches them the same way.
Building a Dedicated Living-Room or Arcade Box With Batocera
A meaningful share of Batocera installs never touch a general-purpose computer at all — they live permanently in a mini-PC tucked behind a TV, or inside an actual arcade cabinet with a coin door and a CRT-style monitor. Because the whole OS lives on the boot drive rather than an internal-disk install, the same mini-PC from Step 1 can boot Batocera exclusively without you ever touching a partition table: plug in the drive, set it as the sole boot device in firmware, and skip the boot-menu key entirely on future power-ons.
For a cabinet build specifically, the practical checklist looks a little different from a desktop install. Prioritize a fanless or low-noise mini-PC, since cabinets sit in living rooms rather than server racks. Wire the cabinet’s arcade buttons and joystick through a USB encoder board so they present to EmulationStation as a standard controller, then run the mapping wizard from Step 8 using the cabinet’s actual controls rather than a gamepad. If the cabinet has its own speakers, confirm the correct audio output is selected under MENU → SYSTEM SETTINGS → AUDIO before you close everything up — a five-second check that saves reopening a bolted cabinet later.
For a living-room box shared with a TV, Kodi turns the same hardware into a media center when nobody’s gaming, and the SMB share from Step 7 means new ROMs can be dropped onto the box from a laptop on the same Wi-Fi network without ever plugging in a keyboard or reopening the case.
Is It Legal? ROMs, BIOS, and Open-Source Licensing
Batocera itself ships zero games and zero BIOS files — it’s emulation tooling, not a piracy distribution, and every core it bundles is open source. The legal question that actually matters is where your ROMs and BIOS dumps come from. Dumping games and firmware from hardware and media you personally own is the position that keeps you clearly on the right side of copyright law in most jurisdictions; downloading ROMs for games you don’t own is not, regardless of how easy that is to do.
The emulation scene has watched this play out at real scale recently: Nintendo’s lawsuit against the Switch emulator Yuzu ended in a $2.4 million settlement and the project’s shutdown, and it set the tone for how aggressively rightsholders are willing to pursue emulator distribution even when the emulator’s own code is clean. We cover that precedent in more detail in our EmuDeck and RetroArch setup guides. Batocera as a distribution hasn’t been targeted the way single-emulator projects have, precisely because it doesn’t distribute copyrighted material — keep your own install that way.
Batocera vs RetroPie vs EmuDeck vs Bazzite: Which Should You Actually Use?
Batocera replaces your OS and offers the broadest hardware support of the group — x86_64 PCs, Pi 4/5, Odroid boards, and a growing list of handhelds — making it the strongest choice for a dedicated retro box or arcade cabinet. RetroPie is a Debian script layer rather than a full OS swap, with its last official pre-built image dated March 2022 even though the setup script itself is still updated; we break down the full hardware and GitHub-star comparison in our Batocera vs RetroPie vs Recalbox piece. EmuDeck installs on top of SteamOS, Windows, or macOS, which makes more sense if the machine already does other things — see our EmuDeck on Steam Deck guide. RetroArch alone is the frontend and core engine underneath both Batocera and EmuDeck; install it directly if you want fine-grained control without any OS-level tooling, covered in our RetroArch setup guide. And if you want one box that handles native Steam gaming and emulation equally well, a general-purpose Linux gaming OS is a different tool for a different job — see our Bazzite vs SteamOS comparison.
Frequently Asked Questions
What is Batocera, and how is it different from RetroPie?
Batocera is a full Linux distribution that boots from removable media and replaces your OS while it’s running. RetroPie is a setup script that installs emulation tools on top of Raspberry Pi OS. Batocera also supports far more non-Pi hardware out of the box. See our full Batocera vs RetroPie vs Recalbox comparison for hardware-support and GitHub-star breakdowns.
Is Batocera free?
Yes. Batocera is free and open source, distributed at no cost from batocera.org. It ships no games or BIOS files; you’re responsible for supplying those yourself from media you own.
How much storage do I need for Batocera?
16 GB is the documented minimum, but 32 GB is the real functional minimum — Batocera can’t download automatic updates on a 16 GB drive. Budget more if you’re planning a large PS2 or GameCube collection, since those go on the same drive by default unless you point Batocera at network storage.
Does installing Batocera erase my Windows or Linux install?
No, as long as you boot it from a USB drive or SD card rather than choosing the "install to internal disk" option. Batocera runs from removable media and leaves your machine’s internal drive untouched; unplug it and the PC boots normally into whatever was already there.
What’s the default password, and do I need to change it?
The default SSH login is root / linux on every Batocera install, and yes — change it in Step 6 before doing anything else, especially if the machine will ever be reachable outside your home network. Batocera’s own wiki describes the project as not designed to be a secure OS by default.
Can Batocera play PS2 or GameCube games?
Yes, via PCSX2 for PS2 and Dolphin for GameCube/Wii, but both need meaningfully more power than 8/16-bit or PS1 emulation — realistically an x86_64 mini-PC or better, not a Raspberry Pi 4.
Is downloading ROMs for Batocera legal?
Dumping ROMs and BIOS files from games and hardware you personally own is generally defensible; downloading copies of games you don’t own is not, and that distinction is exactly what recent lawsuits against emulator projects like Yuzu have turned on.
How do I update Batocera without losing my ROM library?
Run an update from MAIN MENU → UPDATES & DOWNLOADS, or batocera-upgrade over SSH. Updates only touch the read-only boot partition — your ROMs, BIOS, saves, and batocera.conf live on the separate SHARE partition and aren’t affected. Back SHARE up before a major version jump anyway, just in case.
Related Coverage
- Batocera vs RetroPie vs Recalbox: 200+ Systems [2026]
- EmuDeck on Steam Deck: 20+ Emulators, 12 Steps [2026]
- RetroArch: 100+ Cores in 12 Steps, 30 Min [2026]
- Dolphin Emulator: GameCube & Wii in 4K, 12 Steps [2026]
- Bazzite vs SteamOS: NVIDIA & 20+ Handhelds [2026]
- RAM Prices Up 89%: AI Memory Crunch Hits Gaming [2026]