Playnite is a free, open-source game library manager that pulls Steam, Epic, GOG, EA App, Battle.net, and entire emulator ROM collections into one interface, so you stop opening five different launchers to find one game. The project has drawn 13,575 stars on GitHub and runs under the permissive MIT license, with the current stable build sitting at version 10.56, released May 26, 2026. This guide walks through a complete Playnite setup – installation, library imports, emulator configuration, themes, extensions, and Fullscreen mode – in 12 steps, plus the pitfalls and troubleshooting fixes that trip up most first-time setups.
Budget about 30 minutes for the core setup – download through a first authenticated library sync – and longer if you’re importing a large ROM collection, since metadata downloads and emulator configuration scale with how many platforms you add. Everything here works whether you’re setting up a single desktop gaming PC, a portable install for a handheld, or a living-room machine you’ll navigate entirely with a controller.
What Is Playnite and What You’ll Need
Playnite describes itself, in its own official GitHub repository, as “an open source video game library manager and launcher with support for 3rd party libraries like Steam, Epic, GOG, EA App, Battle.net and others,” adding that it “includes game emulation support, providing one unified interface for your games.” That single sentence is the entire pitch: instead of five taskbar icons and five separate windows, you get one scrollable – or controller-navigable – library that treats a Steam game, a GOG installer, and a Nintendo 64 ROM as equally first-class entries.
The project has been developed in the open since March 2017 by creator Josef Nemec, and as of this writing it carries 649 forks and 710 open issues on GitHub – a healthy, actively maintained community project rather than an abandoned side tool. Every feature is free; nothing in Playnite is locked behind a paywall, and the source code is fully auditable, which matters if you’re installing something that will hold your login sessions for Steam, Epic, and Battle.net.
The problem Playnite solves is one most PC gamers accumulate without noticing: a Steam library, a handful of GOG installers bought during a sale, an Epic account with whatever a free-game giveaway added to it, and – for anyone into retro gaming – a folder of ROMs spread across two or three emulators, each with its own window, its own hotkeys, and its own idea of what “recently played” means. None of those tools talk to each other. Playnite’s entire job is to sit above all of them as one searchable, filterable, themeable shell, while leaving the underlying storefronts and emulators completely intact underneath it.
System Requirements
Playnite is lightweight by modern standards. Here’s what the official installer expects before you start:
| Requirement | Minimum | Notes |
|---|---|---|
| Operating system | Windows 10 or Windows 11 | Includes 23H2 and 24H2; a native Linux build is planned for after Playnite 11 ships |
| Framework | .NET Framework 4.6.2 | 4.8 is recommended; most modern Windows installs already have it |
| Disk space | ~200 MB | Base install only – your imported games and ROMs live in their own folders |
| Architecture | x64 | ARM64 Windows 11 devices run it through x64 emulation; expect slower large-library imports |
| Installer size | ~50 MB | Downloaded from the official site or GitHub Releases |
You don’t need administrator rights if you choose the portable build, and you don’t need any of the storefronts pre-installed – Playnite can import a library’s metadata even for games it hasn’t downloaded yet, which is useful for planning what to reinstall on a new drive. An internet connection is required for the initial storefront authentication and metadata downloads, but day-to-day browsing and launching already-imported games works fine offline once your library has synced at least once.
Step 1: Download Playnite
Get the installer directly from playnite.net or the project’s GitHub Releases page – avoid third-party download mirrors, since Playnite handles authenticated sessions for every storefront you connect and you want the binary to match the published source exactly. If you’d rather manage it through a package manager, both routes below install the same official build.
Using Windows’ built-in package manager:
winget install --id=JosefNemec.Playnite -eOr through Chocolatey, which the community package page confirms is kept current with official releases:
choco install playnite -yBefore running either command, it’s worth confirming your .NET Framework version so the installer doesn’t fail silently:
Get-ItemProperty "HKLM:SOFTWARE\Microsoft\NET Framework Setup\NDP\v4\Full" -Name ReleaseExample output on a Windows 11 24H2 machine (a Release value of 528040 or higher corresponds to .NET Framework 4.8):
Release    : 533320
PSPath     : Microsoft.PowerShell.Core\Registry::HKEY_LOCAL_MACHINE\...
PSProvider : Microsoft.PowerShell.Core\Registry
If the command returns nothing or errors out, download the .NET Framework 4.8 runtime from Microsoft before continuing – the Playnite installer will otherwise exit without a clear error message, which is the single most common “it just won’t open” report in setup threads.
Step 2: Choose Installed or Portable Mode
The installer asks where to put Playnite and whether to check a box labeled Portable. This choice matters more than it looks:
- Installed mode writes to Program Files (or a folder you choose), registers an uninstaller, and stores its database under your user AppData folder. This is the right choice for a single desktop PC.
- Portable mode keeps the app, its database, and its extensions in one self-contained folder you can move to a second PC or an external SSD. This is the right choice for handheld PCs (ROG Ally, Legion Go) or if you want to carry your entire configured library between machines.
A portable install looks like this once unpacked:
Playnite\
  Playnite.DesktopApp.exe
  Playnite.FullscreenApp.exe
  library.db\
  Extensions\
  Themes\
  ExtensionsData\
One rule that saves a headache later: don’t run the portable build from a cloud-synced folder like OneDrive or Dropbox. The library database is a live file that gets written to constantly during a scan, and cloud sync clients frequently lock the file mid-write, corrupting the database or freezing the import. Keep the portable folder on local or external storage, and back it up manually instead.
Step 3: Complete the First-Launch Setup Wizard
On first launch, Playnite opens a short wizard rather than dropping you into an empty window. It asks which storefronts you use, offers to check for existing installations on your drives, and gives you the option to skip straight to an empty library if you’d rather add sources manually later. Say yes to the storefronts you actually use – you can add or remove any of them afterward from Main menu → Add-ons → Browse → Libraries, so nothing here is permanent.
The wizard also asks whether to enable automatic metadata downloads immediately. Leave this on for a first run – it saves a manual step later, and you can always turn it off if you want tighter control over which fields get overwritten.
Step 4: Import Steam, Epic, GOG, EA App, and Battle.net
Playnite’s GitHub page names five storefronts as core, built-in integrations: Steam, Epic, GOG, EA App, and Battle.net. Everything beyond that – Ubisoft Connect, the Microsoft Store/Xbox app, Amazon Games, itch.io, and dozens of others – installs as a library extension from the same Add-ons browser, so the distinction between “built-in” and “extension” is mostly invisible once it’s configured.
| Storefront | Integration type | Login required? | Notes |
|---|---|---|---|
| Steam | Built-in | Yes, for private library data | Can also import a public profile without login |
| Epic Games Store | Built-in | Yes | Imports owned titles, not just installed ones |
| GOG | Built-in | Yes | Works well with GOG’s DRM-free installers |
| EA App | Built-in | Yes | Formerly Origin; same account system |
| Battle.net | Built-in | Yes | Covers Blizzard’s current catalog |
| Ubisoft Connect, Xbox, Amazon Games, itch.io | Add-ons browser extension | Varies by extension | Installed from Main menu → Add-ons → Browse → Libraries |
To add a storefront, open Main menu → Add-ons… → Extension settings → Libraries and select each service you use. A YouTube walkthrough of this exact flow puts it about as plainly as it can be put: “If you have games on Steam and GOG, select both and then click next.” That’s genuinely the whole interaction for most people – check the boxes, click through, and let the next step handle authentication.
Step 5: Authenticate and Scan Each Storefront
Each storefront you enabled will prompt for authentication the first time Playnite tries to read your library. Steam, Epic, GOG, EA App, and Battle.net all use a browser-based login window that opens inside Playnite itself, so credentials go directly to the storefront’s own login page rather than through Playnite’s servers – there’s no Playnite account involved anywhere in this process.
Once authenticated, trigger a manual sync from Library → Update Game Library to confirm everything pulled correctly rather than waiting for the automatic background sync. A successful scan reports a short summary in the notification area:
Library update finished.
Steam: 214 games imported
GOG: 38 games imported
Epic: 61 games imported
Battle.net: 4 games imported
If a storefront reports zero games despite a successful login, the most common cause is a privacy setting on that account – Steam profiles set to “Private” will authenticate fine but return an empty game list, since the API call Playnite makes respects the same visibility settings as the public profile page. Switching the profile (or the specific “game details” setting) to at least “Friends Only” resolves it.
Give the first sync more time than feels natural, especially for a Steam library in the hundreds of games – Playnite is fetching per-title data for every entry, not just a flat list of names, and the metadata-download step that usually follows immediately afterward adds its own time on top. Watching the notification area rather than the game grid is the more reliable way to tell whether it’s still working, since the grid can appear to stop updating for a stretch even while the sync is actively progressing in the background.
Step 6: Add Games Playnite Can’t Auto-Detect
Not everything comes from a storefront API. Standalone installers, older games with no digital storefront, and homebrew or fan-translated titles all need to be added manually. From Add game → Add Manually, you can point Playnite at any executable and give it a title, or use Scan Automatically to point it at a whole folder and let Playnite walk the directory tree looking for executables and matching them against metadata providers by filename.
Automatic folder scanning is fast but not perfect – it will happily create an entry for a stray installer sitting next to a game’s .exe if you point it at a messy folder. Scan one game folder at a time for anything outside your storefront libraries, and clean up the results before running a metadata pass, since deleting a bad entry after it already has downloaded cover art is more clicks than not creating it in the first place.
This step matters more than it might seem for anyone with an older PC gaming history – games bought from now-defunct storefronts, Humble Bundle keys redeemed on a platform Playnite doesn’t have a dedicated library plugin for, or standalone installers from a developer’s own site all land here. Once added manually, they behave identically to a Steam or GOG entry: they show up in the same filtered views, get the same metadata treatment in the next step, and launch the same way from Fullscreen mode.
Step 7: Configure Emulators for Your ROM Collection
This is the step that turns Playnite from “a nicer Steam” into a genuine all-platforms front end, and it’s the same feature that lets a single library entry cover a SNES cartridge and a PS2 disc alongside your Steam catalog. Open Main menu → Library → Configure Emulators → Add. As one setup walkthrough summarizes it: “Go to library and then choose configure emulators.” From there, Playnite can auto-detect a number of popular emulators if they’re already installed, or you can add one manually by pointing at its executable.
RetroArch is worth configuring first if you’re starting from nothing – because it bundles dozens of emulator cores behind one executable, you can set up a single RetroArch profile in Playnite and map multiple platforms (NES, SNES, Genesis, Game Boy Advance) to it, instead of adding a separate standalone emulator for each console. For platforms RetroArch doesn’t cover as well, standalone options fill the gap the same way they would outside Playnite.
Once an emulator is added, point Playnite at your ROM folder – organized one subfolder per platform, not one giant folder – and add it as an emulated platform source. As one setup guide phrases the folder-selection step: “Go ahead and select that folder. You don’t want to go in the folders containing your emulators and hit select folder.” In other words: select the ROMs folder itself, not the emulator’s install directory, a mix-up that’s an easy first-time mistake because both dialogs look identical.
ROMs\
  NES\
  SNES\
  GENESIS\
  GBA\
  PS2\
  GAMECUBE\
Match each subfolder to its platform in the emulator’s configuration screen, and Playnite will scan and import every recognized ROM as its own library entry, complete with a platform tag it uses for filtering later. BIOS files, where required, are handled entirely by the emulator itself – Playnite doesn’t manage, provide, or bundle BIOS dumps, so the requirement varies per core exactly as it would if you ran that emulator standalone.
If you’re running RetroArch as a single multi-system profile, each platform entry needs its own core selected – a typical emulator profile ends up looking like this once you’ve mapped a handful of systems:
Emulator: RetroArch
  Platform: Nintendo Entertainment System → Core: Mesen
  Platform: Super Nintendo Entertainment System → Core: Snes9x
  Platform: Sega Genesis → Core: Genesis Plus GX
  Platform: Game Boy Advance → Core: mGBA
Set each of these as the platform’s default emulator once, and every ROM you add to that platform’s folder afterward launches with the correct core automatically – you won’t be prompted to choose an emulator each time you click a game, which matters once your library spans more than two or three systems.
Step 8: Download Metadata, Covers, and Descriptions
With your libraries and emulated platforms imported, run a metadata pass from Library → Download Metadata. Playnite’s primary metadata source is IGDB, which supplies cover art, descriptions, genres, release dates, and community score data for both storefront games and the ROMs you added manually. You can choose whether new fields overwrite existing ones or only fill blanks – the safer default for a first run is “only missing fields,” so you don’t clobber custom entries you’ve already edited.
Metadata matching works by title, so entries with inconsistent naming – “Final Fantasy VII” versus “FFVII” versus a raw ROM-dump filename – can match the wrong record or nothing at all. It’s faster to fix filenames before the metadata pass than to manually correct dozens of mismatched covers afterward. For ROMs specifically, a clean, standardized regional title without scene-release tags matches IGDB’s database far more reliably than a raw dump filename.
For anything that still comes back wrong or blank after the bulk pass – a common outcome for obscure titles, ROM hacks, or homebrew that IGDB simply doesn’t list – right-click the individual game and choose Download Metadata to retry just that entry, or edit the fields manually. Manual edits are never overwritten by a later bulk pass as long as you left the “only missing fields” option selected back at the start of this step.
Step 9: Install and Customize Themes
Playnite ships two interface modes – Desktop and Fullscreen – and each has its own independent theme system, documented in the official theme introduction guide. Desktop themes are mostly cosmetic (colors, layout density); Fullscreen themes are the bigger visual swing, since community themes can restyle Fullscreen mode into something resembling a console dashboard.
Install one from Main menu → Add-ons… → Browse, then pick either the Desktop or Fullscreen tab depending on which mode you’re skinning. Themes install and apply without a restart in most cases, though some heavier Fullscreen themes prompt for one. Check a theme’s listed compatible Playnite version before installing – a theme built for an older major version can load with broken layouts or a Fullscreen mode that fails to render at all, which is one of the more common “why is my screen blank” reports after a theme install.
Beyond the color and layout options built into most themes, many expose their own settings panel – background blur intensity, whether to show recently played games as a horizontal shelf, grid density, and which metadata fields appear on a game’s detail page. It’s worth spending a few minutes in a new theme’s settings before deciding you don’t like it; a theme that looks cluttered by default often looks completely different with two or three toggles changed. If nothing in the Add-ons browser fits what you want, theme source code is just XAML and C#-based styling, which is why the catalog has grown large enough to cover everything from minimalist list views to dashboards styled after specific consoles.
Step 10: Add Extensions for Achievements and Artwork
Beyond themes, the same Add-ons → Browse screen has three more tabs: Libraries (covered in Step 4), Metadata, and Generic extensions – plugins and scripts that add functionality rather than visuals. The full catalog is browsable outside the app too, at the project’s add-ons database. A few extensions cover the gaps most people notice first:
- SteamGridDB – pulls consistent custom grid and hero artwork for entries IGDB doesn’t cover well, especially emulated and manually added games.
- Extra Metadata Loader – adds trailers, logos, and background art beyond IGDB’s default fields.
- SuccessStory – tracks achievements across supported platforms in one unified achievements list, rather than checking each storefront separately.
- Duplicate Hider – flags the same game imported from two sources (a common overlap when a title is both owned on Steam and claimed free on Epic) so you can merge or hide the duplicate.
- HowLongToBeat integration – attaches estimated completion times to each game’s detail page, useful for deciding what to start next from a large backlog.
Extensions add startup time in rough proportion to how many you install, since each one initializes when Playnite launches. If you notice the app taking noticeably longer to open after a few installs, disable ones you’re not actively using from Settings → Add-ons rather than uninstalling and losing their configuration.
Step 11: Set Up Fullscreen Mode and Controller Support
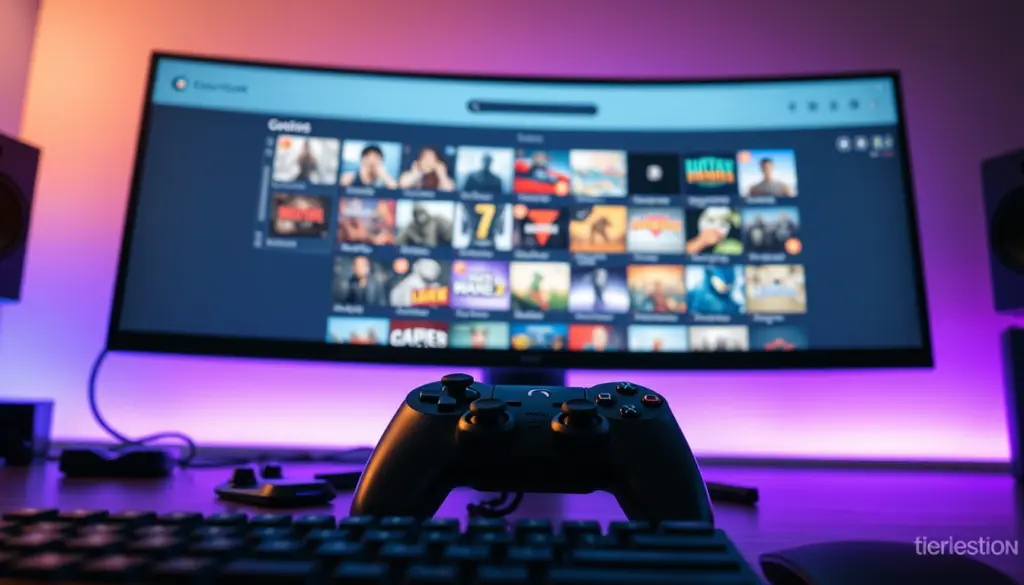
Fullscreen mode is Playnite’s controller-first, 10-foot interface – the one that makes it a genuine alternative to a console dashboard when you’re sitting on a couch rather than at a desk. Launch it from the Desktop app’s Fullscreen button, or set it to open automatically on startup from Settings → General → Start Playnite in Fullscreen mode, which is the right default if you’re setting this up on a Steam Deck, ROG Ally, or a living-room HTPC.
Controller support in Fullscreen mode is automatic for standard Xbox and PlayStation-layout controllers via Windows’ native controller APIs – there’s no separate pairing step inside Playnite itself beyond making sure Windows already recognizes the controller. If a controller works in Windows’ own settings but Playnite’s Fullscreen mode doesn’t respond to it, the fix is almost always a stuck or duplicate device entry in Windows’ game controller list, not a Playnite setting; unplugging and reconnecting the controller after clearing ghost entries resolves it in most reports.
Step 12: Organize With Filters, Categories, and Views
With everything imported, the last step is making a five-hundred-game library actually navigable. Playnite supports custom categories (manual tags like “Co-op” or “Currently Playing”), automatic filter presets that combine criteria like platform, install status, and genre into a saved view, and a toggle between list, grid, and cover-art views. A practical starting setup is a filter preset for “Installed,” one for “Recently Added,” and one per emulated platform, so Fullscreen mode’s sidebar gives you fast access without scrolling a single flat list of everything you own. Filter presets can combine multiple conditions at once – platform plus install status plus a minimum rating, for example – so it’s worth spending a few extra minutes building two or three genuinely useful combined views rather than one preset per single criterion.
At this point you have a complete, working Playnite setup: every storefront library imported and authenticated, ROM collections organized by platform behind configured emulators, metadata and artwork filled in, a Fullscreen interface styled and controller-ready, and filter presets that make the whole thing navigable from a couch. That’s the full loop – from a 50 MB installer to a single unified library covering every way you play.
Backing Up, Updating, and Moving Your Library
Once your library is built, protecting it takes one habit: back up the database before anything risky, not after something breaks. Playnite’s entire configuration – every imported game, every category, every filter preset, every manual edit to a description or cover – lives in the library.db folder alongside the application. In an installed setup that’s under your AppData folder; in a portable setup it’s the library.db directory sitting right next to the executables shown in Step 2. Copy that folder to external storage before a major version upgrade, before reinstalling Windows, or before any change you’re not 100% sure about, and you can restore your entire library – minus the actual game files, which still come from their original storefronts or ROM sources – by dropping it back into place.
Updates themselves are low-friction. The Desktop app checks for new releases automatically and prompts before installing, and because Playnite has shipped multiple point releases roughly every two to four weeks through 2026 – the jump from 10.51 in February to 10.56 by late May covers five separate updates – it’s worth leaving automatic update checks on rather than manually tracking version numbers. Extensions and themes are versioned separately from the core app, which is exactly why a theme built against an older release can break after you update Playnite itself; check the Add-ons browser for updated versions of any installed theme right after a major version bump.
Moving to a new PC is the same operation as a backup, run in reverse: install Playnite fresh on the new machine (or unpack the portable build), close the app, replace the newly created library.db with your backed-up copy, and relaunch. Your categories, filter presets, and metadata edits come back exactly as they were – you’ll just need to re-authenticate each storefront, since login sessions don’t travel with the database for security reasons, and re-point any emulator or ROM-folder paths that changed between machines.
Playnite vs Steam, GOG Galaxy, Heroic, and Lutris
Playnite isn’t the only tool trying to solve the “too many launchers” problem, and it’s worth knowing where it sits relative to the alternatives before you commit an afternoon to setting it up.
| Tool | Price | License | Platform | Unifies other stores? | Built-in emulator manager? |
|---|---|---|---|---|---|
| Playnite | Free | MIT (open source) | Windows (Linux planned) | Yes – Steam, Epic, GOG, EA App, Battle.net + extensions | Yes |
| Steam | Free | Proprietary | Windows, macOS, Linux | No – Steam library only | No (third-party tools add this) |
| GOG Galaxy | Free | Proprietary | Windows, macOS | Partial – select stores via Galaxy integrations | No |
| Heroic Games Launcher | Free | GPLv3 (open source) | Windows, macOS, Linux | Epic, GOG, Amazon Games | No native manager |
| Lutris | Free | GPLv3 (open source) | Linux-first | Steam, GOG, Epic (via Heroic), Battle.net, itch.io and more | Yes |
The practical distinction is platform and scope. Lutris is the closest philosophical match to Playnite – open source, free, and built around the same idea of one interface for every source – but it’s Linux-first, with Windows support only through unofficial workarounds, and its strength leans toward wrapping non-Windows games in Wine/Proton rather than emulating consoles. Heroic is narrower by design: it’s excellent specifically for Epic, GOG, and Amazon Games, and it’s one of the tools Lutris itself integrates with for Epic support, but it has no emulator layer of its own. GOG Galaxy’s integrations feature covers a handful of partner storefronts but nowhere near Playnite’s extension catalog, and Steam doesn’t attempt unification at all. If your library spans Windows storefronts and console emulation in roughly equal measure, Playnite is the tool built specifically for that combination; if you’re Linux-first, the Heroic vs Lutris comparison is worth reading directly.
It’s also worth being clear about what Playnite doesn’t do relative to these alternatives: it doesn’t handle Windows-game compatibility translation the way Lutris and Heroic can through their bundled Proton/Wine tooling, because on Windows that translation layer simply isn’t needed – every storefront client already runs natively. That’s the tradeoff for choosing a Windows-first tool: you get the broadest, most direct storefront integrations and the deepest emulator-manager feature set of the group, in exchange for needing Windows (or, soon, the in-development Linux build) rather than running anywhere Linux already runs today.
Troubleshooting, Common Pitfalls, and Advanced Tips
Most Playnite setup problems fall into a short list of repeat offenders. Here are the ones worth checking first, organized by symptom.
Playnite won’t launch after installing. Almost always a missing or outdated .NET Framework runtime. Re-run the PowerShell registry check from Step 1 and install .NET Framework 4.8 if the Release value is below 528040.
A storefront shows zero games after a successful login. Check that account’s privacy settings – a private Steam profile authenticates fine but returns an empty game list from the API Playnite queries. Set game details visibility to at least “Friends Only.”
An emulator’s games won’t launch even though the emulator itself opens fine. Re-check the executable path in Configure Emulators – Playnite needs the actual .exe, not the folder, and a path that pointed correctly before an emulator update can silently break if that update changed folder structure. Launching the same ROM directly from the emulator itself, outside Playnite, quickly tells you whether the problem is the emulator/BIOS/ROM combination or Playnite’s launch configuration.
Fullscreen mode opens to a blank or black screen. This is a theme-compatibility issue almost every time. Switch back to the default Fullscreen theme from Desktop mode’s settings, confirm the app opens normally, then reinstall the third-party theme and check whether its listing states compatibility with your installed Playnite version.
Duplicate entries appear after an emulator ROM scan. Usually caused by re-running “Scan Automatically” against a folder that was already imported, or by pointing two different platform configurations at overlapping folders. Remove the duplicate platform source rather than manually deleting individual duplicated games, or they’ll reappear on the next scan. The separate Duplicate Hider extension mentioned in Step 10 also helps here, specifically for the more common case of the same game showing up from two different storefronts rather than a ROM re-scan.
Cover art and metadata won’t download. Usually a network or firewall issue blocking the IGDB API rather than a Playnite bug – corporate or heavily locked-down firewalls are the most common cause. Confirm outbound HTTPS isn’t blocked, then retry the metadata download for the affected games individually rather than re-running a full-library pass.
A controller isn’t recognized in Fullscreen mode. Confirm Windows itself recognizes the controller first, in Windows’ own game controller settings. If Windows sees it but Playnite doesn’t respond, look for a duplicate or “ghost” device entry and clear it before reconnecting.
Library sync appears stuck on “Updating library…” indefinitely. Large libraries with several thousand entries and metadata downloads enabled can genuinely take several minutes – give it time before assuming it’s frozen. If it’s still stuck after ten minutes, cancel and re-run the sync one storefront at a time to isolate which source is hanging, since a single unresponsive storefront API can block the rest of the queue behind it rather than timing out on its own.
An achievement-tracking extension shows 0% for installed games. Check that extension’s own settings – most achievement extensions need their own authentication step separate from the storefront login you already completed, since they call a different API than the library import does.
Automatic sync silently stops pulling new games. If you changed a storefront password recently, Playnite’s saved session can go stale without an obvious error. The official documentation covers exactly this case: “Check that your library plugin is configured and authenticated correctly via Main menu > Add-ons… > Extension settings > Libraries,” according to Playnite’s official FAQ documentation. Re-authenticating that one storefront usually fixes it without touching anything else.
Common Pitfalls to Avoid
- Skipping the antivirus exclusion. Real-time scanning on the Playnite folder, your ROMs folder, or an emulator’s folder can silently slow imports to a crawl or block an emulator from launching. Add exclusions for all three before your first big scan.
- Pointing “Configure Emulators” at a folder instead of an executable. The dialog looks the same as the ROM-folder picker, but the emulator step needs the actual program file.
- Importing one giant ROMs folder instead of per-platform subfolders. This produces thousands of misfiled or unrecognized entries. Organize by platform before you scan, not after – reorganizing a few hundred already-imported entries takes far longer than sorting the source files first.
- Running portable mode from a cloud-synced folder. OneDrive and Dropbox can lock the database file mid-write and corrupt it during a scan. Use local or external storage for a portable install.
- Manually renaming games instead of fixing them before the metadata pass. Inconsistent titles – especially on ROM dumps – break IGDB’s title matching and produce mismatched or missing covers.
- Installing a Fullscreen theme without checking its version compatibility. A theme built for an older major version is the most common cause of a Fullscreen mode that won’t render at all.
- Forgetting to re-authenticate after a storefront password change. Saved sessions go stale silently – the library just quietly stops updating rather than throwing a visible error.
- Treating the first metadata pass as final. Bulk metadata matching is fast but imperfect on titles with inconsistent names; budget a second pass to manually fix the handful of games that matched incorrectly rather than assuming one pass caught everything.
Advanced Tips for Power Users
- Standardize artwork with SteamGridDB. Mixed-source libraries end up with wildly inconsistent cover art quality; SteamGridDB’s extension normalizes it across storefront games, manual additions, and ROMs alike.
- Set per-platform default emulators. Once RetroArch or a standalone emulator is configured for a platform, set it as that platform’s default so newly scanned ROMs auto-assign the right emulator without a manual step each time.
- Build smart filter presets instead of manual categories where possible. A preset based on “Recently Played” or “Not Installed” stays accurate automatically; a manual category tag has to be maintained by hand as your library grows.
- Back up the library database before major version upgrades. Playnite’s database format has changed across major versions before; a quick copy of the database folder takes seconds and avoids any risk during an update.
- Pair Fullscreen mode with remote play for couch access to your whole library. If you’re already set up for Moonlight or Steam Link-style streaming, launching Playnite’s Fullscreen app as the streamed session gives you controller-first access to every storefront and emulator from a second device, not just your Steam library.
Worth noting for anyone planning further ahead: creator Josef Nemec confirmed in a November 2025 update reported by GamingOnLinux that Playnite 11 is moving its interface framework from WPF to Avalonia, with a native Linux build planned as a follow-up once that transition ships. Nothing in this guide will need to change for that release – Avalonia is a UI framework swap, not a rework of how libraries, emulators, or extensions are configured – but it’s the reason “Windows-only” comes with an asterisk in 2026 rather than being a permanent limitation.
Frequently Asked Questions
Is Playnite free to use?
Yes. Playnite is fully open source under the MIT license, and no feature – themes, extensions, emulator management, or metadata – is locked behind a paywall.
Is Playnite safe to install?
The source code is public on GitHub and the project has run openly since 2017 with an active issue tracker. As with any launcher that holds storefront login sessions, download only from the official site, GitHub Releases, or a recognized package manager like winget or Chocolatey – avoid third-party mirror sites.
Does Playnite replace Steam, Epic, or GOG?
No. Playnite is a front end that organizes and launches your games from those services – the underlying storefront clients still typically handle the actual game installs and updates. Think of it as a unified shell around your existing libraries, not a replacement for them.
Can Playnite run on Steam Deck or Windows handhelds?
Windows-based handhelds like the ROG Ally and Legion Go run it natively, since they ship Windows 11, and portable mode is a natural fit for a device with a smaller internal drive. Steam Deck runs SteamOS (Linux) by default, so Playnite there requires either a Windows install on the Deck or running it unofficially through Wine/Proton – it isn’t a native, supported path today, which is the main reason Linux-first tools tend to get recommended for stock SteamOS setups instead.
Does Playnite need BIOS files for emulators?
That depends entirely on which emulator you configure, not on Playnite itself – Playnite doesn’t provide, manage, or bundle BIOS files. Some cores run without one; others require a BIOS dump exactly as they would running standalone.
What’s the difference between Desktop and Fullscreen mode?
Desktop mode is a mouse-and-keyboard managed interface for adding games, configuring emulators, and editing metadata. Fullscreen mode is a controller-first, 10-foot interface designed for a TV or handheld screen, with its own separate theme system.
Will Playnite work on Linux?
Not natively yet as of this guide. Creator Josef Nemec has confirmed a Linux build is planned following the Playnite 11 release, which is moving the app’s UI framework from WPF to Avalonia as a prerequisite step.
Do themes and extensions cost anything?
No. Every theme and extension in the official Add-ons browser and add-ons database is free and community-built, consistent with the project’s no-paywall, fully open-source model.
Related Coverage
- Lutris Setup: 8 Stores in 12 Steps, 30 Min
- Heroic vs Lutris: 3 Stores vs 346K Games
- RetroArch: 100+ Cores in 12 Steps, 30 Min
- EmuDeck vs RetroDeck: 3,479 vs 1,225 GitHub Stars
- GOG vs Steam: 30-Day Refunds vs 2-Hour Limit
- Moonlight vs Steam Link: 4K120 vs 4K60, Both Free
For more setup guides and the latest gaming coverage, check the full archive.