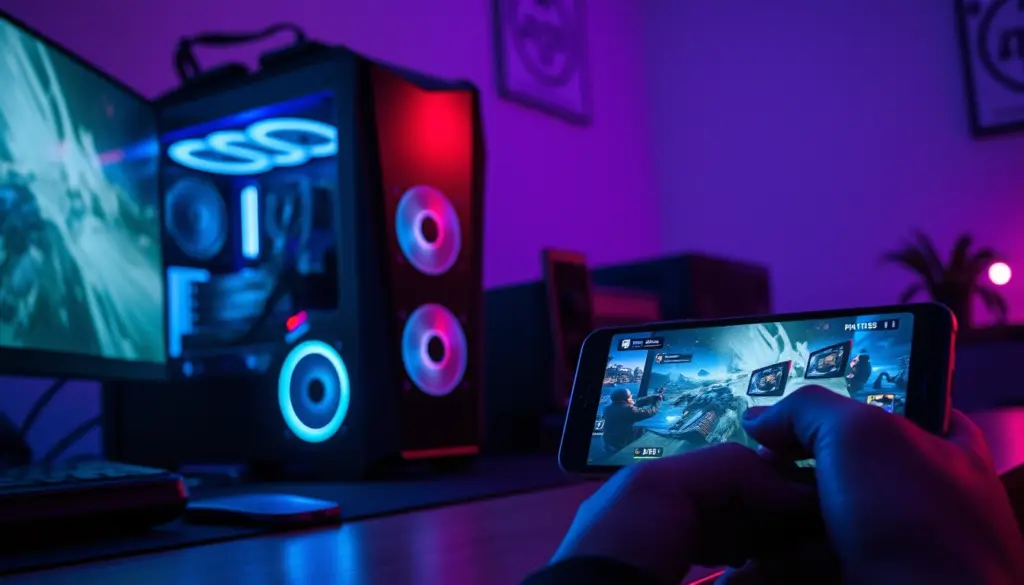
Cloud gaming subscriptions charge monthly fees and cap resolution, but the PC sitting under your desk can do the same job for free. Sunshine and Moonlight are the two halves of the most popular self-hosted game streaming stack in 2026: Sunshine runs on your gaming PC and captures its output, while Moonlight runs on the phone, tablet, Steam Deck, or smart TV you want to play on. Together they replicate – and in several ways exceed – the game streaming experience Nvidia shut down when it retired GameStream.
Sunshine has grown into one of the most-starred self-hosted apps on GitHub, and Moonlight remains the reference client that plugs into it. This tutorial walks through a complete Sunshine and Moonlight setup from a clean install to remote play over the internet, covering the encoder settings, firewall ports, Steam Deck integration, and troubleshooting steps that most quick-start guides skip. By the end you will have a working host-and-client pair, a hardened remote-access configuration, and a reference config file you can reuse for every game you add.
What Are Sunshine and Moonlight?
Moonlight started as an open-source reimplementation of Nvidia’s GameStream protocol, letting Shield devices and PCs stream from a GameStream-enabled Nvidia GPU. When Nvidia discontinued GameStream, the Moonlight client had no official host left to talk to – so the community built Sunshine, an independent, self-hosted host application that speaks the same protocol and runs on Windows, Linux, macOS, and Docker, regardless of GPU vendor. The result is a host-and-client pair that nobody can discontinue out from under you, because both halves are open source and community-maintained.
In practice, Sunshine captures your desktop or a specific game, encodes it with your GPU’s hardware encoder, and streams it over your local network or the internet. Moonlight decodes that stream on the receiving device with minimal added latency, forwards your controller, mouse, and keyboard input back to the host, and displays the video full-screen. Neither app requires a subscription, an account with a third-party company, or a specific GPU brand – the whole stack runs entirely on hardware you already own.
Two community forks extend the core project in different directions. Apollo is a Sunshine fork built around virtual displays, letting each connected client get its own native resolution instead of matching the host’s physical monitor. Artemis is the matching Moonlight-Android fork built to pair with Apollo’s extra features. Both are worth knowing about even if you start with the mainline Sunshine and Moonlight releases this guide focuses on.
| Project | Role | GitHub Stars | Forks | Latest Release |
|---|---|---|---|---|
| Sunshine (LizardByte) | Host – runs on the gaming PC | 40,083 | 2,013 | v2026.516.143833 (May 16, 2026) |
| Moonlight (moonlight-qt) | Client – runs on the receiving device | 18,246 | 1,220 | v6.1.0 (Sep 17, 2024) |
| Apollo | Sunshine fork with virtual-display support | 10,522 | 392 | Rolling releases |
| Artemis | Moonlight-Android fork paired with Apollo | 3,876 | 266 | Rolling releases |
GitHub star, fork, and release figures pulled live from the LizardByte/Sunshine, moonlight-stream/moonlight-qt, and ClassicOldSong repositories.
Prerequisites: What You Need Before You Start
Game streaming is far more sensitive to network quality than to raw GPU horsepower, so don’t skip the networking items below. Gather everything here first and the 12 steps that follow should take about 45 minutes.
| Component | Minimum | Recommended |
|---|---|---|
| Host GPU | Intel UHD 630 / AMD Vega iGPU (software fallback) | Nvidia GTX 1060 or newer, AMD RX 5600 or newer; RTX 40-series for AV1 |
| Host OS | Windows 10, Ubuntu 22.04, or macOS 12 | Windows 11 or a current Fedora/Ubuntu release |
| Network (host) | Wi-Fi, 15 Mbps upload | Gigabit wired Ethernet |
| Network (client) | 2.4GHz Wi-Fi | 5GHz/6GHz Wi-Fi 6 or wired |
| Client device | Any phone, tablet, or PC from 2018 or later | Steam Deck, ROG Ally, or another handheld |
| Moonlight client version | v5.0 or newer | Latest stable, v6.1.0 |
- Administrator/root access on the host machine, to install software and create firewall rules.
- A monitor or dummy HDMI plug attached to the host if it doesn’t already have a display connected – headless GPUs without one will show a black stream.
- Access to your router’s admin panel if you plan to stream over the internet without a VPN (Step 10 covers a VPN-based alternative that skips this entirely).
Step 1: Install Sunshine on Your Host PC
Sunshine is the piece that goes on the machine with the games and the GPU. Grab it from the official LizardByte releases – a Windows installer, a Debian/Ubuntu package, a Flatpak, and a Docker image are all published from the same source:
# Windows (winget)
winget install LizardByte.Sunshine

# Linux, any distro with Flatpak (recommended)
flatpak install flathub dev.lizardbyte.app.Sunshine

# Debian/Ubuntu (.deb package downloaded from GitHub Releases)
sudo apt install ./sunshine-ubuntu-22.04-amd64.deb
On Windows, the installer offers to set up the ViGEmBus virtual-controller driver and a Windows service during setup – accept both, since the service option is what lets Sunshine start automatically at boot without you logging in first. On Linux, the Flatpak build sandboxes Sunshine by default, which is the easiest path for most desktop distros; the native package gives you tighter integration with systemd if you’re comfortable managing that yourself.
Step 2: Complete Initial Setup in the Sunshine Web UI
Sunshine is configured entirely through a local web interface rather than a desktop app window. After installing, open a browser on the host itself and go to https://localhost:47990. Because Sunshine signs its own HTTPS certificate rather than using one from a public authority, your browser will show a certificate warning – this is expected for a self-hosted tool with no public domain, and you can safely proceed past it.
The first time you land on the page, Sunshine asks you to create a local administrator username and password for the web UI itself. This login only protects the configuration panel – it has nothing to do with the PIN pairing step you’ll do later with Moonlight. Choose a real password here anyway, since anyone on your network who reaches port 47990 without one could reconfigure your streaming host or view its settings.
Once logged in, the Applications tab is where Sunshine decides what a connecting client can launch. A “Desktop” entry is included by default, which streams your entire screen exactly like a remote desktop tool. You can add specific games as their own entries later – Step 12 shows a complete example.
Step 3: Choose the Right Encoder for Your GPU
The single setting with the biggest effect on both stream quality and host CPU load is which encoder Sunshine uses. Under the Audio/Video tab, set the encoder to match your GPU vendor – Sunshine detects available options automatically, but it’s worth confirming the right one is selected rather than trusting the default on a system with more than one GPU.
| Encoder | Hardware Required | Host CPU Load | Best For |
|---|---|---|---|
| NVENC | Nvidia GTX 600-series or newer | Very low | Nvidia GPU hosts – the most tested path |
| AMD AMF | AMD GPU with VCE/VCN | Low | AMD GPU hosts |
| Intel QuickSync | Intel iGPU, 6th-gen or newer | Low | Intel-only systems, mini PCs, NUCs |
| Software (x264) | Any CPU, no GPU encoder needed | Very high | Fallback only – expect high latency and fan noise |
Software Encoding Fallback (No Compatible GPU)
If Sunshine falls back to software encoding, it’s almost always because the selected GPU doesn’t support the codec you asked for – most commonly, HEVC or AV1 requested on hardware that only encodes H.264. Force H.264 first to confirm hardware encoding kicks in, then work upward to HEVC or AV1 only if your GPU generation actually supports it. Running on x264 software encoding long-term will peg a CPU core and noticeably raise latency, so treat it as a diagnostic step rather than a permanent setup.
Step 4: Open Firewall Ports for Sunshine
Sunshine needs a specific set of TCP and UDP ports open on the host for pairing, the web UI, and the actual video/audio/control streams. On Windows, the installer adds firewall rules automatically; on Linux, you need to open them yourself with ufw or firewalld, depending on your distro:
# Ubuntu/Debian (ufw)
sudo ufw allow 47984:47990/tcp
sudo ufw allow 48010/tcp
sudo ufw allow 47998:48000/udp
sudo ufw allow 48002/udp
sudo ufw status

# Fedora/RHEL (firewalld)
sudo firewall-cmd --permanent --add-port=47984-47990/tcp
sudo firewall-cmd --permanent --add-port=48010/tcp
sudo firewall-cmd --permanent --add-port=47998-48000/udp
sudo firewall-cmd --permanent --add-port=48002/udp
sudo firewall-cmd --reload
A successful ufw status check should list every range as allowed, similar to this:
Status: active

To                         Action      From
--                         ------      ----
47984:47990/tcp            ALLOW       Anywhere
48010/tcp                  ALLOW       Anywhere
47998:48000/udp            ALLOW       Anywhere
48002/udp ALLOW Anywhere| Port(s) | Protocol | Purpose |
|---|---|---|
| 47984–47989 | TCP | Pairing and HTTP/HTTPS handshake |
| 47990 | TCP | Sunshine Web UI |
| 48010 | TCP | Additional control channel |
| 47998–48000 | UDP | Video and audio streams |
| 48002 | UDP | Additional stream data |
These only need to be open on your LAN for local streaming. Do not forward them on your router unless you specifically want Sunshine reachable from the open internet – Step 10 covers a safer way to stream remotely without exposing any of these ports publicly.
Step 5: Install the Moonlight Client
Moonlight is free on every platform it supports: Windows, macOS, and Linux via moonlight-stream.org or your distro’s package manager, Android and iOS/tvOS through their respective app stores, and native builds for several LG and Samsung smart TVs. Install it on whatever device you want to actually play on – this is the client half of the pair, not something you run on the gaming PC itself.
For a Steam Deck specifically, the simplest route is Discover, SteamOS’s Flatpak-based app store in Desktop Mode; Step 9 covers a Game Mode-native alternative. For Android and iOS, search “Moonlight Game Streaming” in the Play Store or App Store – avoid similarly named apps that aren’t from the official moonlight-stream project.
Step 6: Pair Moonlight With Your Host
With Sunshine running on the host and Moonlight installed on the client, open Moonlight and it should auto-discover the host on the local network within a few seconds using mDNS. If it doesn’t appear – common on networks with client isolation, guest Wi-Fi, or a separate IoT VLAN – tap “Add Host” and enter the host’s local IP address manually instead.
Selecting the host for the first time triggers pairing: Moonlight displays a four-digit PIN. Within 30 seconds, open the Sunshine web UI on the host, go to the PIN page, and enter the same four digits along with a name for the device. A successful pair shows a confirmation directly in Moonlight:
Pairing successful!
You can now stream from this host.
The host now appears as a saved entry in Moonlight, and tapping it lists every application configured on the Sunshine Applications tab – Desktop by default, plus anything you’ve added. If the PIN expires before you enter it, Moonlight simply generates a new one when you retry; there’s no lockout or cooldown to work around.
Step 7: Configure Resolution, Frame Rate, and Bitrate
Moonlight’s in-stream settings menu (accessible via a keyboard shortcut or on-screen gesture, depending on platform) controls resolution, frame rate, and bitrate independently for each client. Matching the client display’s native resolution avoids unnecessary scaling, and bitrate is the setting most responsible for the trade-off between visual clarity and stutter on an imperfect connection.
| Resolution | Frame Rate | Recommended Bitrate |
|---|---|---|
| 1280×800 (Steam Deck native) | 60 fps | 15–20 Mbps |
| 1920×1080 | 60 fps | 20–30 Mbps |
| 1920×1080 | 120 fps | 35–50 Mbps |
| 2560×1440 | 60 fps | 40–60 Mbps |
| 3840×2160 (4K) | 60 fps | 80–120 Mbps |
Start near the low end of the range for your target resolution and raise it only if the picture looks soft on a stable connection – pushing bitrate higher than your actual network can sustain just trades visual clarity for stutter and frame drops. On Wi-Fi in particular, a lower bitrate that holds steady beats a higher one that periodically stalls.
Step 8: Enable HDR and AV1 Streaming
Sunshine supports HDR streaming, but it depends on HEVC Main10 encoding support on the host GPU and an HDR-capable display or client app on the receiving end – enable it in Sunshine’s Audio/Video tab, then toggle HDR in Moonlight’s stream settings for that specific host. If either end of the connection lacks HDR support, Moonlight simply falls back to standard dynamic range rather than failing to connect.
AV1 is the newest codec option and offers better quality per bit than HEVC, but hardware encode support is still limited to recent GPU generations – Nvidia’s RTX 40-series and newer on the host side. Older GPUs simply won’t show AV1 as an encoder option in Sunshine, which is expected behavior rather than a bug to troubleshoot.
Known AV1/HDR Limitations in 2026
Steam Deck’s Van Gogh APU (both the LCD and OLED models) can decode AV1 streams but cannot encode AV1, which only matters if you’re using a Deck as a Sunshine host rather than a Moonlight client – as a client, it plays AV1 streams from a compatible host fine. Valve’s Steam Beta client added official HDR and AV1 streaming support for Steam Deck OLED specifically; the original LCD model’s display isn’t HDR-capable regardless of stream settings. Separately, a Mesa 26.0.x graphics driver regression broke HEVC hardware encoding on Steam Deck’s Van Gogh APU while leaving H.264 unaffected – if HEVC streams from a Deck host show heavy artifacts after a SteamOS update, forcing H.264 in Moonlight’s codec settings is the current workaround.
Step 9: Set Up Sunshine on Steam Deck and Handhelds
Steam Deck and other SteamOS/Windows handhelds can act as either a Moonlight client (streaming from a desktop PC) or a Sunshine host (streaming from the handheld itself to a TV or another device). For a Deck used as a client, the community-maintained decky-sunshine plugin adds a toggle for Sunshine directly in Game Mode, avoiding a trip to Desktop Mode every session. Install it through the Decky Loader plugin store once Decky itself is set up:
# In Decky Loader's plugin browser, search for "Sunshine"
# and install the decky-sunshine plugin, or from Desktop Mode:
flatpak install flathub dev.lizardbyte.app.Sunshine
ROG Ally, Legion Go, and other Windows-based handhelds don’t need a special plugin – install Sunshine exactly as you would on a Windows desktop from Step 1, since the handheld’s Windows install is otherwise a full desktop OS underneath. Battery drain is worth watching on any handheld running Sunshine as a host, since hardware encoding adds continuous GPU load on top of whatever game is running.
Step 10: Stream Over the Internet Safely With Tailscale
Forwarding Sunshine’s ports directly on your router works, but it also means anything on the internet can probe those ports. A private mesh VPN like Tailscale or WireGuard avoids that entirely: install it on both the host and client, and the client reaches the host over an encrypted point-to-point connection using its Tailscale IP, without any router configuration or public exposure at all.
# On the host PC
curl -fsSL https://tailscale.com/install.sh | sh
sudo tailscale up

# Find the host's Tailscale IP once it's connected
tailscale ip -4
Install the Tailscale app from your platform’s app store on the client device (phone, Steam Deck, laptop) and sign in with the same account used on the host. In Moonlight, add the host manually using its Tailscale IP instead of its local network address – everything else about pairing and streaming works identically to a LAN connection, just routed over the mesh instead. This is also the practical fix for CGNAT connections, where your ISP doesn’t give you a public IP to forward ports to in the first place.
Step 11: Map Controllers and Fix Input Lag
Moonlight forwards Xbox, PlayStation, and generic controllers connected to the client device to the host, which emulates a virtual controller using ViGEmBus on Windows or uinput on Linux – this is installed automatically alongside Sunshine, and most games see it as a standard Xbox 360 or DualShock pad without any extra configuration. If a controller isn’t detected in-game after connecting, reinstalling Sunshine with the driver components selected usually resolves it on Windows.
For input lag specifically, three settings matter more than any others: a wired connection on the host, 5GHz or 6GHz Wi-Fi (or wired) on the client, and a bitrate that your connection can sustain without dropped frames. V-Sync and frame pacing options in both Sunshine and Moonlight can shave a few more milliseconds off once the network fundamentals are solid, but they won’t fix a fundamentally congested or weak connection.
Step 12: Run Sunshine as a Background Service
A Sunshine instance that only runs while you’re logged in defeats much of the point – you want it available whenever the host PC is powered on. The Windows installer sets this up automatically if you accepted the service option in Step 1. On Linux, enable the systemd user service Sunshine ships with:
systemctl --user enable --now sunshine
systemctl --user status sunshine
A healthy status check looks like this:
● sunshine.service - Sunshine self-hosted game stream host
     Loaded: loaded (/usr/lib/systemd/user/sunshine.service; enabled)
     Active: active (running) since Thu 2026-06-11 09:14:02 UTC; 2min ago
Also disable sleep/hibernate on the host while it’s meant to be available for streaming – Windows and most Linux desktop environments will happily suspend an idle machine mid-session unless you explicitly change the power plan, which instantly drops any connected Moonlight client.
Common Pitfalls When Setting Up Sunshine and Moonlight
Most Sunshine and Moonlight problems trace back to one of these seven mistakes.
- Picking the wrong encoder on a multi-GPU system. Laptops and some desktops have both an integrated and a discrete GPU. If Sunshine defaults to the iGPU, you’ll get worse quality and higher latency than the dGPU is capable of – check the Audio/Video tab explicitly rather than trusting auto-detection.
- Forwarding ports on the router by default. Most people don’t need to expose Sunshine to the public internet at all. Use the Tailscale route from Step 10 unless you have a specific reason to forward ports directly.
- Headless hosts with no display attached. A GPU with nothing physically plugged into it often refuses to initialize a framebuffer, producing a black stream. A cheap dummy HDMI plug or a virtual display driver solves this.
- Streaming over 2.4GHz Wi-Fi. It’s slower and far more prone to interference than 5GHz or 6GHz, and game streaming is one of the least forgiving use cases for either.
- Running a very old Moonlight client against a current Sunshine host. Features like AV1 and HDR streaming depend on both ends supporting the same capabilities – update Moonlight before assuming a missing feature is a configuration problem.
- Letting the host sleep mid-session. Default power settings on both Windows and Linux desktops will suspend an idle machine, instantly killing any active stream. Adjust the power plan on any machine meant to run as a host.
- Assuming every device supports AV1 or HDR. Older client hardware, and even some current handhelds, cap out at H.264 or HEVC – check your specific device’s capabilities before spending time troubleshooting a codec it simply can’t use.
Troubleshooting Sunshine and Moonlight Issues
Check this table before assuming a deeper problem is at play:
| Symptom | Likely Cause | Fix |
|---|---|---|
| Moonlight can’t find the host automatically | Different subnets, AP isolation, or mDNS blocked | Add the host manually by IP address |
| PIN not accepted during pairing | Typo, or the 30-second window expired | Regenerate the PIN in Moonlight and retry immediately |
| No audio during stream | Wrong playback device selected in Sunshine’s audio settings | Set the correct output device in the Sunshine web UI |
| Black screen after connecting | No display attached to a headless host GPU | Attach a dummy HDMI plug or configure a virtual display |
| Choppy video only over Wi-Fi | 2.4GHz band interference | Switch the client to 5GHz/6GHz, or use Ethernet on the host |
| Controller connects but isn’t detected in-game | ViGEmBus (Windows) or uinput (Linux) driver missing | Reinstall Sunshine and select the driver components |
| Heavy artifacts in HEVC streams from a Steam Deck host | Mesa 26.0.x driver regression on the Van Gogh APU | Force H.264 in Moonlight’s codec settings until patched |
| High CPU usage on the host during streaming | Software (x264) encoder active instead of a hardware encoder | Re-select the correct GPU encoder in Sunshine’s Audio/Video tab |
| Stream disconnects after a few minutes | Host went to sleep or entered a power-save state | Disable sleep/hibernate in the host’s power settings |
| Severe stutter only when streaming over the internet | Insufficient upload bandwidth, or CGNAT breaking direct connections | Lower the bitrate, or switch to the Tailscale setup from Step 10 |
Sunshine vs Apollo vs Parsec vs Steam Link: Picking the Right Streaming Stack
Sunshine and Moonlight aren’t the only self-hosted streaming option, and it’s worth knowing where the alternatives fit before committing. Apollo, Sunshine’s virtual-display-focused fork, is the better choice if multiple people will stream from the same host simultaneously at different resolutions – mainline Sunshine ties every client to the host’s physical display output. Parsec takes a different approach entirely: it’s closed-source, easier to set up for co-op and remote collaboration, and free for personal use, with a paid Warp tier aimed at teams. Steam Link, Valve’s own official app, needs no host software at all for Steam games specifically, trading flexibility for simplicity – see our full Moonlight vs Steam Link comparison for the client-side breakdown.
| Tool | Cost | Open Source | Best For |
|---|---|---|---|
| Sunshine + Moonlight | Free | Yes | DIY self-hosted streaming with the most flexibility |
| Apollo + Artemis | Free | Yes | Multiple simultaneous clients, each at native resolution |
| Parsec | Free (paid Warp tier for teams) | No | Simple setup, low-latency co-op and collaboration |
| Steam Link (official) | Free | No | Streaming your Steam library with zero host software |
If you want cloud-hosted streaming without owning a host PC at all, that’s a different category of product entirely – see our breakdown of the best cloud gaming services in 2026 for that comparison.
Self-Hosting vs Cloud Gaming: Is It Worth It?
Before finishing setup, it’s worth being honest about what self-hosting actually trades away compared to a paid cloud gaming subscription. Services covered in our Boosteroid vs GeForce Now comparison and Xbox Cloud Gaming charge a recurring monthly fee in exchange for infrastructure someone else maintains: no host PC to keep running, no firewall rules to write, and no troubleshooting when a driver update breaks something. Sunshine and Moonlight flip that trade – the software costs nothing and you own every part of the stack, but you’re also the one who patches the host OS, keeps the GPU driver current, and pays for the electricity a PC left running around the clock actually draws.
The other real difference is your game library. A cloud gaming subscription streams from the provider’s copy of a limited game catalog. Sunshine streams whatever is actually installed on your PC – your full Steam, Epic, and GOG libraries, mods, and non-Steam executables included – with no catalog restrictions, because the “cloud” is just your own hardware. The trade-off is availability: your games are only streamable when your host PC is powered on and reachable, whereas a cloud provider’s servers are always running somewhere.
For most people already running a gaming PC that would otherwise sit idle while they’re on the couch or traveling, self-hosting pays for itself immediately since there’s no subscription to weigh against the setup time. If you don’t already own a capable GPU, running the numbers on a year of cloud gaming versus the cost of a GPU upgrade is worth doing before you commit to either path.
Securing Your Sunshine Streaming Setup
Sunshine’s web UI has full control over a machine that can launch arbitrary executables on command – treat it with the same care you’d give any other remote-access tool, not as a toy. A handful of settings make the difference between a convenient setup and an exposed one.
- Use a real password on the web UI, not a placeholder. Anyone who reaches port 47990 with the credentials can add their own paired device or change what launches on connection. Don’t reuse a password from another account.
- Prefer Tailscale or WireGuard over direct port forwarding for remote access. Step 10 covers the setup – it keeps Sunshine’s ports off the public internet entirely rather than relying on the pairing PIN as your only line of defense.
- If you do forward ports, restrict them to specific source IPs where your router supports it. An unrestricted forward means anyone scanning for open Sunshine instances can reach your pairing page, even if they can’t complete pairing without physical access to your PIN.
- Keep Sunshine updated. Like any actively developed self-hosted app, older releases can carry fixed security issues that newer ones don’t. Check the GitHub releases page periodically rather than installing once and forgetting about it.
- Remove paired devices you no longer use. Sunshine’s web UI lists every paired client under its own management page – a phone you sold or a laptop you no longer own has no reason to stay on that list.
None of this is unique to Sunshine – it’s the same baseline you’d apply to any self-hosted service with an internet-facing option, from a home NAS to a personal VPN endpoint. The setup takes a few extra minutes and closes off the most common way self-hosted tools end up compromised: a default or absent password on a service nobody expected to be internet-reachable.
Advanced Tips for Power Users
Once the basic setup is stable, a few extra touches make Sunshine feel like a purpose-built appliance rather than a hobby project. On a headless host with no monitor attached long-term, a virtual display driver avoids the dummy-plug workaround entirely and lets you set an arbitrary streaming resolution instead of being locked to whatever a physical dummy plug reports – Apollo builds this in natively, while mainline Sunshine users typically add a separate virtual display tool.
Per-game prep-cmd entries in Sunshine’s Applications configuration can run a command before a game launches and another when it closes – commonly used to switch the display resolution to match the client, pause background sync tools, or auto-launch a specific storefront client. Combine this with per-client display profiles if you regularly stream to more than one device with different native resolutions, so you’re not manually adjusting settings every session.
Finally, an on-screen performance overlay such as MangoHud (Linux) makes it far easier to tell whether a stutter is a network problem or a host-side frame rate problem – a distinction that saves significant troubleshooting time versus guessing from the client side alone.
Your Complete Working Sunshine and Moonlight Project
After working through every step above, your host should have a running Sunshine service, an open (or Tailscale-routed) network path to it, and at least one paired Moonlight client. The last piece is apps.json, Sunshine’s application list – the file that determines what shows up when a client connects. Here’s a complete, working example with the default Desktop entry plus a second entry for a specific game, which you can extend with as many additional titles as you like:
{
  "env": {
    "PATH": "$(PATH)"
  },
  "apps": [
    {
      "name": "Desktop",
      "image-path": "desktop.png"
    },
    {
      "name": "My Game",
      "cmd": "C:\\Games\\MyGame\\game.exe",
      "working-dir": "C:\\Games\\MyGame",
      "image-path": "mygame.png"
    }
  ]
}
Add one object per game inside the apps array, each with its own name, cmd pointing at the executable, and working-dir set to that game’s install folder. Sunshine’s web UI Applications tab can generate and edit these entries visually if you’d rather not hand-edit JSON – the file above is simply what it produces under the hood, and understanding it makes bulk edits or backups far easier than clicking through the UI one game at a time.
Frequently Asked Questions
Is Sunshine free to use?
Yes. Both Sunshine and Moonlight are free, open-source, and community-maintained, with no subscription, account, or license fee required for either half of the stack.
Do I need a powerful gaming PC to run Sunshine?
You need a GPU with a hardware encoder to avoid the CPU-heavy software fallback, but that includes most integrated GPUs from the last several years, not just discrete cards. The GPU doing the encoding doesn’t have to be the same tier as one you’d need to actually run demanding games well – that requirement comes from the games themselves, not from Sunshine.
What happened to Nvidia GameStream?
Nvidia discontinued GameStream, the proprietary protocol Moonlight originally targeted. Sunshine was built by the community as an open replacement host so Moonlight clients would keep working, decoupling the whole stack from any single company’s support decisions.
Can I stream games that aren’t on Steam?
Yes. Sunshine can stream your entire desktop or a specific executable you point it at, regardless of storefront – Steam, Epic, GOG, or a game with no storefront at all.
Is it legal to use Sunshine and Moonlight?
Yes. You’re streaming your own PC, running games you already own, to your own devices. It’s functionally the same as a very sophisticated remote desktop connection.
What’s the difference between Sunshine and Apollo?
Apollo is a fork of Sunshine that adds virtual-display support, so each connected client can stream at its own native resolution instead of all clients sharing the host’s physical display output. Everything else about setup and pairing is nearly identical between the two.
Do I need to forward ports on my router?
Only for local network streaming – no. For remote streaming over the internet, port forwarding is one option, but the Tailscale-based approach in Step 10 avoids exposing any ports publicly and also works around CGNAT connections where port forwarding isn’t possible at all.
How much bandwidth do I need to stream over the internet?
At minimum, your host’s upload speed needs to comfortably exceed your target bitrate – for 1080p60 at 20-30 Mbps, that means at least that much sustained upload, with headroom left over for other traffic on the connection. Streaming to a Steam Deck at its native 1280×800 resolution is considerably lighter, at roughly 15-20 Mbps.
Related Coverage
- Moonlight vs Steam Link: 4K120 vs 4K60, Both Free [2026]
- Tailscale vs WireGuard: Free vs $8/User [2026]
- GeForce Now vs Xbox Cloud Gaming: 4K vs 1440p [2026]
- Steam Deck vs ROG Ally X: $210 Cheaper, 1.6x Battery [2026]
- Decky Loader Setup: 110 Plugins, 12 Steps, 30 Min [2026]
- Best Cloud Gaming Service 2026: 5 Apps, $0 to $44/Mo
For more self-hosting and handheld setup tutorials, visit the Gaming section on shattered.io.
Sources and further reading: the official Sunshine repository and its documentation on LizardByte, the Moonlight PC client repository, the Moonlight project site, the Apollo fork repository, and Tailscale for the VPN-based remote access setup in Step 10.