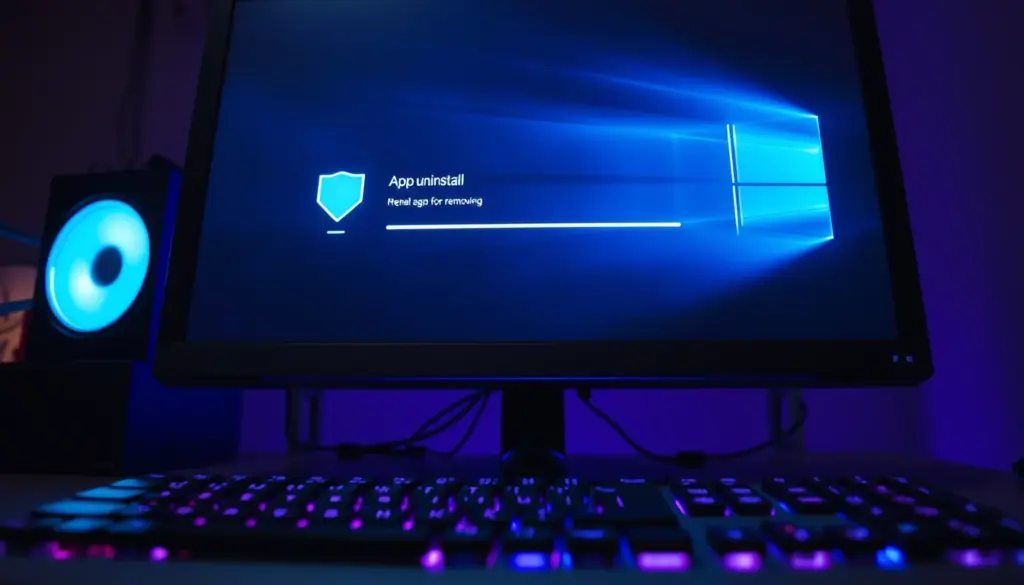
Uninstalling VALORANT should be simple: open Windows Settings, click uninstall, done. But a lot of players hit an unexpected snag once the game is gone. Riot Vanguard, the kernel-level anti-cheat that VALORANT installs alongside itself, doesn’t leave with it. For most people that’s an annoyance. For players who still queue into 2XKO, or who plan to reinstall VALORANT in a month and don’t want to repeat a driver setup and reboot cycle, it’s actually the outcome they want. This tutorial walks through exactly how to remove VALORANT the game while leaving Riot Vanguard’s services and driver in place, verify that split worked, and automate the whole thing with a PowerShell script.
None of this is officially unsupported or hacky. Riot built VALORANT, Riot Client, and Riot Vanguard as three distinct programs on purpose, each with its own entry in Windows’ Programs and Features list. What trips people up is that most general “how to uninstall a game” advice assumes one program equals one uninstall, so players either remove too much (wiping Vanguard when they only meant to remove the game) or too little (leaving orphaned shortcuts and cache folders behind). By the end of this guide you’ll know exactly which of the three programs to touch, which two to leave alone, and how to prove to yourself, with actual command output, that you got the split right.
Why Uninstall Valorant While Keeping Vanguard Installed
Riot’s own support documentation on installing and uninstalling VALORANT treats the game and the anti-cheat as two separate products. Removing VALORANT through Windows Settings or through the Riot Client deletes the game’s assets, but it does not touch the Riot Vanguard program entry, its two Windows services, or its boot-time driver. That’s by design, not a bug.
There are three common reasons to keep Vanguard around after VALORANT is gone. First, 2XKO, Riot’s fighting game, also runs on Vanguard, so a player who drops VALORANT but still fights in 2XKO needs the driver active. Second, players who are just clearing disk space for a season break don’t want to redo the Vanguard driver install and the UAC-elevated reboot prompt when they come back in a month. Third, shared or lab PCs sometimes need a specific game removed for policy reasons while the anti-cheat framework stays available for other Riot titles installed on the same machine.
Whatever the reason, the goal of this guide is narrow: uninstall VALORANT cleanly, confirm Vanguard’s vgk and vgc services are untouched, and know exactly which folders and registry keys are safe to clean up without breaking anything.
There’s a security angle worth flagging here too, since Vanguard is a kernel-mode driver and not just another background app. As of mid-2026, there’s no publicly catalogued CVE specifically tied to vgk.sys, but a driver with kernel privileges is still a meaningfully larger attack surface than a typical user-mode service, regardless of how clean its track record has been. Keeping Vanguard installed for a genuine reason, like an active 2XKO account, is a reasonable trade-off. Keeping it installed by accident, because an uninstall didn’t go the way you expected, is not the same thing, which is exactly why the verification steps in this guide matter as much as the removal steps.
Prerequisites: What You Need Before You Start
Nothing here requires special tools beyond what Windows already ships with, but it helps to confirm each item before you start rather than discovering a gap halfway through an uninstall. The list below covers the operating system version, permissions, and disk space you’ll want in place, plus the optional PowerShell version if you’re going straight for the automated script instead of the manual steps.
- Windows 10 (version 2004 or later, 64-bit) or Windows 11 23H2/24H2, since Vanguard requires 64-bit Windows for its kernel driver
- An administrator account, or admin credentials on hand for UAC prompts
- Riot Client already installed and signed in at least once, so the uninstall registry entries exist
- Roughly 30GB of free disk space before you start, which VALORANT will hand back once removed
- PowerShell 5.1 (built into Windows) or PowerShell 7.x if you want to run the automation script later in this guide
- About 15 to 20 minutes, most of which is the uninstaller running in the background
One thing you don’t need is a separate Vanguard installer or license key. Vanguard ties itself to the machine and the Riot Client install, not to any single game’s license, so there’s nothing extra to download or activate to keep it running once VALORANT is gone.
How Riot Vanguard Works: Services, Driver, and Registry Keys
Riot Vanguard is made of two separate pieces that both need to survive for it to keep working. The first is vgk.sys, a kernel-mode driver that loads at boot, before you log into Windows. The second is vgc, a user-mode Windows service that runs in the background and communicates with the driver. Riot’s Vanguard FAQ describes both components as installing independently of any single game, which is exactly why removing VALORANT doesn’t remove them.
Vanguard also registers itself as its own entry in Windows’ Programs and Features list, separate from VALORANT and separate from Riot Client. It keeps a program folder at C:\Program Files\Riot Vanguard and writes service definitions under HKEY_LOCAL_MACHINE\SYSTEM\CurrentControlSet\Services. None of that lives inside the VALORANT install folder, which is the structural reason the two can be separated cleanly.
This separation isn’t an accident of how the games happen to be packaged. Riot built Vanguard as shared anti-cheat infrastructure from the start, meant to protect more than one title without forcing a fresh driver install every time a player picks up a second Vanguard-protected game. That design choice is also what makes an uninstaller capable of removing VALORANT specifically, without an option to also remove Vanguard bundled into the same click, the default behavior rather than an oversight.
| Component | Type | Typical Location | What It Does |
|---|---|---|---|
| vgk | Kernel-mode driver (vgk.sys) | C:\Windows\System32\drivers\vgk.sys | Loads at boot, monitors for cheat-related kernel activity |
| vgc | User-mode Windows service | C:\Program Files\Riot Vanguard\vgc.exe | Runs in the background, talks to the driver and to Riot’s servers |
| Riot Vanguard | Program entry (Add/Remove Programs) | HKLM\SOFTWARE\Riot Vanguard | Holds uninstall metadata for the whole anti-cheat package |
| VALORANT | Game application | Riot Client-managed game directory | The game itself, entirely separate from the anti-cheat files above |
On-Demand Mode vs Boot-Time Loading
Vanguard has shipped with two loading behaviors for a while now. In its original, always-on configuration, vgk.sys loads at every Windows boot, whether or not you’re about to play a Vanguard-protected game that session. An on-demand option, exposed through VALORANT’s own security settings menu, instead only loads the kernel driver when a Vanguard-protected title actually launches, leaving it dormant the rest of the time. Whichever mode is active doesn’t change anything about the uninstall steps in this guide, but it’s worth checking before you assume Vanguard is quietly running in the background 24/7 when it might not be.
Step 1: Shut Down Valorant, Riot Client, and the Right Processes
Open Task Manager (Ctrl+Shift+Esc) and end VALORANT-Win64-Shipping.exe, RiotClientServices.exe, and RiotClientUx.exe if they’re running. This is the one place people get tripped up: do not end vgc.exe or try to stop the vgk driver here. Leaving those running is the entire point of this walkthrough, and Windows won’t let you stop the kernel driver from Task Manager anyway.
If you’re not sure whether a stray process is part of VALORANT or part of Vanguard, check the name against the table above before ending it. VALORANT’s processes reference the game or the Riot Client by name, while Vanguard’s two processes are always just vgc and, for the driver, listed under Windows’ driver stack rather than in the standard process list at all. Closing the wrong thing here doesn’t uninstall it, but it can cause a confusing error message mid-uninstall if a game process locks a file the uninstaller needs to delete.
# Stop only the game and client processes, leave Vanguard alone
Get-Process -Name "VALORANT-Win64-Shipping","RiotClientServices","RiotClientUx" -ErrorAction SilentlyContinue | Stop-Process -Force
Write-Host "Valorant and Riot Client processes stopped. Vanguard (vgc/vgk) left untouched."
Step 2: Audit What’s Currently Installed Before You Touch Anything
Before you uninstall anything, take a quick snapshot of the current state. This gives you a before-and-after comparison and, more usefully, it locates VALORANT’s exact uninstall command in the registry, which the automation script later in this guide reuses directly instead of guessing a file path.
# Find Vanguard's service status and Valorant's uninstall string
Get-Service -Name "vgk","vgc" -ErrorAction SilentlyContinue | Select-Object Name, Status, StartType

Get-ItemProperty "HKLM:\SOFTWARE\Microsoft\Windows\CurrentVersion\Uninstall\*" -ErrorAction SilentlyContinue |
  Where-Object { $_.DisplayName -like "*VALORANT*" } |
  Select-Object DisplayName, UninstallString, InstallLocation
Expected output looks something like this, with vgk and vgc both showing as running services and a valid uninstall string for VALORANT itself:
Name Status StartType
---- ------ ---------
vgk  Running Boot
vgc  Running Automatic

DisplayName : VALORANT
UninstallString : "C:\Riot Games\VALORANT\Uninstall.exe"
InstallLocation : C:\Riot Games\VALORANT\
Step 3: Uninstall VALORANT Through Windows Settings
This is Riot’s documented, supported path. Press the Windows key, open Settings, go to Apps, then Installed apps (Windows 11) or Apps & Features (Windows 10). Scroll to VALORANT, click the three-dot menu or the app itself, and select Uninstall. Follow the prompts in the dedicated VALORANT uninstaller window that opens. It only removes the game client and its assets, not Riot Client and not Vanguard.
If VALORANT doesn’t show up cleanly in Settings, the older Control Panel route works too: open Control Panel, go to Programs, then Programs and Features, find VALORANT, and right-click Uninstall. Riot’s support team recommends this fallback when the Settings app misbehaves.
Either route triggers the same dedicated uninstaller executable that ships inside the VALORANT install folder, so there’s no meaningful difference in outcome between Settings and Control Panel. The uninstaller will ask for administrator confirmation once through a UAC prompt, then run silently for a minute or two while it removes game assets, shader caches, and its own Start Menu entry. Watch for a completion dialog rather than assuming it’s done the moment the progress bar disappears.
Step 4: Uninstall VALORANT Through the Riot Client Instead
There’s a second, equally valid method that some players prefer because it stays inside one window. Open Riot Client, hover over the VALORANT tile, click the gear icon that appears, and choose Uninstall Game. This removes the same game files as the Windows Settings method and, importantly, does not cascade into uninstalling Riot Client or Vanguard either. Pick whichever method is already open on your screen, since the end result is identical.
This method is worth knowing even if you normally use Windows Settings, because it’s the one that still works if VALORANT’s entry ever goes missing from the Windows apps list while the game folder is still on disk, a rare but real state that can happen after an interrupted Windows Update. Riot Client reads its own internal library record rather than relying on the same Windows registry entry, so the two methods act as a backup for each other.
Step 5: Confirm the Valorant Game Files Are Actually Gone
Check that the install folder (commonly C:\Riot Games\VALORANT) is empty or removed entirely, and confirm the disk space you expected to reclaim shows up in File Explorer. If the folder is still sitting there at its original size, the uninstaller likely stalled partway through, which the troubleshooting section below covers.
It’s also worth right-clicking the C: drive and checking Properties before and after, since VALORANT’s game assets plus shader cache commonly run in the mid-20GB to low-30GB range depending on how many seasons of content have accumulated. If the reclaimed space is dramatically smaller than expected, some assets likely didn’t get removed and are worth tracking down manually in Step 8.
Step 6: Verify Vanguard’s Services Are Still Registered
This is the step that actually confirms your split worked. Open an elevated Command Prompt and query both Vanguard services directly through the Service Control Manager, documented by Microsoft’s sc command reference.
sc query vgk
sc query vgc
A healthy result shows STATE: 4 RUNNING (or occasionally STOPPED, which is normal if VALORANT isn’t running) for both services. If you instead see “The specified service does not exist as an installed service,” Vanguard was removed along with VALORANT, which means something in the uninstall path went further than intended, usually a third-party uninstaller tool being overly aggressive.
Run this check immediately after the VALORANT uninstaller finishes, before you do any manual cleanup in Step 8. That way, if something did go wrong, you know it happened during the official uninstall itself rather than from something you did afterward, which makes the troubleshooting section far easier to apply correctly.
Step 7: Reboot and Confirm the Vanguard Driver Still Loads
Vanguard’s driver loads at boot, so the real test happens after a restart, not before it. Reboot the PC, then check that vgk.sys is loaded as a driver, not just registered as a service.
driverquery /v | findstr /i vgkYou should see a line referencing vgk.sys with a status of Running. Tools like Microsoft’s own Autoruns also show boot-time drivers if you prefer a GUI over the command line, listing vgk alongside every other driver set to load at startup.
This post-reboot check matters more than the pre-reboot one. Windows sometimes leaves a service definition in the registry in a half-removed state that still answers sc query correctly right up until the next restart, at which point it fails to load. Catching that only shows up if you actually reboot and check again, rather than trusting the result you got five minutes after uninstalling VALORANT.
Step 8: Clean Up Leftover Shortcuts, Cache, and Registry Clutter
VALORANT’s uninstaller usually handles most of this on its own, but a few leftovers are common and safe to remove by hand:
- Desktop and Start Menu shortcuts pointing to the now-deleted game executable
- The
%LOCALAPPDATA%\VALORANTcache and log folder, which the uninstaller sometimes skips - Empty parent folders under
C:\Riot Games\once VALORANT’s own folder is gone - Any custom desktop launcher scripts you built for quick-launching the game
What you should not touch: HKLM\SYSTEM\CurrentControlSet\Services\vgk, HKLM\SYSTEM\CurrentControlSet\Services\vgc, HKLM\SOFTWARE\Riot Vanguard, or the C:\Program Files\Riot Vanguard folder. Deleting any of those manually is how people accidentally break Vanguard while trying to tidy up after Valorant, which defeats the entire purpose of this guide.
A simple rule of thumb covers almost every edge case here: if a folder, shortcut, or registry key has “VALORANT” in its name or path, it’s safe to remove once you’ve confirmed the game itself uninstalled correctly. If it has “Vanguard” in its name or path instead, leave it alone unless you’ve made the separate, deliberate decision to remove Vanguard entirely.
Step 9: Reinstall Valorant Later Without Re-Triggering Vanguard Setup
This is the payoff. When Vanguard is already installed and its services are already registered, reinstalling VALORANT skips the driver installation step entirely. There’s no repeat UAC prompt for the kernel driver, no forced reboot before your first match, and no re-download of the anti-cheat package. Riot Client just detects the existing Vanguard install, confirms it’s current, and installs only the game assets. For anyone who uninstalls VALORANT seasonally to save space, this alone is worth the extra care taken in steps 1 through 8.
Compare that to a full teardown where Vanguard is also removed: the next VALORANT install has to redownload the anti-cheat package, run its own installer, request a separate elevated permission prompt, and typically force a reboot before the game will launch for the first time. Keeping Vanguard in place turns a two-stage reinstall into a single, faster one, which is the entire practical case for doing this split in the first place rather than just uninstalling everything and starting over.
How Long Each Method Takes and What to Expect
The three approaches in this guide, the Windows Settings route, the Riot Client route, and the scripted PowerShell route, land in different spots on time and technical comfort. None of them is objectively “best.” The right one depends on whether you’re doing this once or expect to repeat it every few months.
| Method | Typical Time | Technical Comfort Needed | Best For |
|---|---|---|---|
| Windows Settings uninstall | 5-10 minutes | None, fully graphical | A one-time removal, most players’ default choice |
| Riot Client uninstall | 5-10 minutes | None, fully graphical | Players who already live inside the Riot Client UI |
| PowerShell script (this guide) | 2-3 minutes hands-on, plus uninstaller run time | Comfortable running a script as administrator | Repeat use, or anyone who wants a logged before/after verification of Vanguard’s state |
All three produce the same end state on disk. What changes is how much manual verification you have to do afterward. The graphical routes leave you to run Steps 6 and 7 by hand if you want confirmation. The script folds that verification directly into the same run, which is really the only meaningful advantage it has over just clicking Uninstall.
Automate It: A Complete PowerShell Script for the Whole Process
Running steps 1, 2, and 6 by hand every time gets old fast, especially if you do this more than once a year. Here’s a self-contained script that stops the right processes, records the current state, runs VALORANT’s own uninstaller using the exact string Windows has on file, waits for it to finish, and then reports whether Vanguard survived. Save it as uninstall-valorant-keep-vanguard.ps1 and run it from an elevated PowerShell window.
#Requires -RunAsAdministrator

Write-Host "Step 1: Stopping Valorant and Riot Client processes..."
Get-Process -Name "VALORANT-Win64-Shipping","RiotClientServices","RiotClientUx" -ErrorAction SilentlyContinue |
  Stop-Process -Force

Write-Host "Step 2: Recording current Vanguard service state..."
$before = Get-Service -Name "vgk","vgc" -ErrorAction SilentlyContinue |
  Select-Object Name, Status, StartType
$before | Format-Table

Write-Host "Step 3: Locating Valorant's uninstall string..."
$valorantEntry = Get-ItemProperty "HKLM:\SOFTWARE\Microsoft\Windows\CurrentVersion\Uninstall\*" -ErrorAction SilentlyContinue |
  Where-Object { $_.DisplayName -like "*VALORANT*" } | Select-Object -First 1

if (-not $valorantEntry) {
    Write-Host "VALORANT uninstall entry not found. It may already be removed." -ForegroundColor Yellow
    exit
}

Write-Host "Found: $($valorantEntry.DisplayName) -> $($valorantEntry.UninstallString)"
Write-Host "Step 4: Launching the official uninstaller. Follow any on-screen prompts..."
Start-Process -FilePath $valorantEntry.UninstallString -Wait

Write-Host "Step 5: Re-checking Vanguard services after uninstall..."
$after = Get-Service -Name "vgk","vgc" -ErrorAction SilentlyContinue |
  Select-Object Name, Status, StartType
$after | Format-Table

if ($after.Count -eq 2) {
    Write-Host "SUCCESS: Vanguard services (vgk, vgc) are still registered." -ForegroundColor Green
} else {
    Write-Host "WARNING: One or both Vanguard services are missing. Vanguard may have been removed too." -ForegroundColor Red
}
This script is the complete, working version of everything covered in steps 1 through 6. It’s deliberately conservative: it never touches the Vanguard registry keys or service definitions directly, it only reads their status before and after, and it relies on the uninstall string Windows itself has on record rather than a hardcoded path that might not match your install location.
It’s also safe to run more than once. If VALORANT is already gone, the script simply reports that the uninstall entry wasn’t found and exits without touching anything else on the machine. That makes it reasonable to keep around as a standing verification tool, not just a one-time uninstall helper, since running it later with no changes made just confirms Vanguard’s two services are still exactly where you left them.
Common Pitfalls When Splitting Valorant and Vanguard Removal
Most of the ways this goes wrong share a common thread: a tool or a menu option that’s built for a full, complete removal gets applied where a partial one was intended. None of the pitfalls below are exotic edge cases. They’re the default behavior of tools most players already have installed, which is exactly why they’re worth checking for in advance rather than discovering after the fact.
- Using “Uninstall All” in Riot Client. Some versions of Riot Client offer a bulk uninstall option that removes every Riot product on the machine, Vanguard included. Always uninstall VALORANT individually from its own tile.
- Running third-party uninstaller tools. Utilities like Revo Uninstaller or IObit Uninstaller often flag Vanguard’s leftover registry entries as junk and offer to “deep clean” them, which removes the very services you’re trying to keep.
- Manually deleting the Riot Vanguard program folder. Deleting
C:\Program Files\Riot Vanguardby hand breaks the service’s file reference without properly deregistering it, leaving a broken, unrecoverable state that’s worse than a full uninstall. - Disabling Vanguard from Task Manager’s Startup tab. This can stop the user-mode service from launching cleanly but doesn’t touch the kernel driver, creating a mismatched state that causes errors the next time you launch a Vanguard-protected game.
- Skipping the reboot. Windows sometimes marks VALORANT’s uninstall as “pending” until the next restart. Checking service status before rebooting can give a false read on whether the uninstall actually finished.
- Forgetting Riot Client itself is shared infrastructure. If you later uninstall Riot Client thinking it’s tied only to VALORANT, you’ll lose your launcher for 2XKO and any other Riot title too, even though Vanguard’s driver stays put.
- Running the uninstall from a non-administrator account. The VALORANT uninstaller and the service checks in this guide both need elevated permissions. A standard account will prompt for admin credentials mid-process, and canceling that prompt can leave the uninstall half-finished.
- Assuming a clean Add/Remove Programs list means Vanguard is gone too. VALORANT disappearing from that list only confirms the game was removed. Riot Vanguard remains its own separate line item, and it’s easy to glance past it and assume everything Riot-related left with VALORANT.
Troubleshooting: 8 Things That Go Wrong
Uninstall-Time Issues
1. The VALORANT uninstaller hangs partway through. End any lingering VALORANT-Win64-Shipping.exe or RiotClientServices.exe processes in Task Manager, then re-run the uninstaller. A running game process is the most common cause of a stalled uninstall, since Windows can’t delete files that are still open and locked by an active process.
2. Riot Client still lists VALORANT as installed after the uninstall finishes. Restart Riot Client completely (right-click its tray icon and Exit, not just close the window), then reopen it. The client’s library cache occasionally lags behind the actual file system state, especially if Riot Client was left open in the background during the uninstall instead of being closed first.
3. VALORANT still shows in Add/Remove Programs after uninstalling. Wait for a reboot before troubleshooting further, since Windows’ Programs list doesn’t always refresh instantly. If it persists after a restart, use the Control Panel route described in Step 3 as a second uninstall pass, which sometimes clears an entry that Settings alone left behind.
4. Running the uninstaller from a standard (non-admin) account fails silently. If the uninstall appears to complete but files or the Programs entry remain, re-run it from an account with administrator rights, or right-click the uninstaller and choose Run as administrator. Partial permissions are a common, easy-to-miss cause of an uninstall that looks done but isn’t.
Issues After Vanguard Stays Installed
5. The Vanguard tray icon disappeared after uninstalling VALORANT. Check sc query vgc first. If the service still reports RUNNING, the tray icon issue is cosmetic and usually resolves after a sign-out and sign-in, since the icon is a small helper process that doesn’t always survive VALORANT’s process teardown even though the underlying service does.
6. “vgk” is missing entirely from sc query. Vanguard was removed alongside VALORANT, most likely by a third-party uninstaller or the Riot Client bulk-uninstall option. If you needed it for another Riot title, you’ll need to reinstall Vanguard from scratch the next time you launch a Vanguard-protected game, which will trigger the driver setup and reboot prompt again.
7. Another Riot game prompts you to “reinstall” Vanguard even though it’s still there. This usually means the installed Vanguard version is outdated relative to what the new game expects. Let the prompt run, since it updates Vanguard in place rather than doing a full reinstall, and your existing service registrations stay intact through the update.
8. Antivirus software flags vgk.sys right after removing VALORANT. This is a known false-positive pattern with some antivirus heuristics that treat orphaned-looking kernel drivers with suspicion once the game that “justified” them is gone. Confirm the file is still digitally signed by Riot Games in its file properties before assuming it’s actually malicious, and avoid quarantining it if you intend to keep Vanguard functional.
Bonus: reinstalling VALORANT later fails or hangs on the first launch. Leftover registry fragments from an incomplete earlier uninstall can conflict with the new install. Re-run the official uninstaller once more (even if VALORANT appears gone) to clear residual entries, then reinstall from a fresh Riot Client session.
Advanced Tips: Vanguard Across 2XKO and When to Remove It for Good
Riot’s 2XKO support hub confirms the fighting game shares the same Vanguard install as VALORANT, so anyone splitting the two games can genuinely uninstall one while playing the other without touching the anti-cheat layer twice. If you manage several Riot titles on one machine, treat Vanguard as shared infrastructure: uninstall and reinstall individual games freely, and only ever touch Vanguard itself when you’re done with every Riot title that needs it.
It’s worth being precise about what Vanguard does not cover, too. League of Legends ranked play in 2026 does not require Riot Vanguard, based on Riot’s own published ranked update notes, which describe matchmaking and rank-reshuffle changes without introducing any Vanguard dependency. If your only reason for wanting Vanguard gone is a worry that League requires it, that concern doesn’t currently apply, and you can uninstall Vanguard freely as long as no other Vanguard-protected title is still active on the machine.
If you eventually decide you don’t need Vanguard on the machine at all, for privacy reasons or because you’re retiring the last Riot title from that PC, that’s a separate teardown involving the Riot Vanguard entry in Programs and Features rather than anything covered in this guide. Treat that as a deliberate, standalone decision rather than something to do by accident while cleaning up after a single game.
The PowerShell script earlier in this guide also scales past a single PC with minimal changes. Wrapping it in a loop that targets a list of computer names, or pushing it out through whatever remote management tool your school lab or office already uses, turns a one-machine routine into something that can clear VALORANT off a whole batch of shared computers overnight while leaving Vanguard active for any other Riot title those machines still need.
| Anti-Cheat | Kernel-Level Driver | Loads at Boot | Shared Across Multiple Games | Uninstalls Independently of the Game |
|---|---|---|---|---|
| Riot Vanguard | Yes | Yes (or on-demand, configurable) | Yes (VALORANT, 2XKO) | Yes |
| BattlEye | Yes | No, loads with the protected game | Yes, across many third-party titles | Varies by publisher |
| Easy Anti-Cheat | Yes | No, loads with the protected game | Yes, across many third-party titles | Varies by publisher |
| Activision Ricochet | Yes | Yes, boot-time driver | Within the Call of Duty family | Tied to the Call of Duty install |
The practical takeaway from that comparison is that Vanguard’s design, a persistent boot-time driver shared across every Riot title on the machine, is exactly what makes the split-uninstall approach in this guide possible in the first place. Anti-cheat systems that load only alongside their specific game don’t offer the same flexibility, because there’s nothing left running once the one game protected by them is gone.
Frequently Asked Questions
Will uninstalling VALORANT automatically remove Riot Vanguard?
No. Riot’s own uninstall flow for VALORANT, whether through Windows Settings or the Riot Client, leaves Vanguard’s services and driver installed. You have to remove Vanguard separately, on purpose, through its own Programs and Features entry.
Is it safe to leave Vanguard installed if I’m not playing any Riot game right now?
It’s supported by Riot and won’t cause conflicts with other software in normal use. Whether you’re comfortable with a kernel-level driver sitting idle is a personal call, not a technical requirement either way.
Does Riot Vanguard run all the time or only during matches?
By default the driver loads at every boot, though some setups expose an on-demand option that limits it to only when a Vanguard-protected game is running. Check VALORANT’s security settings menu to see which mode you’re on.
Can I use Revo Uninstaller or a similar tool to remove just VALORANT?
You can, but be careful with any “leftover files” or “deep clean” step those tools offer afterward. That’s exactly where Vanguard’s registry keys and service definitions tend to get swept up by mistake.
Will keeping Vanguard installed slow down my PC?
The service and driver are lightweight in idle use, similar in footprint to other background security drivers. Most performance concerns people raise are about it running during matches, not about it sitting idle when no Vanguard-protected game is open.
What happens to Vanguard if I uninstall Riot Client entirely?
Uninstalling Riot Client does not automatically remove Vanguard either. The two are still separate entries in Programs and Features. If your goal is to remove everything Riot-related from a machine, you’ll uninstall each of the three (the game, Riot Client, and Riot Vanguard) individually.
How do I fully remove Vanguard later if I change my mind?
Go to Settings, Apps, find Riot Vanguard specifically (not VALORANT or Riot Client), and uninstall it the same way. If it won’t remove cleanly, the sc delete vgc and sc delete vgk commands mentioned in Microsoft’s service control documentation are the standard fallback, followed by a reboot.
Does this process work the same on Windows 10 and Windows 11?
Yes. The uninstall paths through Settings and the Riot Client are identical on both, and the service and driver verification commands in this guide (sc query, driverquery) work the same way on Windows 10 2004+ and every current build of Windows 11.
Do I need Riot Vanguard for League of Legends ranked play?
Not currently. Riot’s 2026 ranked update notes for League of Legends describe matchmaking and rank changes without introducing a Vanguard requirement, so League players can uninstall VALORANT and even remove Vanguard entirely without affecting their League ranked access.