
A graphics card swap looks intimidating the first time you crack open a case, but it is one of the simplest hardware upgrades in PC gaming once you know the order of operations. We will also cover the budget-friendly RTX 5070 Ti, note where the new RTX Spark platform fits in, and give you a working Python script to monitor your new card’s temperature and power draw after the install is done.
By the end you will have a physically installed card, correctly seated power cables, a fresh driver stack with DLSS 5 enabled, and a repeatable way to verify the upgrade actually worked instead of just hoping it did. For more coverage of GPUs, chips, and PC components, see our hardware section.
Why Upgrade Your Graphics Card in Late 2026
Desktop GPU demand has been climbing back after a rough stretch. Jon Peddie Research tracked the global PC-based graphics processor market at 74.7 million units in the second quarter of 2025, with “desktop graphics shipments increased 11.0% year over year in the second quarter of 2025.” That is a real swing from the first quarter of 2025, when the firm reported the market at 68.8 million units and said desktop graphics shipments actually decreased 16% year over year. Jon Peddie Research also projected that discrete GPUs would reach a 23% penetration rate in PCs over the following five years, which is a meaningful jump for a component category people keep predicting will fade into integrated graphics.
The timing also matters because the lineup itself just shifted. NVIDIA’s RTX Spark platform, a combined CPU and GPU module built for compact AI-capable systems, started shipping on October 16, 2026, first in OEM laptops with compact desktop units following in November. That launch pulled a lot of engineering and marketing attention toward integrated platforms, but for anyone building or upgrading a traditional desktop tower, a discrete card you install yourself is still the better fit, and the RTX 5080 is currently sitting at the top of what most builders can actually buy and drop into an existing PCIe x16 slot.
If you already have an RTX 30-series or RTX 40-series card and a power supply under 750 watts, this tutorial will also tell you exactly where that setup runs out of headroom before you spend money on a card your PSU cannot feed.
Why You Can’t Do This on a PS5 or Xbox Series X
It is worth saying clearly before diving into the steps: this entire tutorial applies to a traditional desktop PC, not a console. A PS5 or Xbox Series X ships with a soldered or module-based GPU that cannot be swapped out, which is exactly why console upgrade guides focus on storage instead. If you own a PS5, the realistic upgrade path is expanding storage with a compatible M.2 SSD rather than touching the graphics hardware, and shoppers comparing a PS5 against an Xbox Series X are usually weighing total cost of ownership rather than raw GPU swappability either way.
That constraint is actually the strongest argument for owning a desktop tower if you care about staying current on graphics hardware long-term. A console locks in whatever silicon shipped on launch day, while a desktop PC lets you replace just the graphics card every few years without touching the CPU, motherboard, storage, or case. The rest of this guide assumes that flexibility is exactly why you are here.
Prerequisites and Compatibility Checklist
Before you touch a screwdriver, confirm every item below. Skipping this stage is the single biggest reason graphics card installs go wrong, and most of the problems in the troubleshooting section further down trace back to one of these checks being skipped.
- Operating system: Windows 11 (23H2 or later) or a current Linux distribution with kernel 6.8+. RTX Spark systems ship with Windows 11 out of the box.
- Power supply: 850W or higher, 80 Plus Gold certified, for an RTX 5080. 750W minimum for an RTX 5070 Ti. Check the actual label on your PSU, not the box it came in five years ago.
- PCIe slot: A free PCIe x16 slot, ideally the top slot closest to the CPU socket for the shortest trace length and best airflow clearance.
- Case clearance: At least 336mm of length and triple-slot width for most RTX 5080 board partner designs. Measure your case before ordering the card, not after.
- Driver tools: Display Driver Uninstaller (DDU) 18.0.8.0 or newer, and the latest NVIDIA Game Ready or Studio driver downloaded in advance (you will need internet access on a second device if your new card has no display output for your monitor’s cable type).
- Static safety: An anti-static wrist strap, or at minimum a habit of touching a grounded metal surface before handling the card.
- Tools: A magnetic Phillips #2 screwdriver, zip ties or velcro straps for cable management, and a flashlight or phone light.
Tools and Materials You Will Need
Keep this list next to you. Nothing here is exotic, but running back and forth to find a screwdriver mid-install is how screws end up lost inside a case.
- Phillips #2 screwdriver (magnetic tip preferred)
- Anti-static wrist strap
- Your new graphics card (this guide references the RTX 5080 and RTX 5070 Ti)
- Native 12V-2×6 power cable from your PSU, or the adapter included with the card if your PSU predates the connector
- USB drive with the latest NVIDIA driver installer, downloaded on another machine
- DDU (Display Driver Uninstaller) installer
- A small tray or magnetic parts dish for screws
- Zip ties or velcro cable straps
Step-by-Step: Preparing Your PC
Step 1: Confirm Case Clearance and PCIe Slot
Open your case and measure the distance from the rear I/O shield to the nearest obstruction, usually a hard drive cage or front fan. The RTX 5080 reference design runs long and wide enough to cover three expansion slots on most board partner cards, so confirm you have clear space before the card arrives rather than after. Identify the top PCIe x16 slot on your motherboard. On nearly every ATX and mATX board built in the last six years, this is the slot immediately below the CPU socket, and it is almost always wired for the full sixteen lanes your GPU needs.
Step 2: Check Your Power Supply Wattage and Connectors
Pull the spec label off the side of your PSU (not the retail box) and confirm the continuous wattage rating. The RTX 5080 is rated at 360W and NVIDIA recommends an 850W system power supply to cover the rest of your CPU, drives, and fans with headroom left over. The RTX 5070 Ti is rated at 300W with a 750W PSU recommendation. If your PSU is modular, check whether it already shipped with a native 12V-2×6 cable (the current high-density power connector used on RTX 50-series cards) or whether you will need the included 3x 8-pin-to-12V-2×6 adapter instead. Mixing up which cable goes where is one of the most common mistakes in this entire process, and we will cover it again in the pitfalls section.
Step 3: Uninstall Old GPU Drivers Safely
With the old card still installed and your PC still running, uninstall the current driver cleanly before you ever remove the hardware. Boot into Windows Safe Mode (Settings, System, Recovery, Advanced Startup, Restart Now, then Troubleshoot, Advanced Options, Startup Settings, and choose Safe Mode), run DDU, and select your current GPU brand from the dropdown before clicking “Clean and restart.”
You can confirm exactly which driver and card you are removing first with a quick command. Open Command Prompt and run:
wmic path win32_VideoController get name, driverversionThat single line prints the exact model name and driver build number currently loaded, which you will want to compare against the new driver version after the swap to confirm the install actually took.
Step-by-Step: Removing the Old Graphics Card
Step 4: Power Down and Ground Yourself
Shut down fully, then flip the physical rocker switch on the back of the power supply to the off position. Leave the cable plugged into the wall outlet. The PSU’s ground connection, as long as it stays plugged in, gives your system a path to bleed off static electricity when you touch the case frame. Press and hold the front power button for about five seconds after flipping the PSU switch to drain any residual charge sitting in the capacitors. Put on your anti-static wrist strap and clip it to an unpainted metal part of the case before you touch any component.
Step 5: Remove the Old Graphics Card
Unplug every power cable running into the old card first, pulling gently on the connector body rather than the cable itself. Unscrew the one or two screws holding the card’s rear bracket to the case. Most modern motherboards have a small plastic latch at the end of the PCIe slot, usually with a press-tab design that releases with one finger, though some older or budget boards use a simple lever you push sideways. Release that latch, then lift the card straight up and out. Set it on an anti-static bag or a cardboard box, never directly on carpet or a bare table if you plan to resell it.
Step-by-Step: Installing the New Graphics Card
Step 6: Insert the New Card Into the PCIe Slot
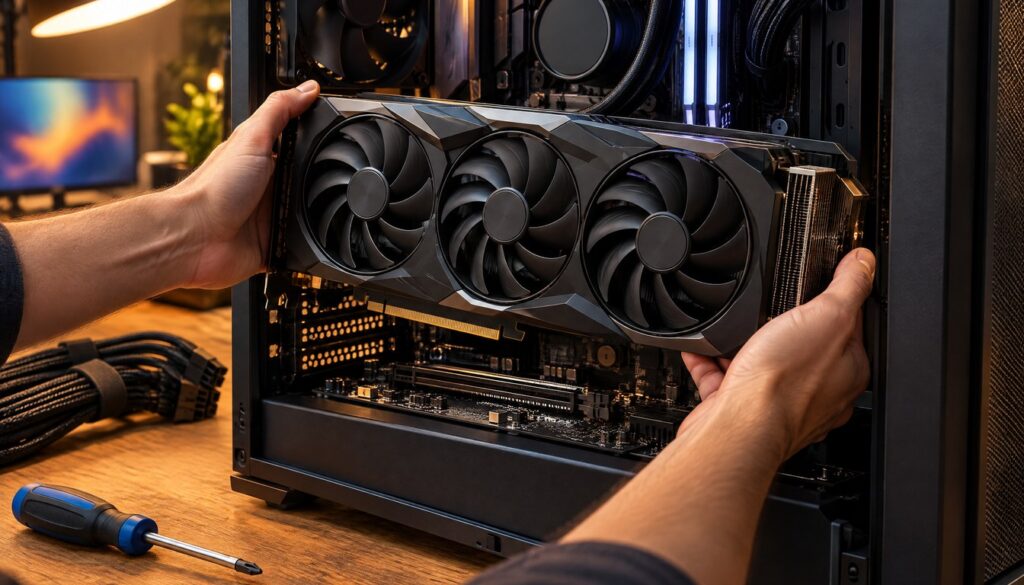
Align the new card’s gold PCIe edge connector directly over the x16 slot, keeping the card level. Push down evenly on both ends at once rather than rocking it front to back. You should feel the card seat with a light click as the retention latch snaps closed around the notch on the connector. Check visually that the card sits flush and parallel to the motherboard, not tilted up on one end, which usually means one side is not fully seated.
Step 7: Connect the Power Cables Correctly
This is where most installation mistakes happen. The RTX 5080 and RTX 5070 Ti both use the 12V-2×6 connector, a smaller 12-pin header that replaced the older 12VHPWR design, specifically built to reduce the risk of partial insertion. Push the connector in until it clicks fully, then visually confirm it is seated flush against the card, not sitting at an angle with a visible gap. If your PSU is older and only has 8-pin PCIe connectors, use the adapter that shipped in the card’s box, and make sure every 8-pin lead on the PSU side is fully connecting into its own slot on the adapter rather than daisy-chaining cables meant for other components.
Screw the card’s rear bracket back into the case using the same screw holes the old card used. This is also the point to reconnect any case fan headers or RGB cables you had to move out of the way.
Step-by-Step: Closing Up and First Boot
Step 8: Close the Case and Reconnect Peripherals
Before closing the side panel, do a visual sweep for loose screws sitting on the motherboard tray, which can short something out once power is restored. Close both panels, reconnect your monitor cable to the new card’s display output rather than the motherboard’s integrated graphics port if your CPU has one, and plug your keyboard and mouse back in.
Step 9: First Boot and BIOS/UEFI Verification
Flip the PSU switch back on and press the power button. If the system posts normally and you see your motherboard’s boot logo, enter the BIOS/UEFI setup (usually Delete or F2 during boot) and check the hardware monitor page to confirm the new card is detected and reporting a temperature reading at idle. This step matters because a card that physically seats but is not fully making contact with the PCIe slot will often still power on fans without ever posting a video signal, which looks like a dead card but is actually a seating problem.
Step-by-Step: Drivers, DLSS 5, and Benchmarking
Step 10: Install Drivers and Enable DLSS 5
Boot into Windows normally and install the fresh NVIDIA driver you downloaded earlier. Reboot once more when prompted. Open the NVIDIA app and confirm the card model listed matches your new hardware. NVIDIA’s current DLSS 5 stack, the same feature set shipping on the new RTX Spark platform, bundles Super Resolution, Ray Reconstruction, Dynamic Multi Frame Generation, and 3D-Guided Neural Rendering, all of which are available on RTX 50-series desktop cards as well and are enabled per-game through the NVIDIA app’s Graphics settings tab or directly inside a supported title’s video options menu.
Confirm your driver version from the command line to make sure the install actually replaced the old one:
Get-WmiObject Win32_VideoController | Select-Object Name, DriverVersion, AdapterRAMRun that in PowerShell and compare the output against the driver version number you noted back in Step 3. If the name field still shows your old card, Windows has not finished enumerating the new hardware, and you should restart once more before troubleshooting anything else.
Step 11: Benchmark and Stress-Test the New GPU
Run a short stress test before you trust the install with a long gaming session. NVIDIA’s bundled tools and most third-party monitoring utilities expose the same underlying telemetry through the driver’s management interface. The fastest command-line way to pull a live read on temperature, power draw, and clock speed is:
nvidia-smi --query-gpu=name,temperature.gpu,power.draw,clocks.sm,utilization.gpu --format=csv -l 2That command refreshes every two seconds and prints the card name, GPU temperature, live power draw, core clock, and utilization percentage. Load a demanding game or run a 15-minute benchmark loop while that window stays open in the background. An RTX 5080 should hold under 83 degrees Celsius under a typical case with decent airflow, and power draw should plateau close to its 360W rating under full load rather than spiking well past it, which would point to a power delivery problem worth investigating before you close the case back up for good.
Build a GPU Health Monitoring Script
A one-time benchmark tells you the card works today. A small logging script tells you whether it is still healthy in six months, which is the more useful signal if you ever suspect thermal paste degradation, dust buildup, or a fan starting to fail. Here is a complete, working Python project that polls nvidia-smi every few seconds, writes the results to a CSV file, and prints a warning if the card crosses a temperature threshold you set.
Save this as gpu_monitor.py. It requires Python 3.10 or newer and the NVIDIA driver installed from Step 10 (no extra packages needed, since it shells out to the nvidia-smi binary that ships with the driver):
import csv
import subprocess
import time
from datetime import datetime

LOG_FILE = "gpu_health_log.csv"
TEMP_WARNING_C = 85
POLL_SECONDS = 5

QUERY_FIELDS = [
    "name",
    "temperature.gpu",
    "power.draw",
    "clocks.sm",
    "utilization.gpu",
    "memory.used",
]

def read_gpu_stats():
    cmd = [
        "nvidia-smi",
        f"--query-gpu={','.join(QUERY_FIELDS)}",
        "--format=csv,noheader,nounits",
    ]
    output = subprocess.check_output(cmd, text=True).strip()
    return [field.strip() for field in output.split(",")]

def main():
    with open(LOG_FILE, "a", newline="") as f:
        writer = csv.writer(f)
        if f.tell() == 0:
            writer.writerow(["timestamp"] + QUERY_FIELDS)

        print(f"Logging GPU health to {LOG_FILE} every {POLL_SECONDS}s. Ctrl+C to stop.")
        while True:
            stats = read_gpu_stats()
            timestamp = datetime.now().isoformat(timespec="seconds")
            writer.writerow([timestamp] + stats)
            f.flush()

            temp_c = float(stats[1])
            if temp_c >= TEMP_WARNING_C:
                print(f"[WARNING] {timestamp}: GPU temp {temp_c}C exceeds {TEMP_WARNING_C}C threshold")
            else:
                print(f"{timestamp}: {stats[0]} | {temp_c}C | {stats[2]}W | util {stats[4]}%")

            time.sleep(POLL_SECONDS)

if __name__ == "__main__":
    try:
        main()
    except KeyboardInterrupt:
        print("\nStopped logging.")
Run it with python gpu_monitor.py in a terminal while you game, render, or run a long benchmark pass, and it will keep appending rows to gpu_health_log.csv that you can open later in a spreadsheet to spot slow upward drift in idle or load temperatures over weeks and months. That drift is usually the earliest sign that a cooler needs a dust-out or a repaste before the card starts throttling noticeably.
RTX 5080 vs RTX 5070 Ti vs RTX Spark N1X: Which Fits Your Build
If you are still deciding which card to install rather than committing to the RTX 5080 outright, here is how the current lineup breaks down based on specs reported by GPU review coverage and NVIDIA’s own platform materials. Note that the RTX Spark N1X is a different category of product entirely, an integrated CPU-GPU platform rather than a card you install in an existing desktop, included here only so you understand why it is not a drop-in alternative to the other two.
| Spec | RTX 5070 Ti | RTX 5080 | RTX Spark N1X (platform) |
|---|---|---|---|
| Form factor | Discrete desktop card | Discrete desktop card | Integrated laptop/mini-PC module |
| CUDA cores | 8,960 | 10,752 | 5,120 – 6,144 (config-dependent) |
| Rated power | 300W | 360W | 45W – 140W (configurable) |
| Recommended PSU | 750W | 850W | N/A (laptop power brick) |
| Memory | GDDR7 | 16GB GDDR7 | Up to 128GB shared LPDDR5X |
| Street price (Oct. 2026, Newegg) | $1,179.99 | $1,679.99 | Starts higher, OEM-dependent |
| DLSS 5 support | Yes | Yes | Yes (full suite) |
| You install it yourself | Yes | Yes | No, it ships built into the device |
For most people reading a tutorial on how to install a graphics card into an existing tower, the practical choice sits between the RTX 5070 Ti and the RTX 5080. The 5070 Ti costs about $500 less and needs a smaller 750W supply, which can save you a second purchase if your current PSU already clears that bar. The RTX 5080 buys roughly 20% more CUDA cores and meaningfully more headroom for 4K gaming, but only if your power supply and case clearance already check out. The earlier compatibility checklist exists specifically so you are not deciding this on specs alone without confirming your case can actually fit either one.
What the RTX Spark Launch Means for GPU Prices and Availability
One side effect of a new platform launch is that it shifts where manufacturing attention and marketing budget go, even when the new product is not a direct competitor to the cards you are shopping for. Early hands-on coverage from Windows Central’s week-long RTX Spark testing found the platform genuinely strong for AI workloads and compact builds, while also noting it is not positioned to replace a discrete desktop GPU for people who specifically want maximum gaming frame rates. That split matters for anyone installing a graphics card right now, because it means desktop RTX 50-series cards are not being phased out in favor of RTX Spark. They remain the product line NVIDIA expects serious PC gamers to keep buying.
Retail availability for the RTX 5080 and RTX 5070 Ti has been more stable through October 2026 than it was during the initial RTX 50-series launch window, which is part of why this is a reasonable month to actually go through with an upgrade rather than waiting on a restock. Pricing has settled closer to list price on most board partner models, though it is still worth comparing a few retailers before you buy, since a $50 to $100 swing between listings for the same card and cooler design is common.
Power Supply and Connector Requirements
Power delivery mistakes cause more failed installs than any other single factor, so treat this table as a second compatibility gate before you buy cables or adapters.
| Card | TDP | Min. recommended PSU | Power connector | Adapter needed if PSU is older? |
|---|---|---|---|---|
| RTX 5070 Ti | 300W | 750W | 12V-2×6 | Yes, if PSU has only 8-pin PCIe |
| RTX 5080 | 360W | 850W | 12V-2×6 | Yes, if PSU has only 8-pin PCIe |
| Previous-gen RTX 4070 Ti Super (for reference) | 285W | 750W | 12VHPWR (older standard) | Yes, different connector shape |
| Previous-gen RTX 4080 Super (for reference) | 320W | 850W | 12VHPWR (older standard) | Yes, different connector shape |
Note that the 12V-2×6 connector used on current RTX 50-series cards is a revised design from the earlier 12VHPWR connector, built with a shorter set of sense pins specifically to reduce the risk of a partially seated cable going undetected. If you are upgrading from an older 40-series card, do not assume your existing PSU cable will plug directly into the new card without checking the connector shape first.
Choosing a Case and Cooling for Your New Card
A lot of installation headaches trace back to the case rather than the card itself. If you are buying a new case alongside your GPU upgrade, look for three things specifically: a GPU clearance spec of at least 350mm printed on the case’s own listing, at least two intake fans rated for positive airflow, and a PSU shroud that does not block the bottom-front intake fan from pulling air across the card. Mesh front panels consistently outperform solid tempered-glass fronts for GPU temperatures, often by several degrees under sustained load, simply because they let more air reach the card in the first place.
If you are reusing an older case rather than buying a new one, measure twice before ordering the card. A tape measure from the rear expansion slot bracket to the front drive cage or front fan shroud tells you your real usable length, and it is common to discover an older mid-tower case has 20 to 30mm less room than its original marketing copy suggested once a modern front-panel fan hub or cable routing channel is accounted for.
Case fan direction matters just as much as fan count. Front and bottom fans should pull air in, top and rear fans should push air out, and a case running all fans in the same orientation by accident is one of the most common reasons a card runs several degrees hotter than its board partner’s own published reviews suggest it should. Open your case’s fan control software or the motherboard’s fan header settings and confirm each fan is spinning in the direction its airflow arrow (usually printed on the fan’s frame) indicates before you close the panel for good.
Common Pitfalls When Installing a Graphics Card
These are the mistakes that show up most often, in rough order of how often they actually happen.
- Forgetting the rear bracket screws. A card that is seated but not screwed down can sag over time from its own weight, putting uneven pressure on the PCIe slot and eventually causing intermittent display dropouts.
- Using the wrong power cable from a modular PSU. Many modular power supplies use similar-looking connectors for CPU and PCIe cables. Plugging a CPU cable into a PCIe header, or vice versa, can damage both the cable and the component. Always check the printed label on the cable itself.
- Not fully uninstalling the old driver first. Swapping hardware while leftover driver files from the old card are still present is the single most common cause of black screens, stuttering, or a system that boots to a blank display after the swap.
- Underestimating case clearance. Triple-slot, nearly 340mm-long cards do not fit in every mid-tower case, especially ones with a front-mounted 3.5-inch drive cage. Measure before you buy, not after the card is already sitting on your desk.
- Partially seating the power connector. The 12V-2×6 connector needs to click fully. A connector that looks plugged in but is sitting at a slight angle is the leading cause of melted connectors reported across the RTX 40-series and early RTX 50-series generation.
- Ignoring BIOS updates on older motherboards. Boards more than three or four years old sometimes need a BIOS update to properly recognize a brand-new GPU generation at full PCIe bandwidth, even though the physical slot is compatible.
Troubleshooting: 8 Common Problems and Fixes
If something is not working after the install, work through this table before assuming the card itself is defective. Most of these are seating or driver issues, not hardware failures.
| Symptom | Likely cause | Fix |
|---|---|---|
| No display signal, fans spin | Card not fully seated in PCIe slot | Power down, reseat the card, confirm the latch clicked |
| System won’t power on at all | PSU switch still off, or power cable partially disconnected | Check the rocker switch and both ends of the 24-pin cable |
| Black screen after driver install | Leftover drivers from the old GPU conflicting with the new one | Boot Safe Mode, run DDU again, reinstall fresh driver |
| Random crashes under load | Power connector not fully seated, or undersized PSU | Reseat the 12V-2×6 cable, verify PSU wattage meets the recommendation |
| Card runs hotter than expected | Fan curve too conservative, or poor case airflow | Adjust fan curve in the NVIDIA app, add an intake fan |
| Windows shows the old GPU name | Driver install did not complete, or Windows cached the old entry | Reboot, rerun the PowerShell check from Step 10 |
| Coil whine under load | Normal electrical noise from the VRM, worse under high frame rates | Cap frame rate with a frame limiter, usually harmless |
| Game crashes only in one title | Outdated game-ready profile, or a title-specific driver bug | Check NVIDIA’s driver release notes for a hotfix, update the game |
Advanced Tips for Tuning Your New GPU
Once the card is stable, a handful of adjustments can improve both performance and noise without touching the hardware again.
- Undervolt before you overclock. Modern Blackwell-based cards like the RTX 5080 often run cooler and quieter at a slightly reduced voltage curve with almost no performance loss, since they ship from the factory with some thermal headroom baked in for worst-case silicon.
- Set a custom fan curve. The default curve on most board partner cards favors silence over temperature at low loads. A slightly more aggressive curve in the 60 to 80 degree range keeps clocks higher for longer gaming sessions.
- Enable Resizable BAR in the BIOS. This lets the CPU address the entire GPU memory pool at once instead of in smaller chunks, and it is off by default on some older motherboards even when the hardware fully supports it.
- Use DLSS 5’s frame generation selectively. Dynamic Multi Frame Generation helps most in GPU-bound scenarios at 4K, but can add input latency in competitive shooters where raw responsiveness matters more than frame count.
- Keep one driver version back if you hit a bug. If a brand-new driver introduces a regression in a specific game, NVIDIA’s driver archive lets you roll back to the previous stable release while a fix is in progress.
To confirm Resizable BAR and basic adapter details directly from Windows without opening any third-party app, run:
Get-CimInstance -ClassName Win32_VideoController | Select-Object Name, AdapterRAM, VideoProcessorCross-check the result against the NVIDIA app’s System Information panel, which reports Resizable BAR status directly for your specific card and motherboard pairing.
For context on how tight the current high-end GPU supply really is, our earlier coverage of why Nvidia’s GB202 chip economics favor RTX Pro over the RTX 5090 and the related report that the RTX 5090 may be winding down at retail both help explain why the RTX 5080 is functioning as the practical ceiling for most desktop builders right now, rather than a step below the flagship. If you are weighing it against the cheaper option, our breakdown of the RTX 5070 Ti against AMD’s RX 9070 XT is worth a look before you commit to a cable and PSU purchase.
Memory pricing is also worth watching while you shop, since the ongoing memory chip shortage has already pushed PC prices up across the board, and if a laptop-class integrated option like RTX Spark appeals to you more than a desktop tower rebuild, we have covered which OEM laptops are shipping with the platform and what they cost.
Frequently Asked Questions
Do I need to uninstall my old graphics card drivers before installing a new GPU?
Yes. Running DDU in Safe Mode before you physically swap cards is the most reliable way to avoid driver conflicts, black screens, and stuttering after the install. Skipping this step is one of the most common reasons people think a new card is defective when it is actually a leftover software problem.
What power supply wattage do I need for an RTX 5080?
NVIDIA recommends an 850W power supply for a system running the RTX 5080, which is rated at 360W on its own. For the RTX 5070 Ti, a 750W supply covers the card’s 300W rating with enough headroom for the rest of a typical build.
Can I install a graphics card without removing the motherboard?
Almost always, yes. A graphics card installs directly into the top PCIe x16 slot without requiring you to remove the motherboard itself. The only exception is in extremely cramped small-form-factor cases where cable routing or a riser cable makes direct access easier, which is uncommon for a standard mid-tower or full-tower build.
Why won’t my PC display anything after I installed a new GPU?
Check that your monitor cable is plugged into the new card’s output, not the motherboard’s integrated graphics port. If that is correct, power down and reseat the card in its PCIe slot to confirm the retention latch clicked fully closed. A card that is only partially seated will often still spin its fans without ever sending a video signal.
Is the 12V-2×6 connector the same as the older 12VHPWR connector?
No, though they look similar. The 12V-2×6 connector used on current RTX 50-series cards is a revised design with shorter sense pins, intended to reduce the risk of a partially inserted cable going unnoticed. If you are upgrading from an RTX 40-series card, confirm which connector your existing cables actually use before assuming they will fit the new card.
How long does it take to install a graphics card?
Budget around 45 minutes for a full install including driver setup, assuming your PSU and case clearance are already confirmed compatible beforehand. The physical card swap itself usually takes under 15 minutes. Most of the remaining time goes into the driver uninstall and reinstall cycle, plus a short benchmark pass to confirm everything is stable.
Should I buy an RTX 5080 or wait for RTX Spark desktop units?
They solve different problems. RTX Spark is an integrated CPU-GPU platform aimed at compact AI-capable systems, with desktop units not arriving until November 2026 and a different value proposition built around unified memory rather than raw gaming frame rates. If you already own a standard desktop tower and want a straightforward upgrade in an existing PCIe slot, a discrete card like the RTX 5080 or RTX 5070 Ti remains the more direct option.
What should I do with my old graphics card after upgrading?
Test it briefly in another system if you plan to sell it, since a card that worked fine in your build may still have a cosmetic or functional issue worth disclosing. Store it in an anti-static bag if you are keeping it as a backup, and avoid stacking anything heavy on top of the bare PCB.